Category Archives: Guide

Fouled Cylinder Chambers from using .38 in .357

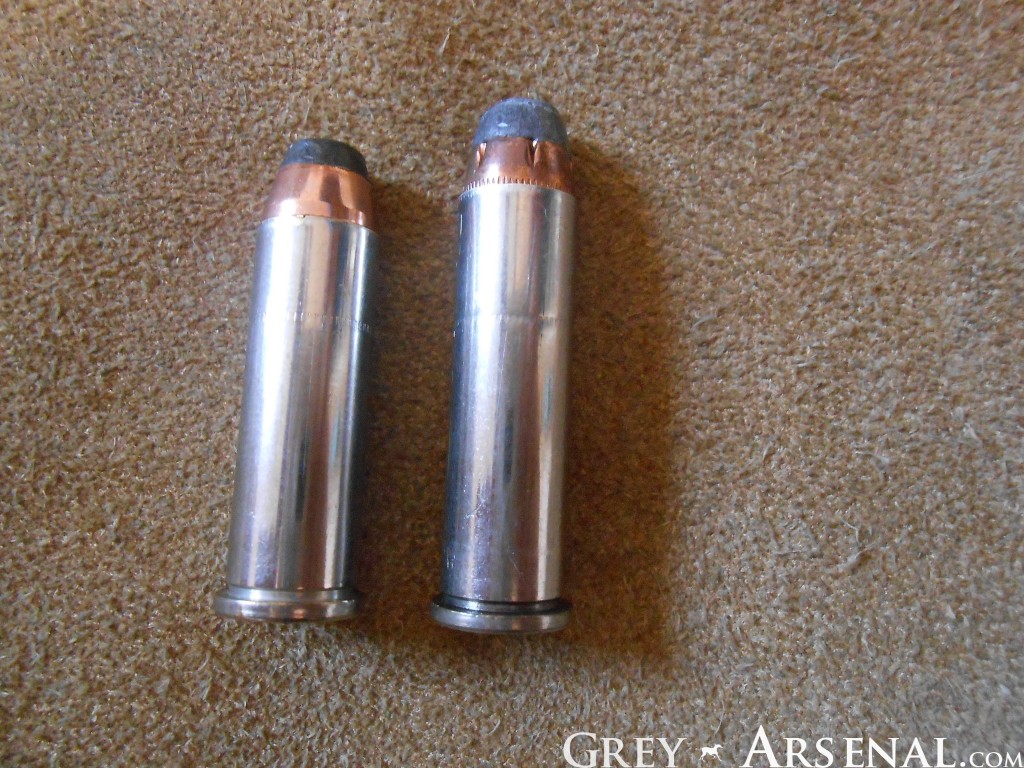
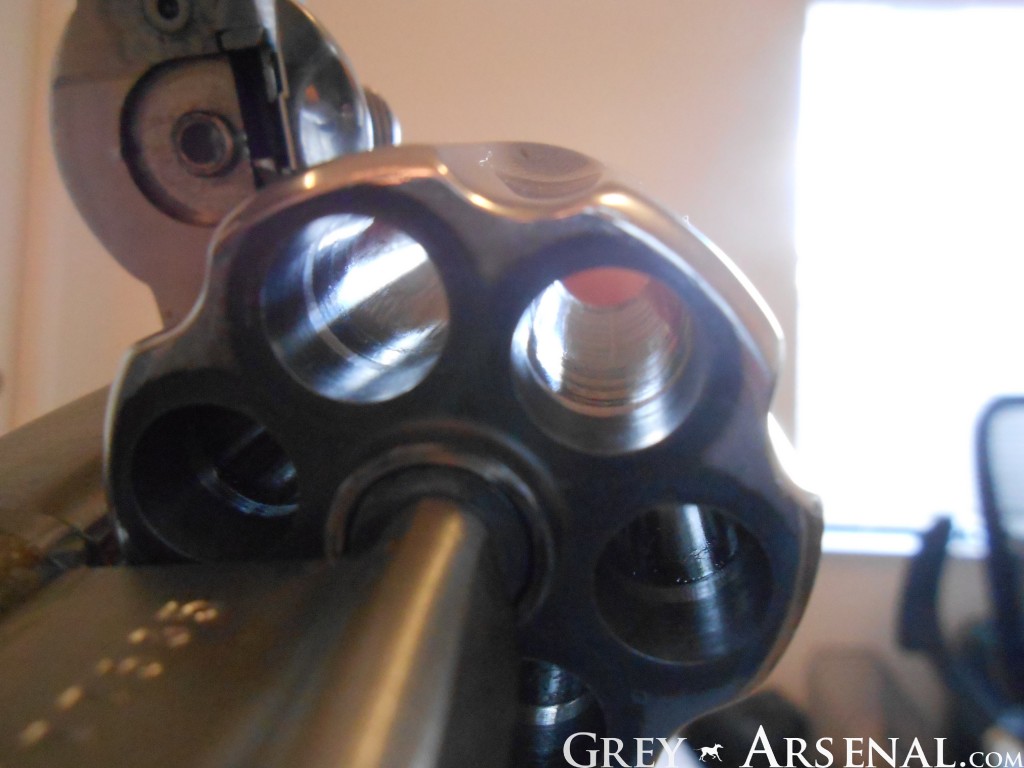
DSCN1676It’s fairly common to shoot .38 Spl from a .357 Magnum revolver for practice or competitive shooting events, as it’s cheaper, and has significantly less recoil, without much difference in accuracy (despite the “jump” it has to make).  This leads to an often brought up topic of fouling making it difficult to load .357 Magnum cartridges after prolonged bouts of shooting .38 Spl.

The problem comes from the fact that the .357 Magnum cartridge is a bit longer (and miniscule bit wider) than a .38 Spl cartridge.

DSCN1675

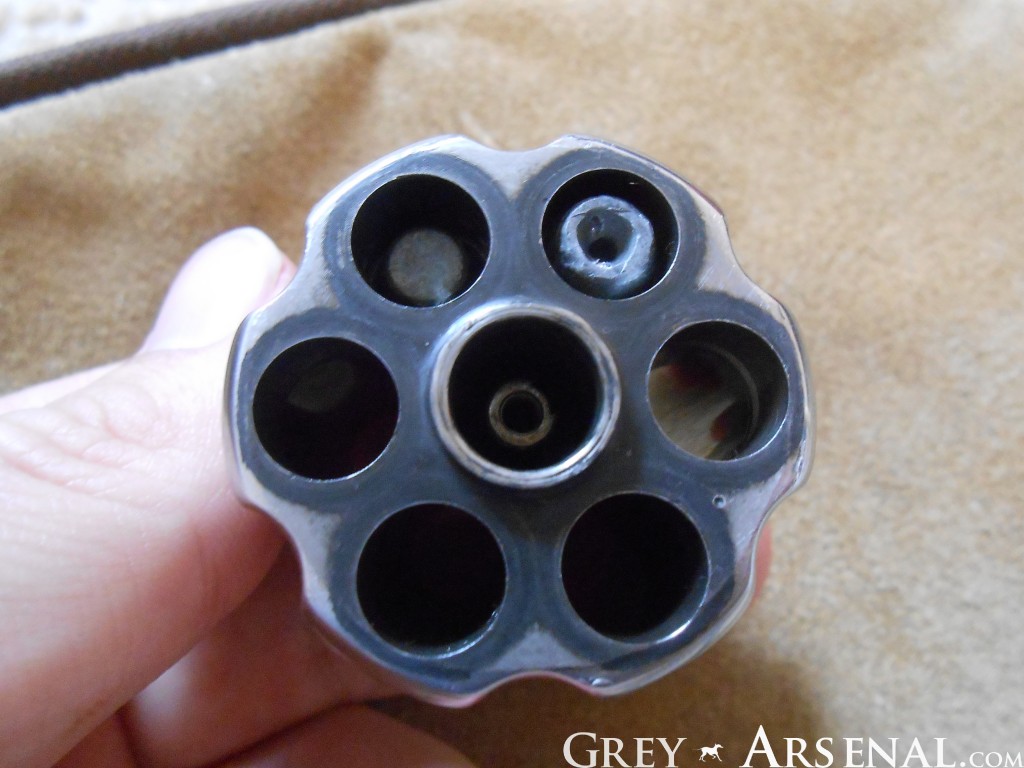
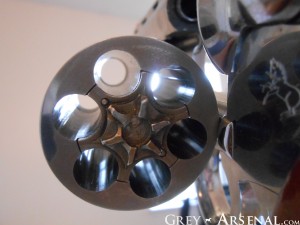
This means the .38 Spl bullet has to jump a bit through the cylinder chamber to get to the forcing cone and into the bore.  This means there will be fouling at a lower point in the cylinder, and that build up and burn in over time (sometimes even after a hundred or so rounds during one session) and make loading of .357 Magnum cartridges difficult to impossible.  See the image below to see a ring of where this buildup was removed from the chambers.

DSCN1678

What you end up with is a .357 Magnum Revolver that doesn’t seem to want to accept .357 Magnum cartridges.  Not cool.

DSCN1697

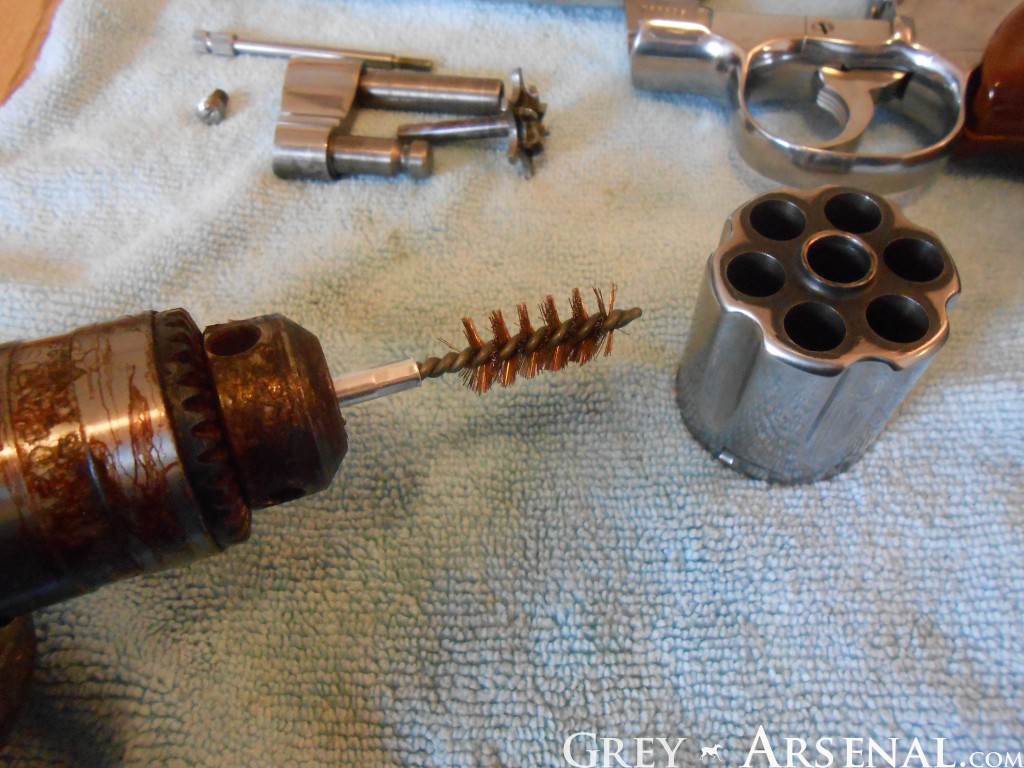
Luckily, it’s not permanent.  Even if cleaned normally after shooting .38 Spl, you still may need to go a bit further to remove this fouling.  You could use a slightly oversized brass brush (for instance, a .40 S&W brush in a .357 Cylinder) soaked in solvent and just have at it for a while.  A serious while.  It takes A LOT of effort to remove this fouling this way.  Luckily for you, I’m going to show you the easy (well, easy-ish, more on that at the end) way.

Things you’ll need:

DSCN1672

  • Electric Drill (preferably newer than the one pictured)
  • Brass brush of required size (in this case a .40 S&W sized one)
  • Solvent (Hoppe’s 9 / CLP work well, MC25 doesn’t break up the lead as well)
  • Tools for disassembly of your firearm

Naturally this will vary by firearm, but what you’re going to need to do is remove the Cylinder.  My sample here is a Colt Python, so here you’ll get a bonus Colt Python Cylinder Removal quick-guide.

  • Carefully LOOSEN this screw enough to easily turn by hand:
  • DSCN1682
  • Remove by hand while minding that a very tiny spring and plunger sit inside of it.  It’s not under pressure, but may fall out and be a PITA to find.
  • DSCN1683
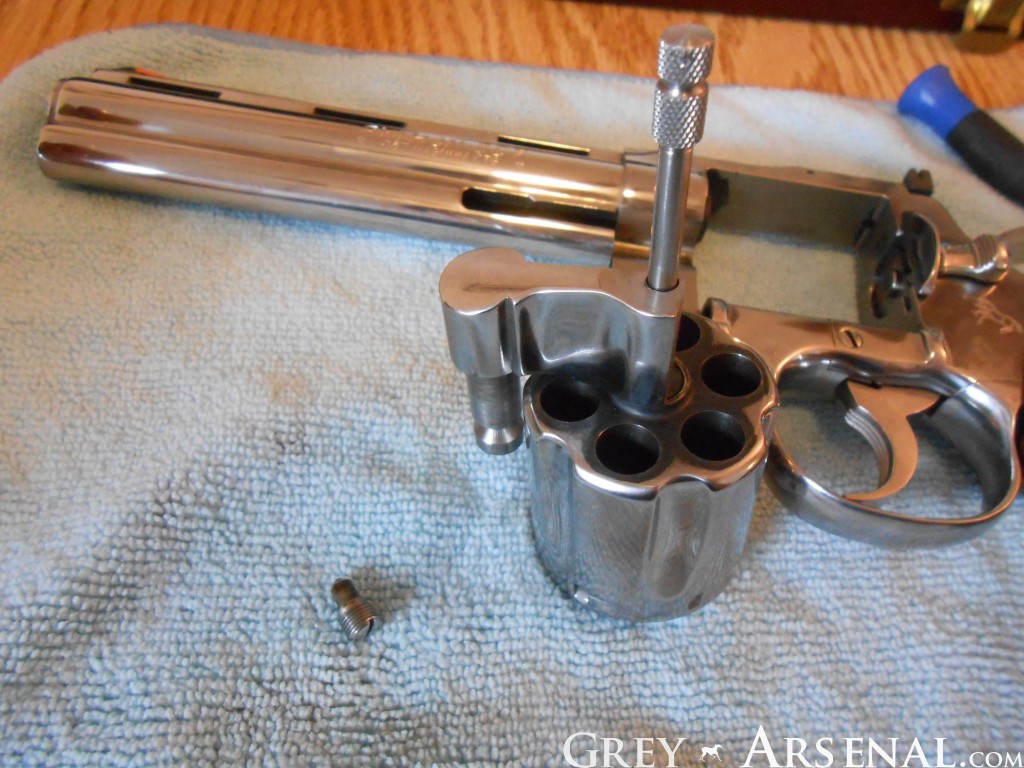
  • Use spur to open the cylinder action, and slide forward off of the frame.
  • DSCN1685
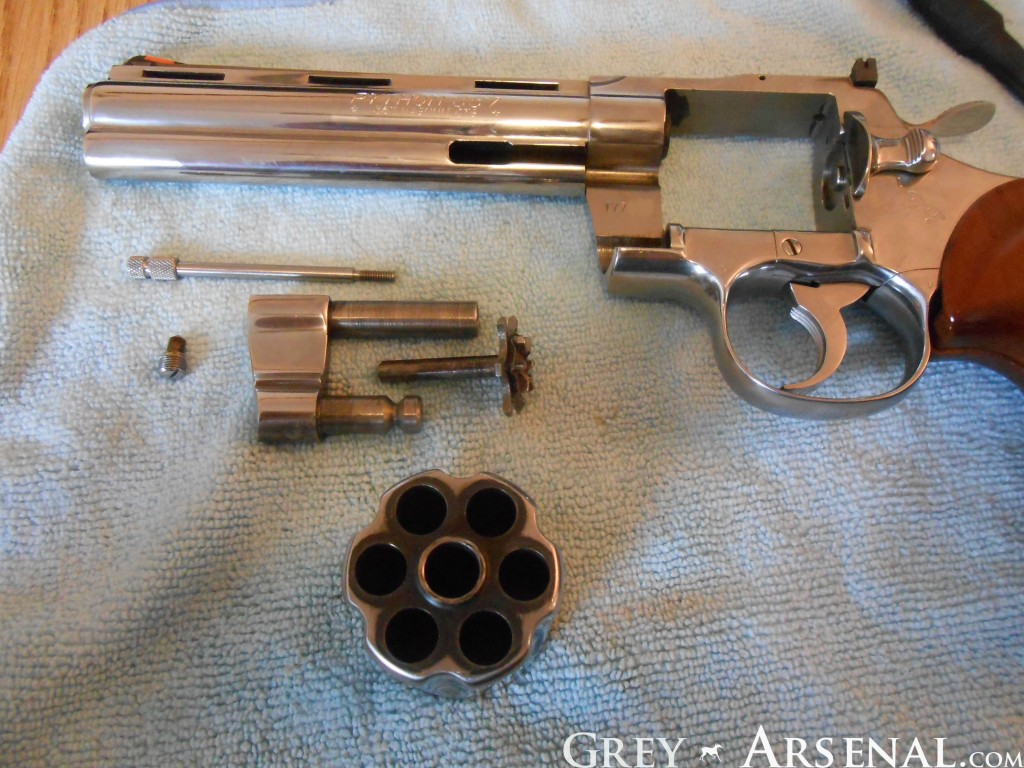
  • Unscrew the Extractor Rod and remove, along with the parts that are now freed up by this.
  • DSCN1687
  • Complete.

Yes, that cylinder has some serious burn rings on the front as well.  This Python may have the appearance of a safe queen, but she gets worked out quite a lot thanks to being such a pleasure to shoot.  If there’s interest, I’ll do another quick article on getting THOSE rings off, but the long and short- lead remover cloth, or scotch pads and Hoppe’s 9.

So, what we’re going to do here next is go ahead and chock that brush into your drill.

DSCN1689

Soak the brush in the solvent of your choice, and holding your cylinder in one hand and the drill in the other, get that brush in there and let ‘er rip.  This may seem harsh, but the brass stands no chance against the steel inside of your chambers, you’re not going to damage it, but you will break up the fouling like a boss.  For extra-bad fouling, you may want to tilt the drill a touch in circles to apply extra pressure, but not too much or you’ll bend up your brush too much.

DSCN1690

When this is done, you’ll have A LOT of dirty solvent all over that cylinder.  Give it a good wipe and normal cleaning.  Once that’s done, move to your test area (because I KNOW you didn’t have ammunition near your work space, right?) and let’s see what happens.

DSCN1691DSCN1693

Ta-da!  Your .357 Magnum is back to being a .357 Magnum.

Now, about the EASIEST way of doing this that doesn’t involve jury-rigged powertools.  Just buy this.  Brass screen over a rubber piece will get that fouling out in one pass.  Also works very well at cleaning bores and getting your forcing cone clean.  As a bonus, this is a 9mm size, it works for .38 / .357 / 9mm just like brushes / bore snakes, and one tool for multiple guns is always the way to go.
Cleaning for beginners, Cleaning Kit How-To

DSCN1660

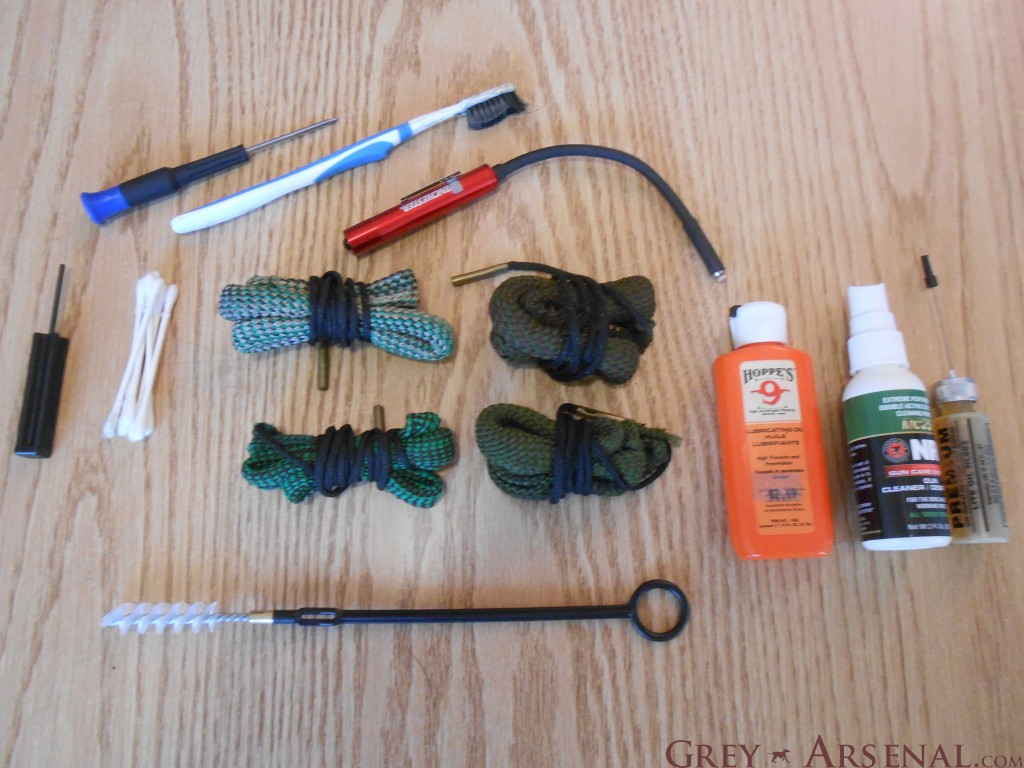
Well, I said I would get to this eventually so here goes.  How to get a new shooter up and running with a basic cleaning kit.  I’m not going to go into detail here on the cleaning process, that would best be covered in individual guides- but we’ll do a basic overview of the process and what bits and pieces you’ll want in your kit to let you do so.

DSCN1655

So first off, basic break down of the process you should be following as soon as possible after shooting.

  1. ALWAYS Verify firearms are unloaded and remove any ammunition from the workspace.
  2. Field Strip (or as far down as you’re personally comfortable with and feel is necessary at the time, the deeper the better) firearms used one at a time.
  3. Give all parts a brief wipe down with a clean and dry rag (or cloth patch if you like).
  4. Spray parts and surfaces down with MC25 Solvent (my preference, plus it smells nice) and allow to set briefly, or, if you like, simply spray or wipe with a rag/patch soaked with CLP.
  5. Spray chamber and inside of barrel liberally with solvent of choice.
  6. Wipe Solvent / CLP soaked parts with clean rag / patch to remove initial fouling.  Repeat above steps until rag / patches return clean results.
  7. Use CLP soaked (followed by dry) Q-tips (seriously, click link, way better than the ones for your ears) to detail clean Chamber, Breechface,  Lugs, and other detailed areas.  Use pipe cleaners (the absorbent kind, not craft pipe cleaners) to get into harder to reach spots.  Additionally, a toothpick or dental pick wrapped in one layer of thin cloth works pretty well for buildup in tight crevices.  Use solvent-soaked toothbrush for very fouled areas, especially fouling on intricate areas.
  8. Run calibercorrect Boresnake through barrel at least 3 times, ALWAYS from Chamber -> Muzzle.  NEVER pull through from Muzzle end to Chamber.  Wipe down the feed ramp with CLP soaked rag / patch again, just for good measure.
  9. Wipe all parts down with dry rag / patches.  At this point, there should be minimal to no fouling showing on any cleaning material after wipes.
  10. Lubricate per needs of your firearm with oil and/or grease*
  11. Reassemble firearm and wipe off excess oils.  You may elect to SPARINGLY apply a bit of CLP to a rag and rub a protective coating on the exterior metal surfaces of the firearm.  This will depend on storage and intended further use, but can be of benefit when the firearm is going back in a safe for a while.
  12. Cycle the weapon’s action liberally to distribute lubricants.

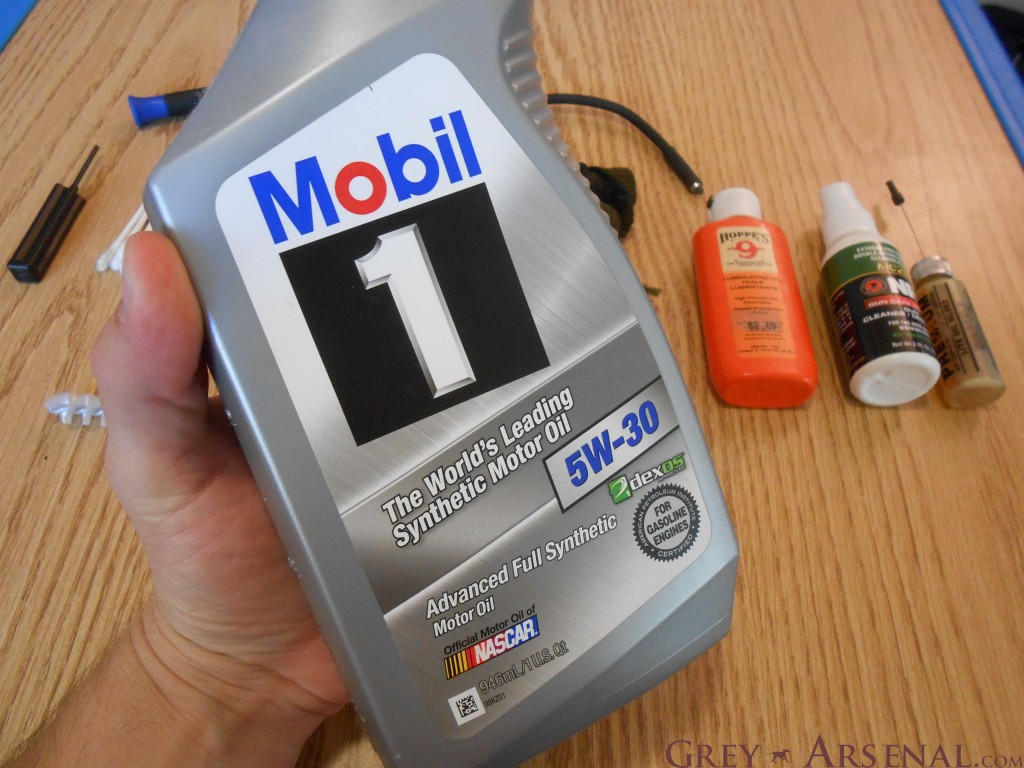
*Opinions on lubricants is another hot-button issue.  My personal theory here: If you have the money to spend, by all means, Mil-Comm makes great products, and my friends who’ve used their stuff where their life depended on it swear by it.  BUT, on a budget, I figure any jackoff in their basement can slap a cool logo and guarantee on a bottle of mineral oil and come up with a story on how long they spent researching it, then charge an arm and leg for it.  Know who does spend a ton of verified money on high-performance lubricants that need to hold up to a variety of environmental conditions for thousands of hours of intense use?  Automotive lubricant companies, that’s who.  Enter the cheapest-per-volume high-performance firearm lubricant you’ll find, and likely one purchase will keep you lubing for years:

DSCN1656

That’s right.  It’s good enough for moving parts in a metal box full of explosions driving a shaft to several thousand revolutions per minute for ~450,000 hours before you should replace it, in nearly any environment you’ll find on Earth.  I think it’ll hold up just fine keeping a couple of surfaces and moving parts slick over the course of a few hundred cycles before it’s wiped off and reapplied.  Similar logic applies to grease- Mil-Comm stuff is the shit, and recommended by SIG for their products.  But Lucas Oil White Lithium Grease is hard to beat with it’s track record and price point.

Additional thoughts-

  • A brass brush, and traditional steel rod with brush attachments are still good to have on hand in case of heavy fouling.
  • A bottle of Windex (or generic ammonia based glass cleaner) is good to have if you’re planning on shooting corrosive surplus ammunition.  Just be sure to clean properly afterwards.  The ammonia doesn’t replace a step in the process, only adds one before you do the first round of solvent.
  • Seriously CLP is awesome.  Have some.  Have extra.  This stuff works for all kinds of stuff, from sticky door locks, to bicycle maintenance.
  • A box of some sort is nice.  I honestly can’t remember from where mine originally came into being.  I believe it was a hard case for one of my father’s old electric grooming devices.  Perfect size for the range bag though, so it just kind of stuck.  Small tool or tackle boxes work pretty well though.
  • DSCN1658
  • Medical exam gloves are awesome to use while cleaning.  You will get fouling all over your hands.  You will get solvent all over your hands.  You will get lubricant all over your hands.  The pleasant smelling MC25 isn’t too bad to get on yourself, but still best to avoid getting most of these chemicals all over yourself.  Use protection my friends.
  • A Bore Light, such as the one mentioned in a previous post, is a great additional tool to have in the kit, so you can have a look in tight places, and check how spic & span your barrel interior is after running those boresnakes through.
  • As far as a toothbrush, a military-style one that has the large and small bristle area is awesome, but what do I always have around?  Worn out former dental toothbrush, after good cleaning of course.  They last about the same interval anyway.
  • Additionally, a small screwdriver set and punches (as needed by your particular firearms) are good to keep on hand in your kit.

Enjoy, and shoot clean.

Considering your first firearm: Part I

What kind of gun should I buy?

185640_10100246779294263_438176988_n
This is one of the more common questions I get, along with “Should I get A or B?”  It’s not the easiest to answer, because it depends a lot on what you’re looking to do with it.  In this post, I’ll try to address this as easily as possible, and point you in the right direction of further researching your decision.

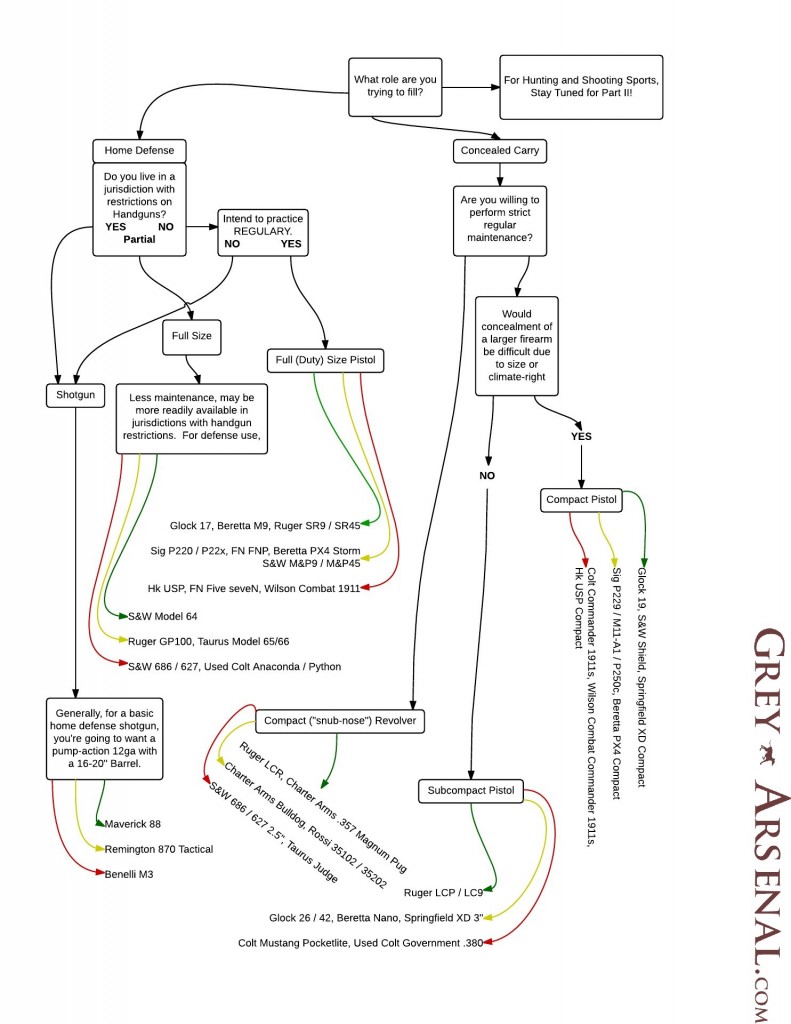
Luckily, I’ve created a handy chart to help!  Follow along to see which type of firearm may be a good fit for you, and follow the green, yellow, and red lines to examples at different relative price ranges with green being the cheapest and red being the most expensive.

First Firearm - New Page

Basically, you first have to ask what purpose you’re looking for your firearm to fill.  The big 4 roles (and most common firearms for such) here being:

  • Home Defense (Shorter Pump Shotguns, Full Size Handguns)
  • Concealed Carry (Compact and Subcompact Handguns)
  • Shooting Sports (All types, regulations specify specifics)
  • Hunting (Rifles, Long Barreled Shotguns, Big Bore Handguns)


DSCN1478DSCN1309b644746_10100331270762683_1519565809_nDSCN1503While there’s obviously a bit of a overlap between categories, and there’s a lot of desire in many new buyers to want to get something to fill as many roles as possible, it’s best to decide what you want most and get something that will fill that role as best as possible for what you want to spend.  The problem of having a Jack-of-all-trades, master-of-none is going to become apparent fairly quickly when attempting to practice or put the firearm to use for it’s intended purpose.

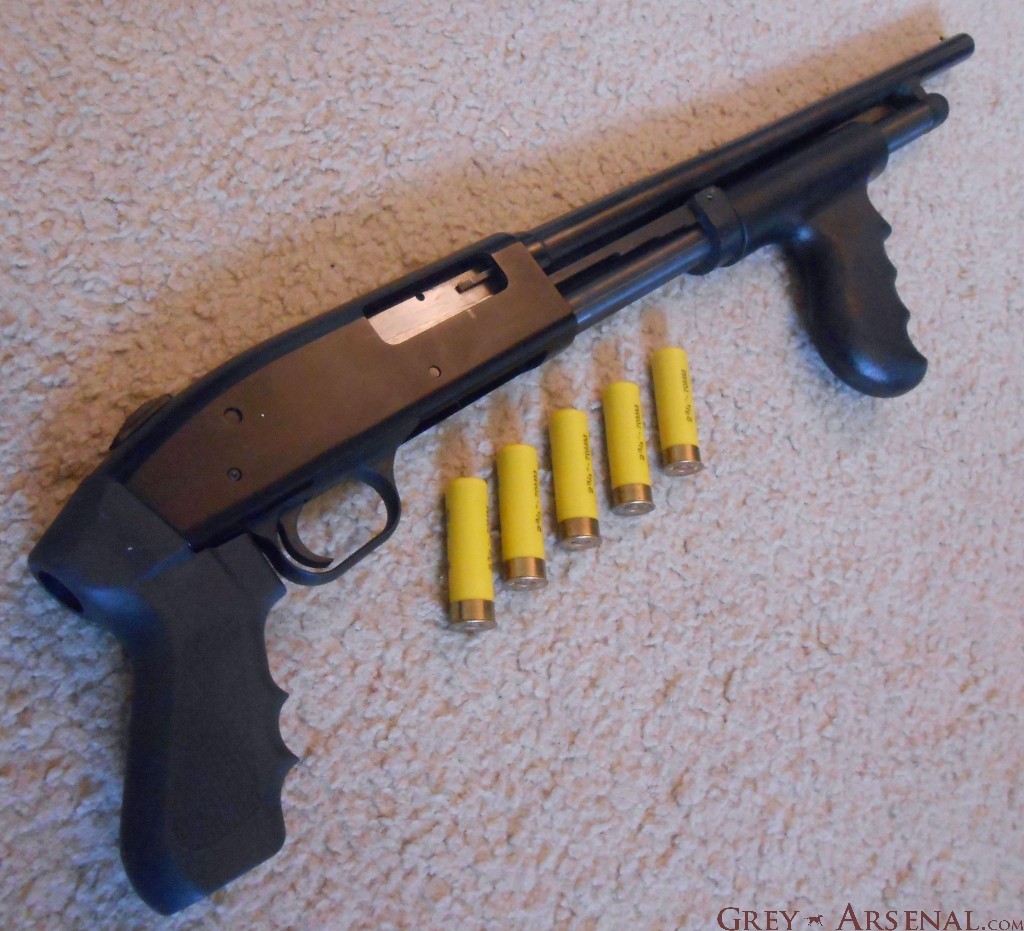
For instance, a common mistake is wanting to get a shotgun that can just as easily be used for sport as it can for home defense.  The requirements are very different for these two roles, and even in cases where it can be readily converted (for instance, a Mossberg 500 / Maverick 88 could have the tactical stock / pistol grip swapped out for a traditional field stock, and the 18″ barrel changed out for a 28″ Vented Ribbed barrel with a choke, or vice versa) it’s rarely going to do nearly as well as it would just have a dedicated platform for what you’re trying to get out of it.

There are exceptions, of course, for instance practical shooting sports such as IDPA, which specifically exist to promote the use of, and thus increase in skill with, personal defense weapons.

For additional help in choosing a specific firearm for sport purposes, this was an awesome read by a true professional in the world of shooting sports.

shoot

Basic How-To, Mossberg 500

DSCN1478

Alright, this one is going to be short, but I got a request from a new Mossberg 500 owner (and new shotgun owner in general) without a manual who wanted some basic instructions, such as safety, loading, unloading, that sort of thing.  This user is already aware of basic firearm use and safety.

So, right to it- most important is Safety Lever location, which is pretty obvious in this case.DSCN1479Rear for Safety ON, Forward for Safety OFF (pictured) showing red.

  • The Mossberg 500/590 line varies in magazine capacity, so here’s a breakdown of Capacity by model for 2 3/4″ and 3″ shells:
  • 835 Models: 5+1
  • 535 Models: 4+1
  • 500 Models: 5+1, 7+1 with high-capacity Magazine Tube
  • 505 Models: 4+1
  • 590 Models: 8+1

Note: As mentioned in the manual, many are shipped new with a wooden dowel rod in the end of the magazine tube to limit magazine capacity due to Migratory Bird Laws (capacity limit for hunting).  Additionally, “Bantam” models include a dowel that limits capacity to 1+1.  If there’s demand for it, I’ll expand this post with removal instructions.

On to LOADING:

There are two parts here that I’ll be showing, which makes it less confusing than the way it’s laid out in the manual.

The first part is if you would like to load to maximum capacity, having one round in the chamber, action cocked, and kept with the Safety ON.  This is how you would want to load the firearm if you were intending on carrying and using it, for instance when going out hunting, so that you can employ the firearm quickly and relatively quietly by just throwing the Safety OFF and ready to fire.

PART I: PRE-CHAMBERING A CARTRIDGE (if desired)

  • Ensure the Safety lever is ON (rear, NO RED DOT)
  • Cycle the action open (pump to the rear)
  • DSCN1482
  • Place one shell, facing forward, in to the Ejection Port, letting it fall and rest on the Loading Ramp.
  • DSCN1483
  • Cycle action closed (move pump fully forward), chambering the shell.
  • DSCN1484
  • DSCN1478

The second part is how to load the magazine tube.  When done in addition to the above, you’ll achieve maximum capacity, and are ready to fire by simply switching the Safety Lever OFF.

Additionally, you could do this on it’s own without loading a round into the chamber.  This is generally how most people keep the firearm if kept loaded to be used in a home-defense role.  It’s thought of as *safer* and if needed, all that needs to be done is cycling (racking) the action.  It’s often stated, but quite debated, about the psychological effect of a shotgun racking sound as a criminal deterrent- personally if they’re already in MY house, the best warning they’ll get is a Safety clicking OFF if they’re listening really closely, but to each their own.

PART II: LOADING MAGAZINE TUBE

  • Rotate (cant) the weapon so that the Loading Port is accessible.
  • DSCN1486
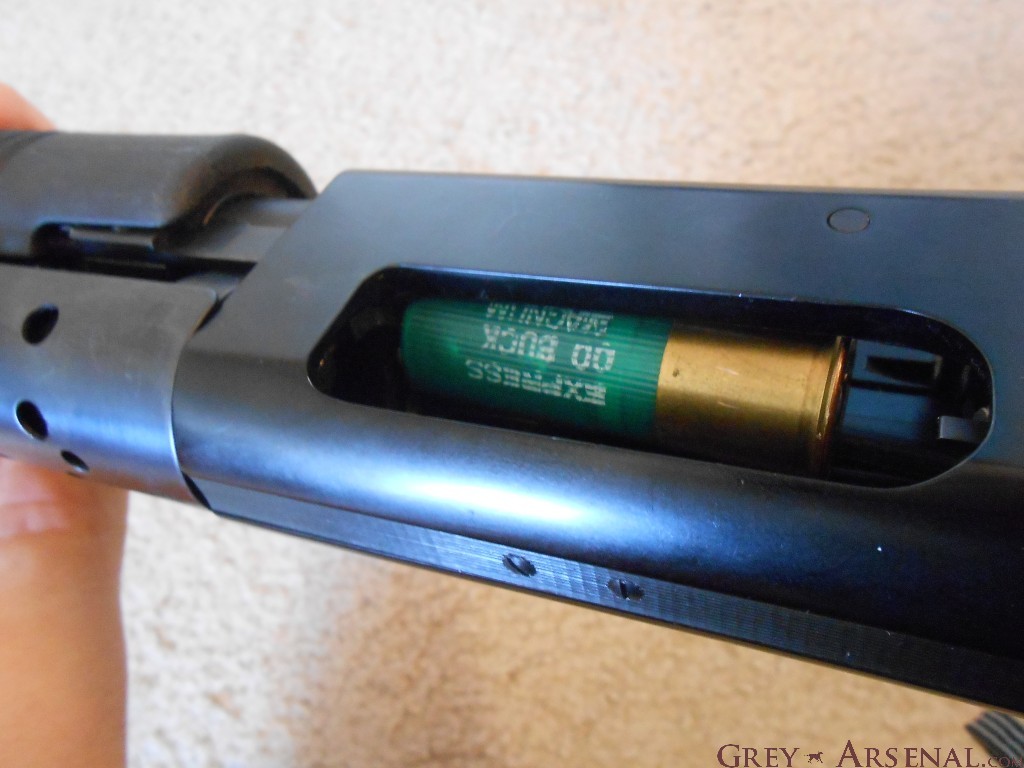
  • Place shells facing forward into the port one by one, sliding them into the Magazine Tube until they’re secured by the Cartridge Stop (visible in picture above as a tab on the right side of the cartridge rim)
  • DSCN1485
  • Do this until you’re reached capacity.  You’ll know you’re at capacity when you can no longer completely insert another shell.

UNLOADING:

Just like loading, unloading is done in two parts depending on whether or not there is a round chambered.  First, I’ll cover removing the chambered round, as you’ll want to do this before further handling the firearm to unload the magazine.  If stored WITHOUT a round chambered, skip to Part II.

PART I: UNLOADING THE CHAMBERED ROUND (and ensuring the next round in the magazine is not chambered)

  • ENSURE SAFETY LEVER IS ON (REAR, no Red Dot)
  • You’ll notice that you’re unable to cycle the action after it’s already cocked.  In order to do so, you’ll have to depress the Action Release Lever to the left of the trigger.  This is also a good visual indicator of whether or not the firearm’s action is cocked.
  • Depress the Action Release Lever while slowly opening the action (moving pump to the rear)
  • DSCN1480
  • DSCN1481
  • With the Ejection Port facing downwards (towards a surface onto which you would like to eject the cartridge), complete cycling the action open (moving pump fully to the rear).  This will cause the chambered round to eject from the firearm.
  • This sets up the Feed Ramp to begin loading the next cartridge from the Magazine Tube, which we want to avoid.
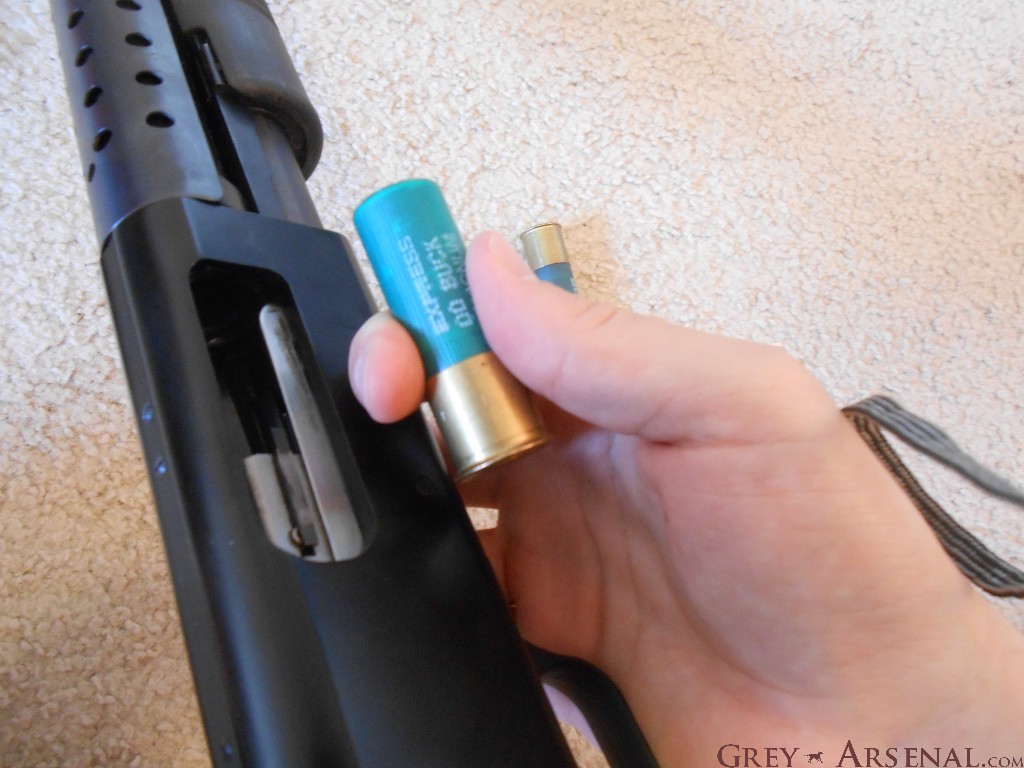
  • SLOWLY move the action just slightly forward, so that the next cartridge is released from the Magazine Tube on the Loading Ramp.
  • DSCN1492
  • While in this state, rotate the firearm over so that the cartridge can drop free out of the Ejection Port.  It’s important not to move the action too far forward.  If unable to be removed from the Ejection Port, just move the action slightly back toward the rear until it is able to be dropped free.
  • DSCN1493
  • DSCN1494
  • After this is done, close the action (pump fully forward), while observing that no round is chambered.  Proceed to Part II.

PART II: UNLOADING THE MAGAZINE TUBE

  • This part’s easy.  Rotate (cant) firearm so that the Loading Port is accessible.
  • DSCN1486
  • Remember I pointed out the Cartridge Stop earlier?
  • DSCN1488
  • Well you’re going to press on it (easier to do if you press closer to the round).  With each press, the next cartridge in the Magazine Tube will pop out into the Loading Port, allowing you to remove it.
  • DSCN1489
  • Repeat until all rounds are removed and you can clearly see the Magazine Tube follower instead of the rear of a cartridge.

Well, there you go.  If anyone would like any more detail, please let me know.  I may eventually expand this post into maintenance / disassembly instructions, and how to remove the dowel rod from the Magazine Tube to increase capacity.
Also, see my previous post reviewing the Kicklite stock / Ultimate Arms Gear kit for the Mossberg.DSCN1491If you liked the foregrip shown on the 20ga Mossberg 500 in this review, check it out here.


Walther P38 / P1 Compare & Field Strip

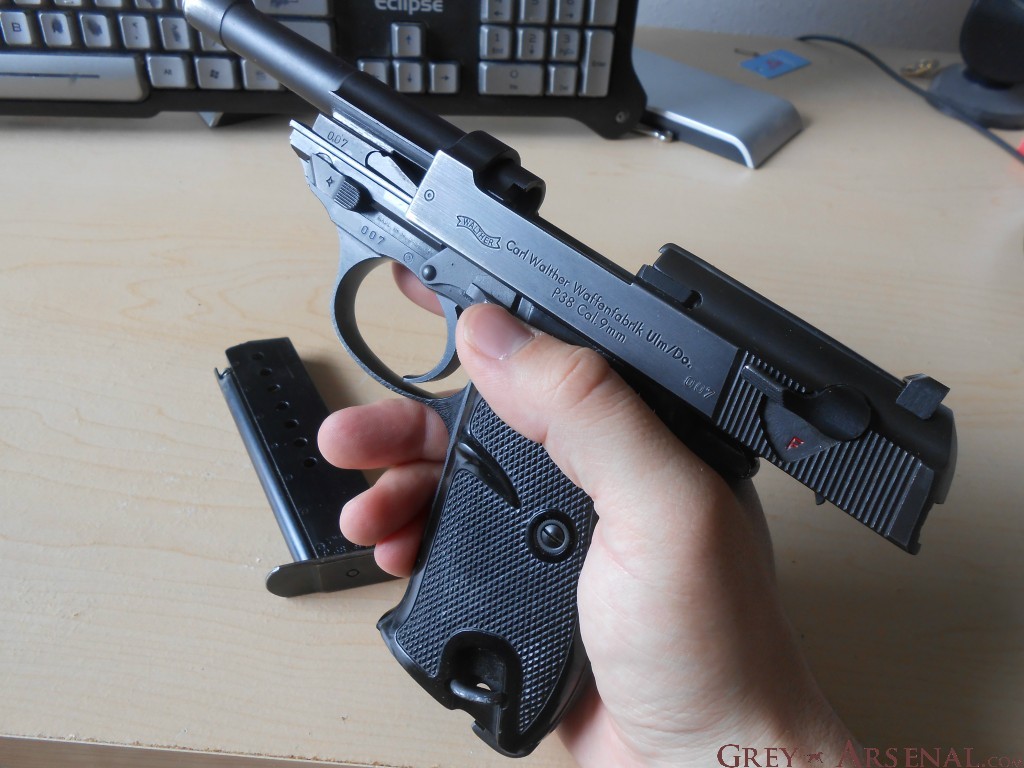
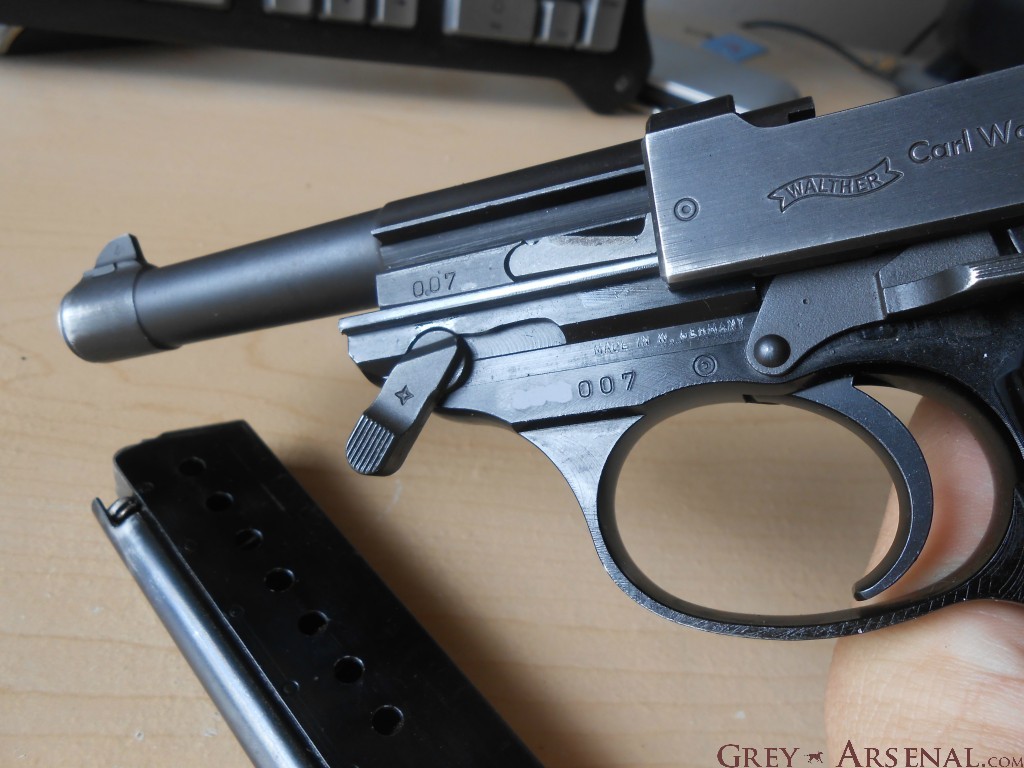
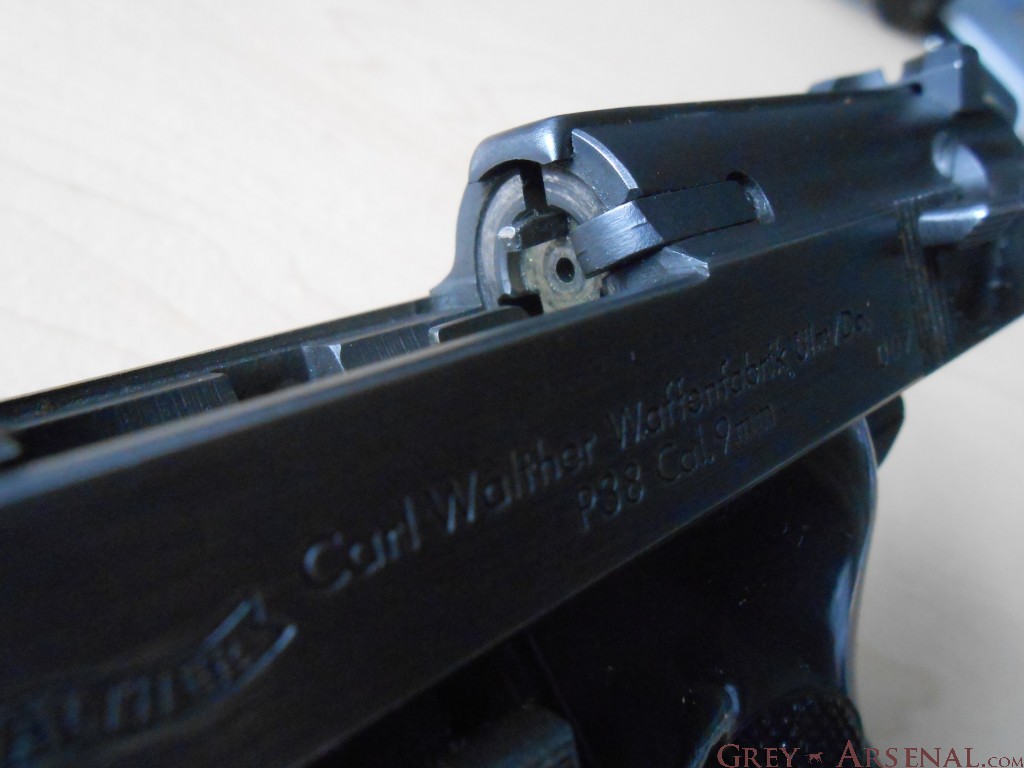
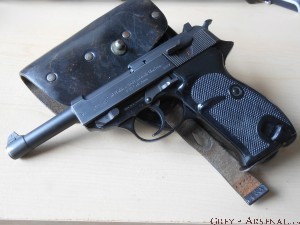
DSCN1447Lets move on last week’s post in France to wartime Germany where we’ll be getting intimate with the Walther P38, and it’s post-war relative, the P1.  First produced in 1939 by Walther Arms to serve as the service pistol of the Wehrmacht, the P38 is a first-of-it’s-kind locked-breech semi-automatic pistol with a DA/SA trigger.  This is also the earliest handgun I’m aware of which includes a Loaded Chamber Indicator (in this case, above the hammer).  More on that later.

DSCN1451

Chambered in 9mm Luger similar to their previously used P08 Luger, this was a more powerful handgun than the other Walther issued to the Wehrmacht, the PP/PPK.  The original wartime P38s were produced from 1938 to war’s end in 1945.  17 years passed before the Bundeswehr announced that they would be adopting the P38 as their service pistol, and in June of 1957 production of the P38 recommenced.  These were produced until 1963, when an updated design was adopted, referred to as the P1, which was finally phased out completely in 2004, replaced by the HK P8/USP.

DSCN1452

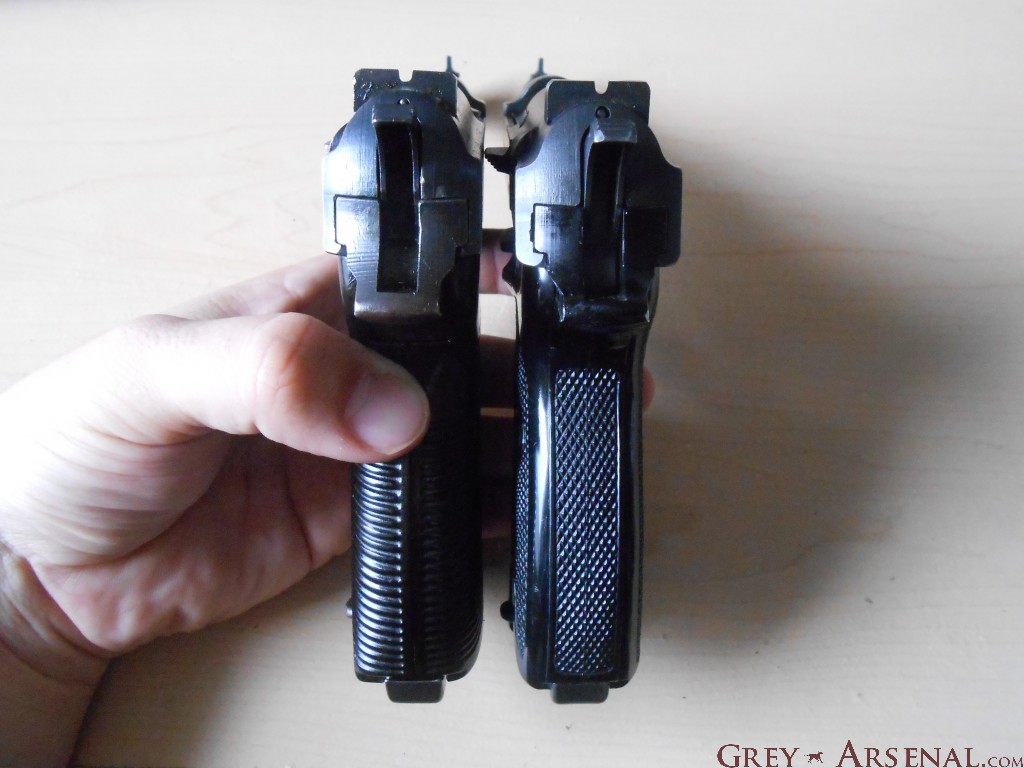
The major difference between the earlier P38 and the P1 variant is construction of the frame, which was switched to Aluminum in the P1.  As is visible, the grip design also changed from grooved to checkered.

DSCN1448

DSCN1447

The top example is a wartime P38, and the bottom is a P1 produced in late 1968.

They’re still considered to be great shooters, and while not having the greatest DA trigger pull in the world, their SA trigger pull is extremely crisp, and has the shortest reset I’ve personally experienced.  They’re well balanced, and even the aluminum framed P1 has very comfortable recoil.

ipb-walther-p38

Right, onto the tear down-

  • Remove the magazine via the bottom magazine release, and open action to ensure that the firearm is unloaded.
  • DSCN1454
  • Swing the slide release located on the front left of the frame down and forward, noting how it aligns to allow the slide move forward and off the frame.
  • DSCN1455
  • Disengage the slide lock if necessary, and move the slide forward only to the point where it would normally rest.  At this point, de-cock the hammer to allow the slide to be fully removed from the frame.  The de-cocking lever may be used carefully, but it’s preferable to just lower the hammer gently while using the trigger.
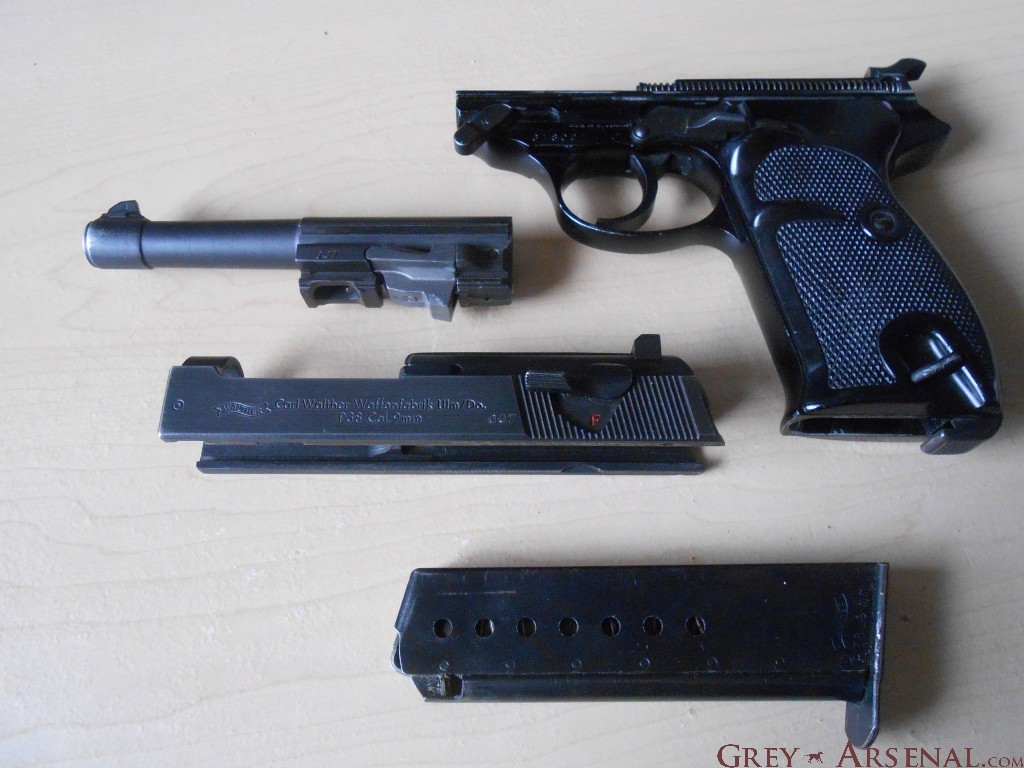
  • To remove the barrel from the slide, simply push the “button” (locking block operating pin) visible at the rear of the barrel assembly, which will push the locking-block wedge out a bit, allowing the barrel assembly to be withdrawn from the front of the slide.
  • DSCN1458
  • DSCN1459
  • DSCN1460
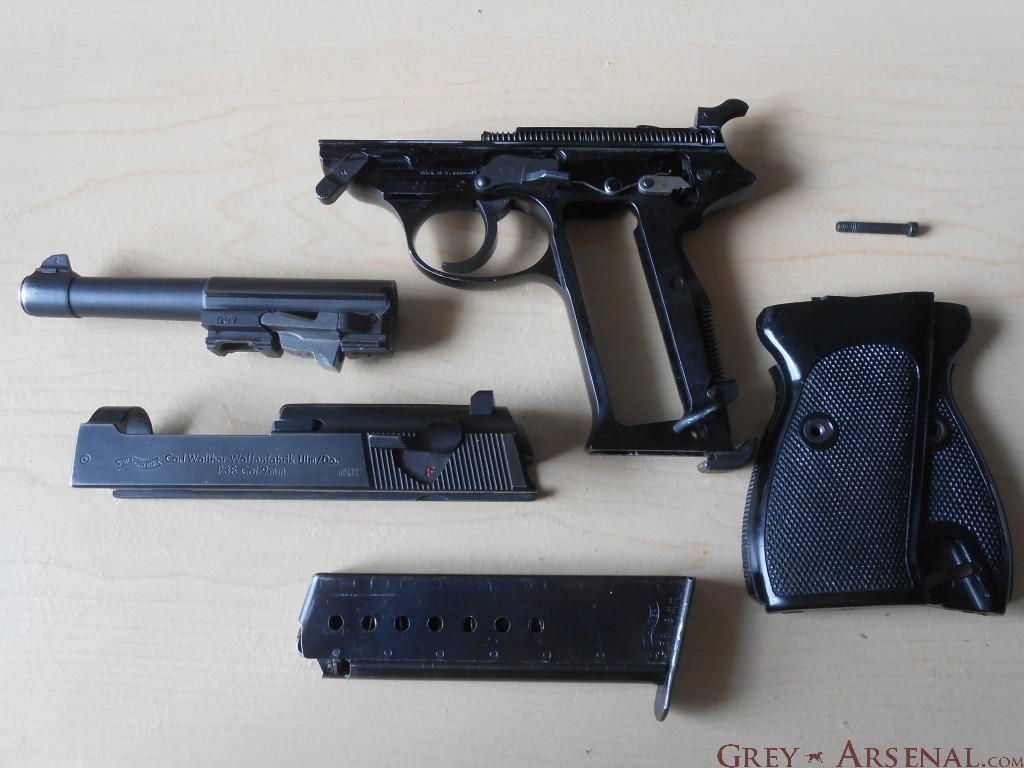
  • At this point, you have access to everything you need for a decent simple clean ‘n lube.  Notice the unique dual recoil springs on either side of the frame.  These can be removed, if desired, by either using a small tool to pull the spring back away from the contained rod at the front far enough that you can remove the rod, then withdrawing the spring OR using a tool to push the spring forward a bit from the rear until it can be extracted from the wider area at the rear.  I prefer the first method, but didn’t bother showing it, as it’s rarely necessary, and pretty easy to figure out.
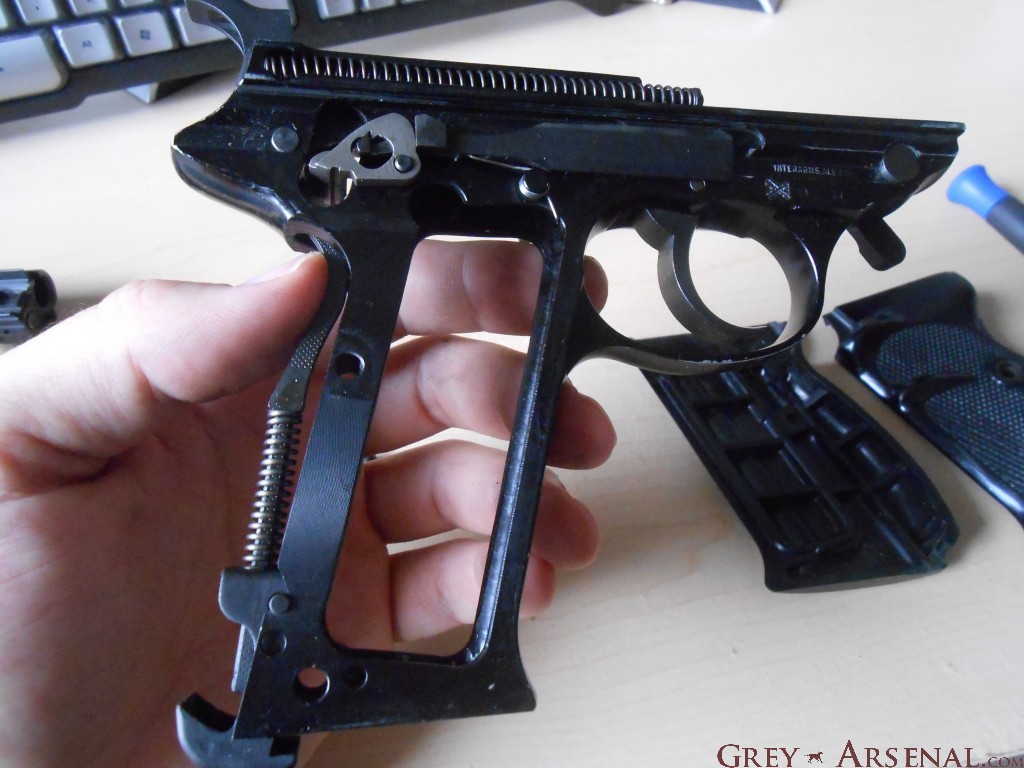
  • One thing I would check out while you have it apart, however, is the Trigger Bar and Sear are interacting correctly.  To get access to this, use a small flat-head screwdriver to remove the Grip Screw from the left side of the firearm.  Remove the right side grip panel first, then maneuver and remove the left side panel, taking care not to damage it on the slide release.
  • DSCN1461
  • DSCN1464
  • What you’re looking for is on the right side of the frame, previously covered by the right grip panel.
  • DSCN1463
  • The grey part with the hole there is the Sear.  A problem I’ve seen develop with the P38 is the Trigger Bar spring coming loose, and not forcing the “duck bill” hook of the Trigger Bar from interacting with the corresponding notch in the Sear when pulling the trigger.  This can lead to a dangerous situation where you pull the trigger, no bang happens, and the weapon is now Condition 0, and has a malfunctioning trigger, a VERY dangerous situation.  A weak/worn spring can also cause this.  To check, be sure the spring is where it should be, then cock the hammer, and slowly pull the trigger (lowering the hammer with your thumb) to watch the action of the trigger bar on the Sear.  Watch out for this:
  • DSCN1465
  • If, when you pull the trigger, the Trigger Bar hook doesn’t positively catch the notch in the Sear, you have a problem, and should find a replacement Trigger Bar Spring.

Reassemble in reverse order, making note to insert the barrel assembly into the slide with the locking-block pushed out (that is, button pushed in so the locking-block is lowered), and when replacing the slide to the frame, make sure to push the locking-block back up so that it’s able to stay with the slide when you retract it far enough to re-engage the slide release.

Oh, one more thing to share!  The Loaded Chamber Indicator I’d mentioned.  Pretty interesting really:

DSCN1467

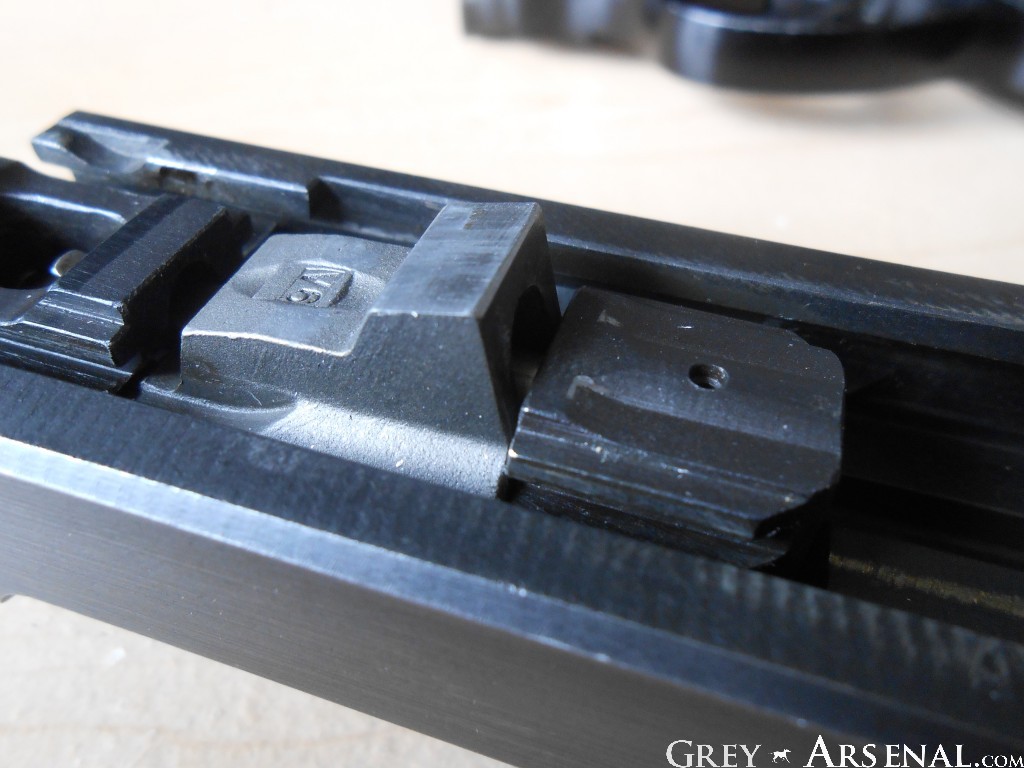
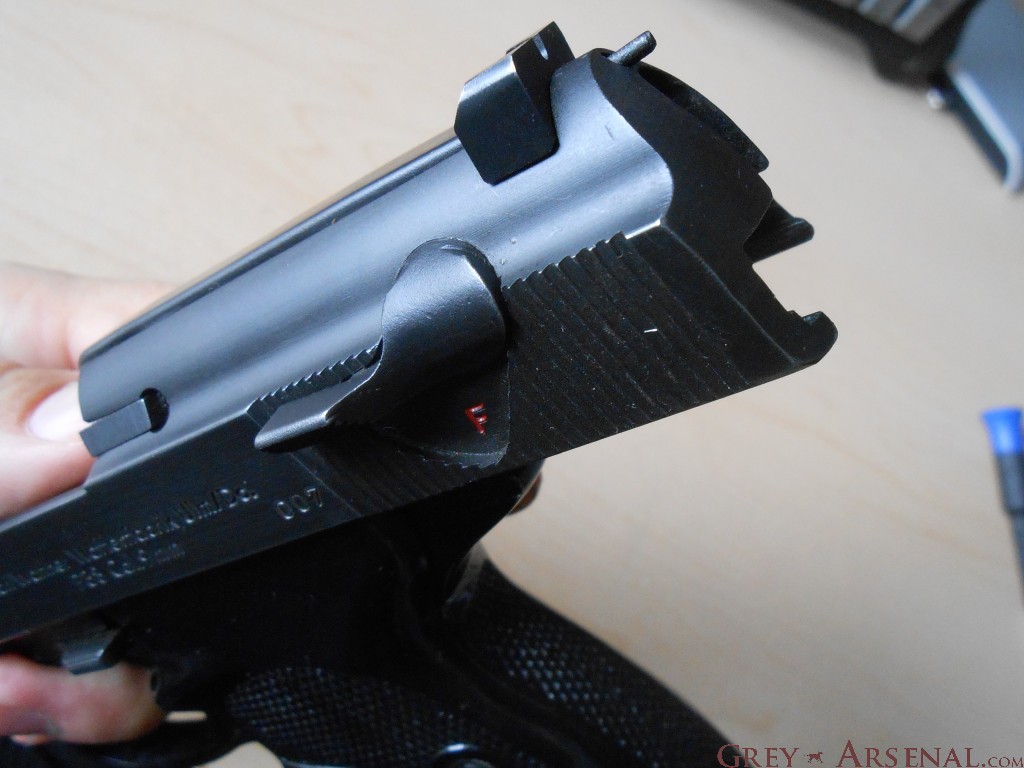
Note the protruding post at the top of the breech face?  When a round is chambered, that rod is pushed back against a weak spring, and out of a small hole above the hammer on the rear of the slide, making this visible:

DSCN1468

There are slight differences between the P38 and P1 in the design of the “Cartridge Indicator Pin” channel (as evidenced below), but it works the same way on both.

DSCN1450

Next week, I think we’ll get back to a more familiar end of the 20th Century.

“Unique” Model 17, “7.65 Court 9 Coups” Field Strip

DSCN1432

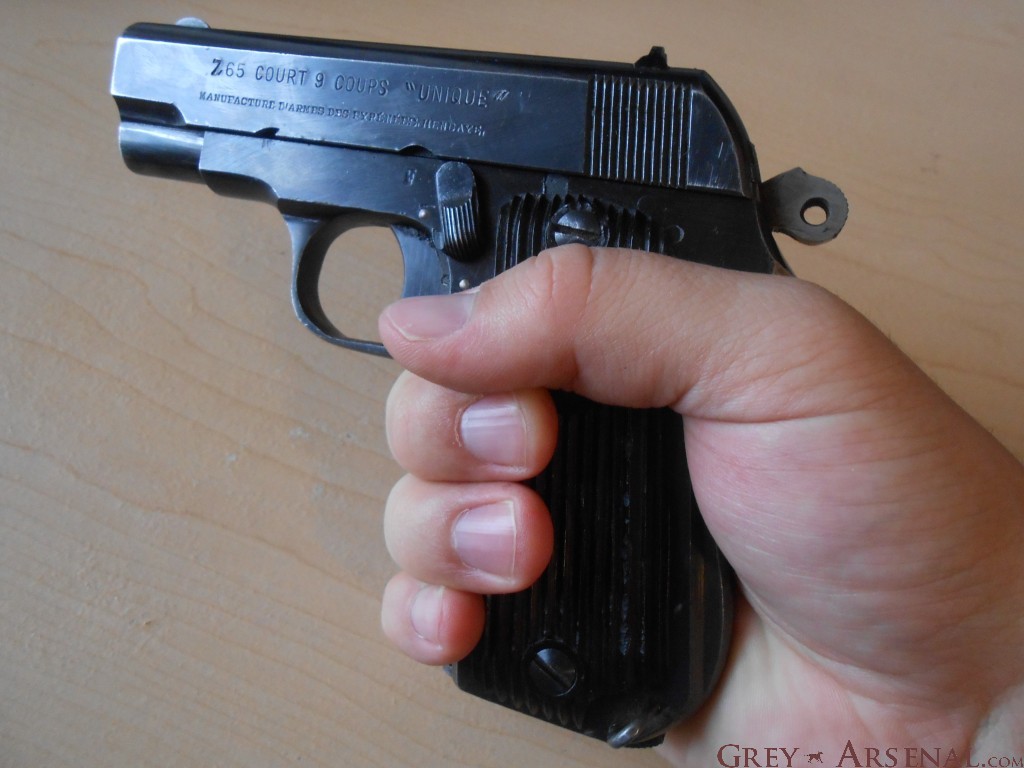
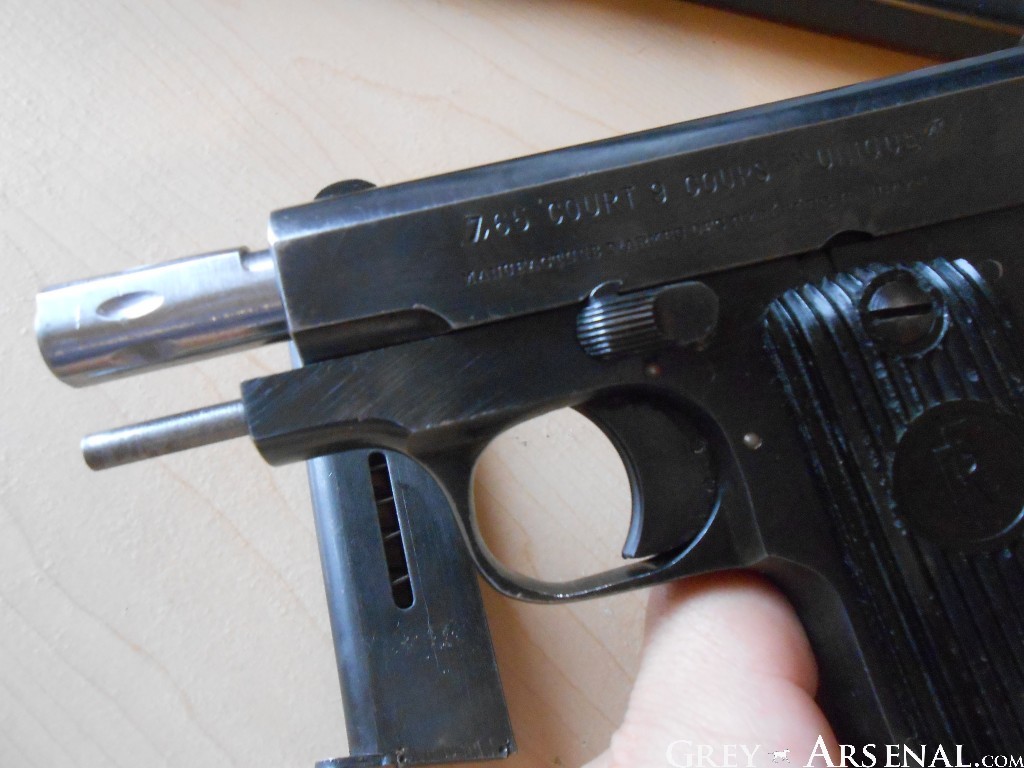
So, we’ll go ahead and continue with the series on don’t-build-them-like-they-used-to handguns, and this time, we’ll be moving from Belgium to France.  Specifically, Hendaye, France- as this was home to Manufacture D’Armes Des Pyrenees (MAPF) from ~1923 to 2001.  From 1928 to 1944, they produced this handy little shooter, the Unique Model 17.DSCN1434

As you can see, the markings on the slide state 7.65 COURT 9 COUPS “UNIQUE” which, I have to admit, made identification of exact model a tad difficult.  What the markings on the slide are indicating is “7.65 Short (7.54 Browning), 9 Cartridge” and then the type of weapon “Unique” which referred to the brand.

DSCN1443

As I said, it’s pretty handy, and though it has quite a bit of heft to it, it’s very well balanced.  Functionally, it’s fairly similar to a handgun I’ve previously talked about on this blog, the Colt 1903 Pocket Hammerless (misnomer, as the Colt simply had a hidden hammer).  That said, the craftsmanship is no where near as fine as on the Colts or FNs from this era.  The tolerances are very loose, and though when assembled and shooting it feels fine, are very noticeable when you break it down.  The finish work throughout is also pretty terrible, and it shows when looking at the condition of many surviving examples.

So, on to the guide.

  • Remove magazine and ensure firearm is unloaded.
  • Retract slide to the point that the safety lever can be swung forward and catch the slide.
  • DSCN1436
  • Similar to the Colt, rotate the barrel 90^ clockwise (from front)
  • Disengage catch and withdrawl the slide from the frame.
  • Rotate barrel 90^ counter clockwise and remove from slide.
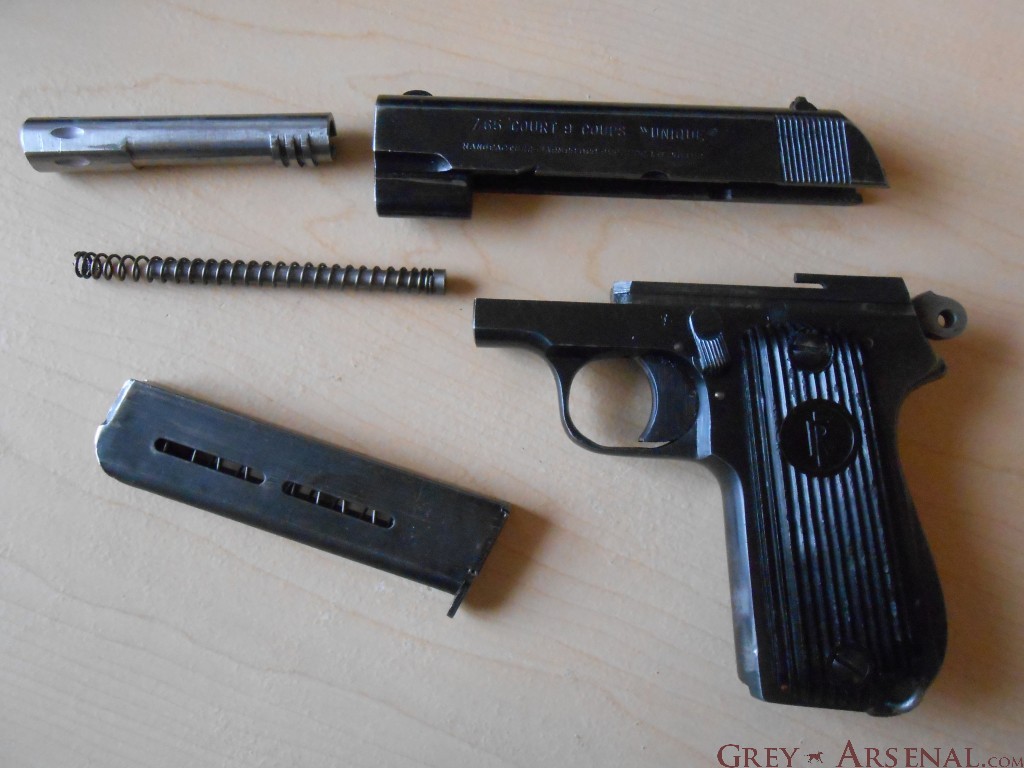
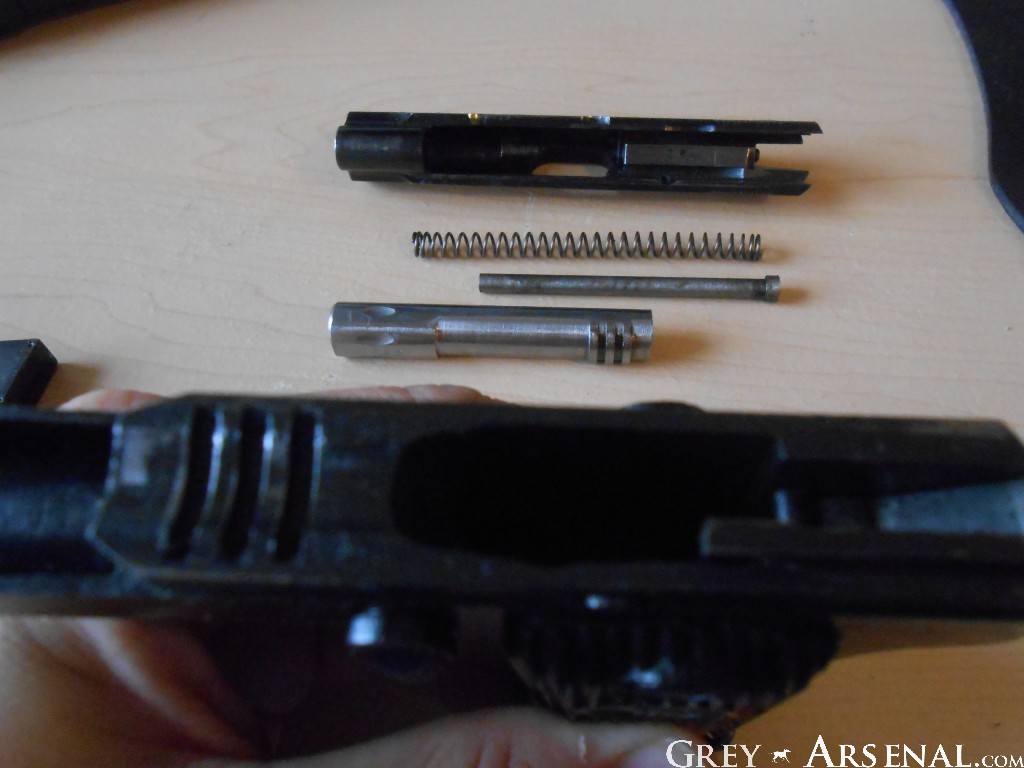
  • Remove Guide Rod from Frame and pull the Spring off of it.
  • DSCN1437
  • This is as far as you need to go for a basic cleaning.  Grip panels can be removed easily with a flathead screwdriver to access the Trigger Bar and clean out the Magazine Well if required.
  • Clean thoroughly and oil all contact surfaces.  These include the Barrel Lugs (frame and barrel), slide rails, and a light coating on the barrel itself and the Guide Rod.  Basically, if it looks like something rubs it, get a light coat of something on there.
  • DSCN1440
  • Reassembly can be a bit tricky due to the loose-as-hell tolerances I mentioned.  Getting the Barrel to re-engage with the Barrel Lugs in the frame can be a PITA since there aren’t any markings as some others (Colt) include.  But, I’ll give you the foolproof method here at Grey Arsenal
  • Reinsert Guide Rod into Spring, and reinsert the assembly into the hold in the Frame below the barrel, in the orientation it was originally (see earlier pictures if needed)
  • Replace the Barrel into the Slide, and when able, rotate 90^ Clockwise to lock it into the slide (term used VERY loosely).
  • Begin to replace Slide onto the Frame, taking care to line up the Guide Rod with it’s place in the Slide.
  • DSCN1442
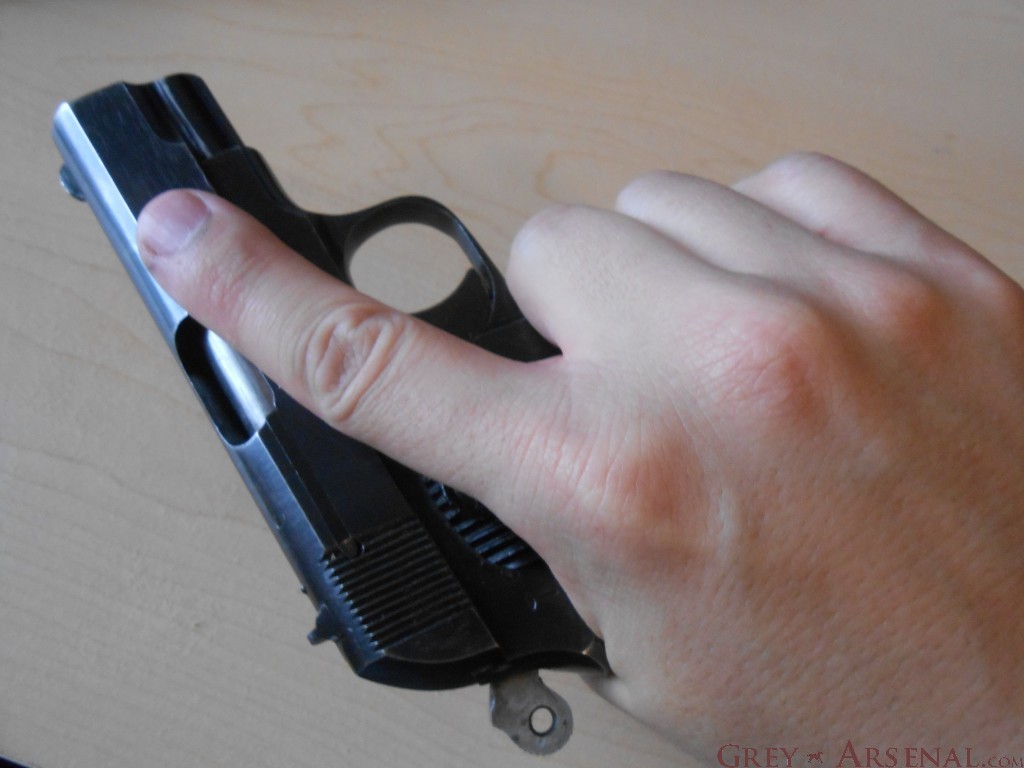
  • At this point, things get fun, and by that I mean extremely frustrating if you haven’t done this before and aren’t using an awesome guide like mine.  You’ll want to move the slide back to the point where you can engage the safety/slide lock again, but be sure to move the barrel with the slide with one of your fingers.  If not, the loosey goosey tolerances will cause the Barrel to move around in there and you wont get it to engage the lugs.
  • DSCN1436
  • Once you have it locked up, Rotate the Barrel 90^ Counter Clockwise, which may be tough depending on the level of lubrication you gave it, and your particular Model 17.  Once you’ve rotated it properly, you should be able to disengage the Safety and the slide won’t be able to be pulled off.  Give it a try- if it comes off, try again.  If it stays put, Congratulations.

DSCN1444

For most owners, this handgun is the definition of a Curios & Relics class firearm, it’s an odd, storied little French autoloader that was probably handed down and down from a relative who brought it back as a WWII trophy.  Although it’s a “small” caliber, as I’ve mentioned before, some hot-loaded 7.65 rounds are still no joke, especially when you have a small package like this that can have 9+1 of them being carried Condition One.  Given the choice between this and a contemporary sub-compact concealed carry such as LCP or Sig P238 in .380, I’d readily choose the one that probably saw a WWII battlefield, or the mean, baguette-scented, streets of 1930’s Paris in the hands of a LEO.  Did I mentioned how nicely it fits in your palm?

Mossberg 500 ‘Ultimate Arms Gear’ Kit Review / Install Guide

DSCN1417

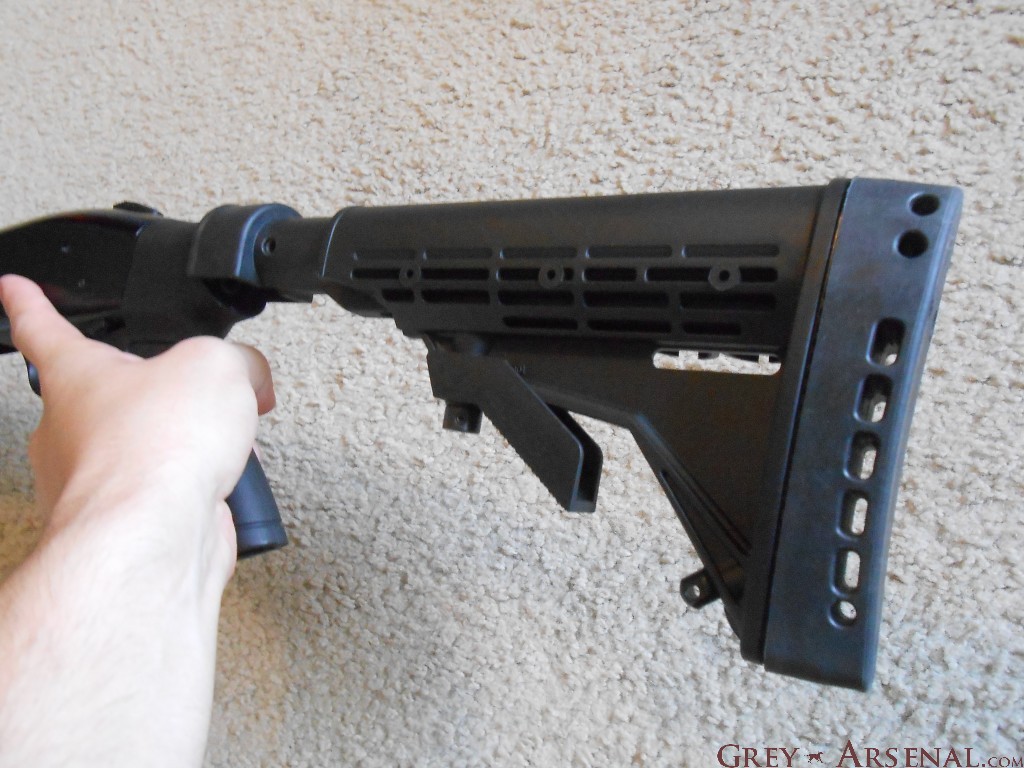
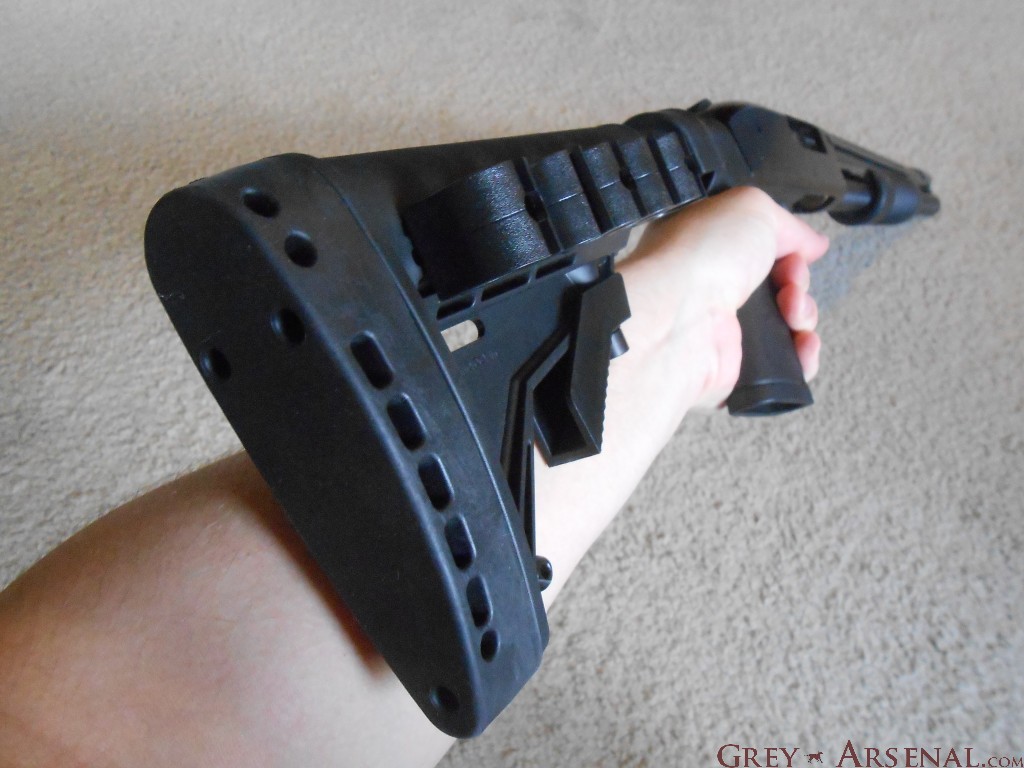
I recently went shooting with a friend who had put a Kicklite Recoil Reduction stock on his Mossberg 500.  I liked the feel of the AR-style stock, and the recoil reduction did feel nice with heavier loads.  After thinking about it, I figured I’d accessorize my old Mossberg 500 Cruiser a bit, for my audience’s benefit, of course.  While I was looking, I decided I didn’t need to spend the extra money on the recoil reduction system, but Kicklite also makes a “Field Series” that has the same great feeling butt pad (seriously, this thing is really soft in the right places) but without the recoil absorbing system in the “buffer tube” that’s in the more expensive models.  I ran across a kit with a few extras for the same $69.95 MSRP as the Kicklite Field Series and free shipping.

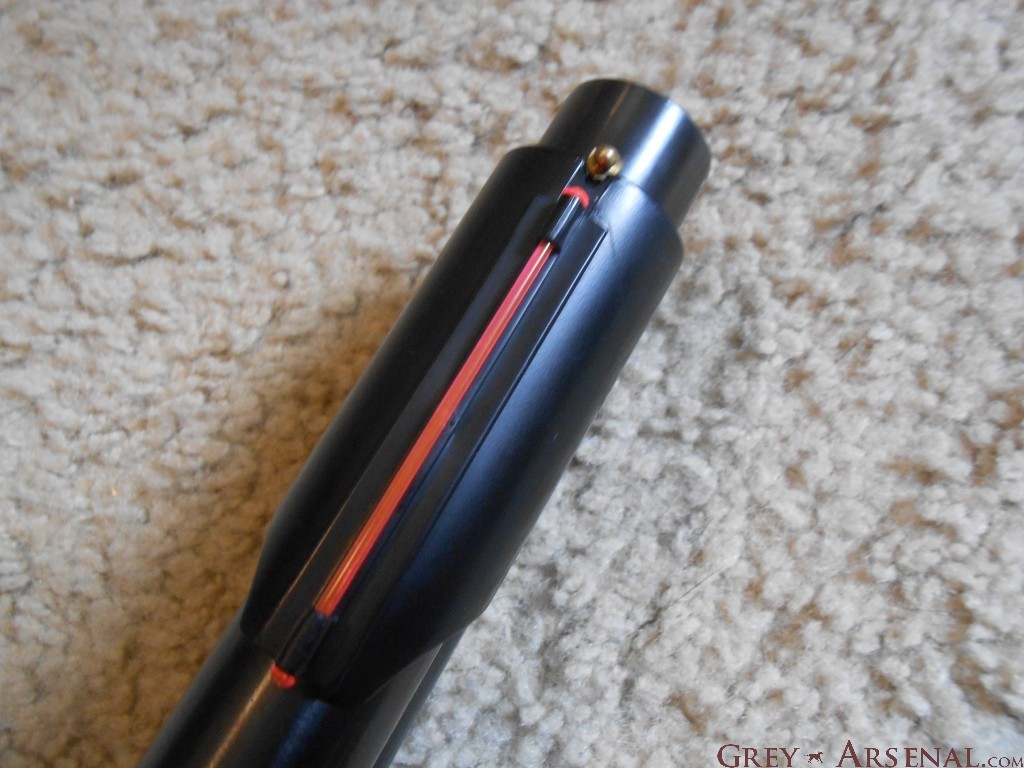
It includes the Kicklite Field Series stock, a Shell Holder that can be attached to either side of the stock, and a TruGlo Fiber Optic sight (though it may be a knock-off, works all the same).DSCN1420 DSCN1424


Anyway, here’s the rundown of my thoughts on it:

Stock feels nice, is just as adjustable as a standard 6-position AR stock, is angled down just slightly making a decent cheek weld easier, pistol grip feels fine, the whole package is solid.  As mentioned before, you won’t believe how nice that buttpad feels on your shoulder, even after a while of shooting.

The Shell Holder could be better, as it’s just hard rubber, but it’s easy to mount on either side of the stock, and for my purposes it seemed to hold the shells nice and tight, but reviews on Amazon are mixed- I pretty much considered this just a bonus though, and as I said, it worked just fine for me.

The Fiber Optic front sight is pretty awesome, much nicer to look at from behind than stock gold bead on there.  Held on just fine, despite what some of the other reviewers had said.  Also very easy to mount- more on that in a moment.

Installation Guide

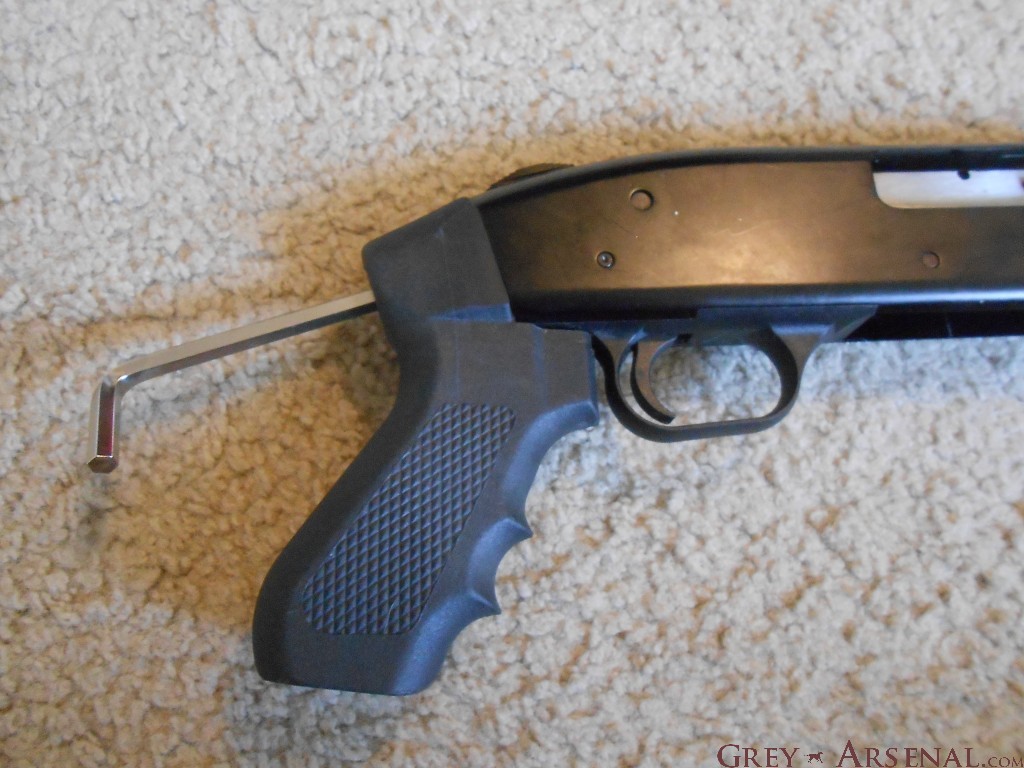
First up, the stock.  This may vary a tad depending on your current configuration, as this was written based on a Cruiser model (pistol grip only).  The only tools here that you’ll need with the kit are a 1/4″ Hex Key and a regular sized Phillips Head Screwdriver.

DSCN1428

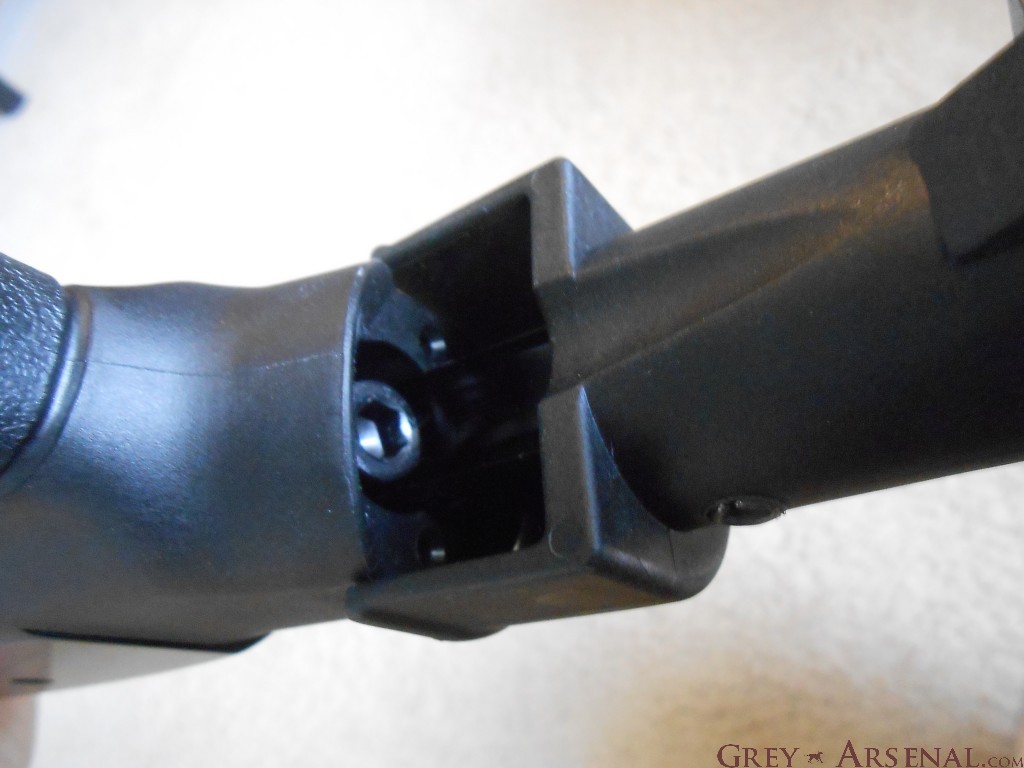
Unscrew bolt on the rear of the grip with Hex Key as shown.  Be sure to hang onto the washer and crush washer (if applicable).  The new stock lines up perfectly, though took a bit of a nudge to get it all the way on there (fits pretty tight).DSCN1431

Replace the Hex nut w/ washers into the same location, and tighten.  The angle is a bit odd, so it may take a series of short turns and re-positioning, but it’ll eventually get on there nice and securely.

The Shell Holder comes with a couple of small screws, and is pretty self explanatory.  Just line up the holes in the Shell Holder with the pre-made holes in the stock on the side of your choosing, then screw in the provided screws until tight.

DSCN1426DSCN1425

Lastly, the Fiber Optic sight, which was a tad confusing, but only because I felt like I was going to break it putting it on.  It’s tougher than it looks, however.  Basically, just get it in place above the barrel where it’s going to go, lining up the front notch with your front bead sight.  When in place, push down with your thumbs with an even pressure on the front and back, and it’ll snap on there.DSCN1422

If you didn’t get it right the first time, it’s seriously difficult to move due to how tight it fits, it’s better to pop it back off from below and try again.

Well that’s that.  Oh, maybe not, the links in this review were specific to the 12ga Mossberg 500.  If you have a 20ga Mossberg (500C), use this link.  The whole package here is complimentary, the stock along with the front sight is great, and the shell holder is a nice bonus.  Also great for the price.  I’ve only had it to the range once, but it feels pretty solid.  I’ll update if that changes.

FN Model 1910/22: John Browning goes to Europe

DSCN1394

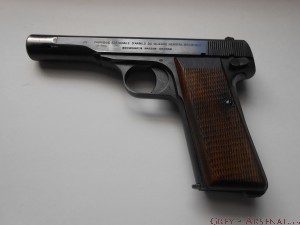
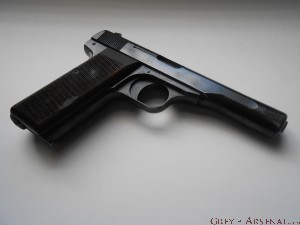
In a previous post, I covered the Colt Model 1903, now we’ll move on to another John Moses Browning .32/.380 design which, just as before, and as always, was ahead of it’s time.  Except this time, Colt didn’t want to make it, and looking back with that 20/20 hindsight, that was probably a poor choice, since the FN Model 1910 was in production all the way until 1983.

DSCN1396

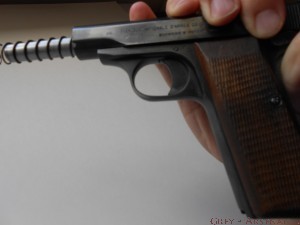
Innovations in this model included a new type of recoil system, wherein the recoil spring surrounds the barrel.  This made for the handgun’s signature slim design and light weight, as it removed the need for a guide rod.  This style was later used in the Walther PPK and made standard in the Makarov.  It also incorporated a Striker firing mechanism, included a grip safety similar to the earlier Colt 1903 and later 1911, a magazine safety (no trigger activation without a magazine inserted), and an external safety lever at the rear.  This made up what was referred to as the “triple safety.”  Hmm, an innovative striker fired handgun with triple safety features… can we get some photo comparisons between JM Browning and Gaston Glock, we may have an immortal engineer on our hands.

DSCN1395Anyhow, in 1922, some modifications to the design were made, lengthening the barrel, slide, and handgrip, lending to increased accuracy and an additional 2 rounds in magazine capacity.  This was done for the purpose of military contracts.  Sadly, the military they’re most associated with would be the German army, as they were produced by the Nazis after Belgium was occupied.
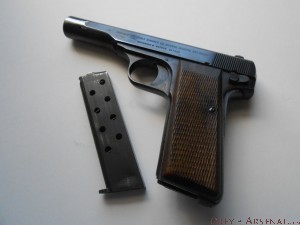
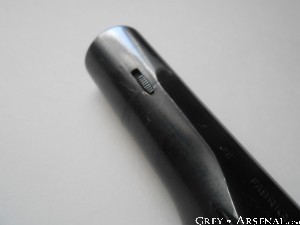
This guide is specific to the  Model 1922 or 1910/22, but for a Model 1910, simply ignore the steps involving the Front Barrel Cover.  Obviously (but I’ll say it every time) make sure the weapon is unloaded, and no ammunition is in your workspace.

  • Remove magazine from weapon by pressing the magazine release on the bottom of the grip to the rear, and withdrawling.  Also, disengage the thumb safety if it’s engaged.DSCN1397
  • Find the lever on the front lower left of the slide, this is used to release the front barrel cover on the 1922 model.DSCN1398
  • Twist so that you’re twisting the front sight blade towards the right side of the weapon.  When it’s at 90^ from it’s original position, the front barrel cover should pop off revealing the front of the barrel and spring.DSCN1399DSCN1400
  • This is the only tricky part, as unlike the Colt 1903 and other handguns that use a rotating barrel design, there’s no mark showing you how far you have to pull the slide back to free the barrel to rotate.  See picture for approximation, but basically slide it back slowly and keep attempting to twist the barrel (same direction you turned the barrel cover).  Once you have rotated it as far as you can, you should be able to withdrawl the slide forward off of the frame.DSCN1401DSCN1402
  • Rotate the barrel the rest of the way in that direction until it’s lugs are no longer locked into the slide, and withdrawl it from the front of the slide.  Remove spring for cleaning.DSCN1403 DSCN1404
  • Remove the firing pin from the rear of the slide.
  • Clean, then reapply lubrication to obvious contact surfaces (groves, barrel lugs, etc.) remembering that a little goes a long way.DSCN1405DSCN1408

Reassembly:

  • Reinsert firing pin into channel, observing how the post fits into the grove.DSCN1406
  • After replacing the recoil spring, reinsert barrel into slide from the front with the lugs facing down.  When the lugs are lined up with the gap where they engage with the slide, rotate the barrel 90^ into them.
  • Replace the slide onto the frame and again begin feeling for that spot.  When you’ve found it, rotate barrel the opposite way as before until it locks in place.
  • Attach front barrel cover with the front sight blade 90^ from center to the right (same direction as when it popped off).  Push flush with the frame and twist so that you’re moving the sight blade back up into position, it will click into place.  Be sure not to do this backwards, or you’ll end up with a front sight post on the bottom :pDSCN1409