All posts by James

Magazine Review: ETS & Lancer

Title

First off, let me apologize for the assault on your eyes that is the above image.  It was created in MS Paint on a laptop via touchpad.  If it has caused any bodily harm, please contact me and I’ll give you the contact information of my attorney.

Okay, so there are a couple of fairly new contenders out there trying to give Magpul a run for their money on polymer magazines.  In a recent project, I tested Lancer’s L5 Advanced Warfigher Magazine, or “L5AWM” magazine in it’s most relevant 30-round configuration with my Windham AR.

While these aren’t brand-spanking-new, they’re new enough that some folks I showed ’em off to hadn’t seen them yet or heard of them, whereas I’m sure any of them could’ve ID’ed a PMAG from a mile away.  They have been getting some attention at SHOT and in other marketing venues, as I’ve been seeing them pop up in pictures of new ARs or platforms using STANAG type magazines, and seem to be the preferred magazine used in SIG’s marketing of the MCX.  Of course it’s today’s SIG, so they probably just picked them because they looked decently sci-fi to go with everything else they’ve been doing lately.

So, aside from looking futuristic enough for SIG, how are they?  Pretty good, actually- Mine were the “smoked” color, which seems to be the most popular.  It’s nice to get a visual read on your round count from any angle, and to even be able to quickly visually identify which ammunition is loaded, and not have an open slit on the side like the window’ed PMAGs.  The material feels a bit harder than the polymer used by Magpul (and Troy), but doesn’t feel the least bit brittle or flimsy.

L5-AWM

The metal upper, which gets these referred to as “hybrid” magazines, sets these apart, and inspires confidence.  It also allows use of the standard loading tool when loading them from stripper clips.  While this has gotten to be standard for other polymer magazines, it still feels nice to have that metal-on-metal contact when doing so.

As far as actual performance, I’ve had roughly 1000 rounds between 3 of these and haven’t had a single failure.  While that’s also singing praises to my Windham AR and the Federal XM193 ammunition being used, not having a single magazine-related failure over that span, even while trying to be a bit more rough than usual, reflects well on these.

They were selling for real cheap for a while, and had been available from Wilson Combat on sale for ~$12 when I snagged them, but they seem to be hitting ‘Flavor-of-the-Month’ status with a price and stock level to reflect that.  At the time of writing, they seem to be going for ~$20.

Edit: Also, happened to find this showing a drop test between these and PMAGs.  Glad someone else decided to repeatedly drop their AR for our benefit, because I wasn’t about to test ’em that hard just for your benefit.


Next up: ETS Glock Magazines
IMG_6724 Edited_zpsajdj7ohj

Alright, so these actually *are* new enough that I can definitely call them new, as they seem to have just been announced last October and just started hitting the market around the time of SHOT.  ETS (Elite Tactical Systems), in addition to another translucent polymer AR magazine, brings us translucent polymer Glock magazines.
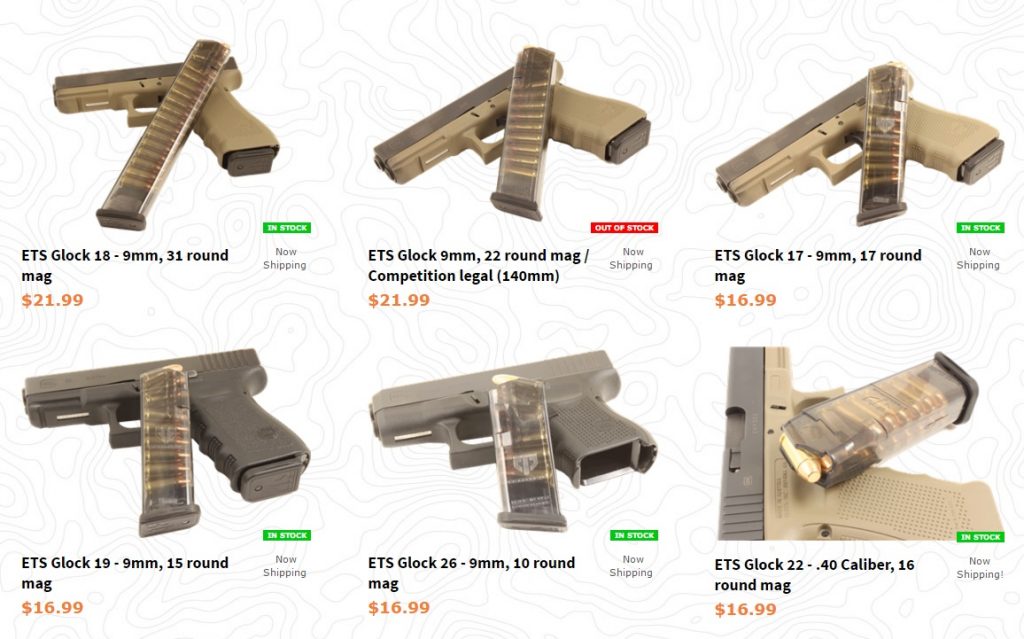
ets site

Currently available in a variety of sizes and capacities, generally made to match common varieties, that is, a 17rnd Glock 17 sized mag, 15rnd Glock 19 sized mag, 10rnd Glock 26 sized mag, and a 31 round Extended mag.  They’ve also got 10-round limited varieties for folks in places where that’s required, and a 22rnd “Competition Legal” length magazine (140mm).  So, no matter what you’ve got as far as 9mm or .40cal Glock, they’ve got you covered.  They’re also fully compatible with Glock OEM floorplates, and disassemble in the same manner, so feel free to slap a 7151 “+” plate and insert on there and get an extra round or two in ’em.

Also, notably, they’ve beaten Magpul to the market, as Magpul has yet to release their Competition length and Extended magazines, which are currently scheduled for release this summer.  Magpul’s offering also seems to be a bit odd in that they have a lower capacity in the same size magazines compared to both OEM and ETS, their competition, with extended magazines being 21 and 27 round capacities, respectively.  They’re also not compatible with OEM or other aftermarket floorplates, as they seem to be proprietary.

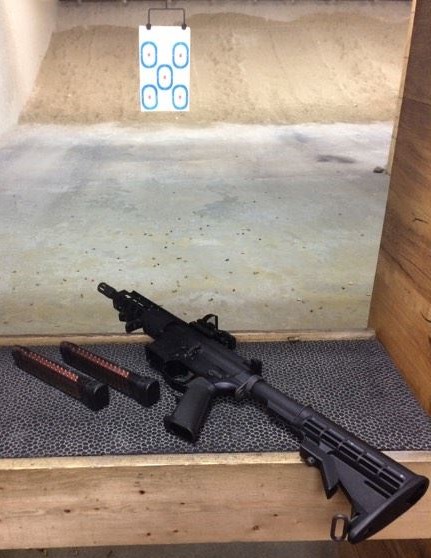
While I haven’t tested these as extensively as I have the Lancer mags, I can say, while my initial impression was a bit leery, due to the cheap-ish feeling polymer and what seemed to be a clearly visible thin-gauge spring, the 31 round magazine performed flawlessly in both my Glock 19 and a PSA 9mm AR pistol over the course of 350 rounds, with only a single FTF in the AR pistol which doesn’t appear to be a fault of the magazine.

One notable quirk, however, is that while these drop free when empty, when fully loaded, they seem a bit tighter going into both platforms with which I tested them.  Not prohibitively tight or anything, but just similar to using magazines that don’t drop-free, kind of like I’ve experienced with some other (very cheap) non-OEM Glock magazines, or older G17 magazines.  Loading one less round seems to have resolved this (30 instead of 31) completely, and I’ll update once I install “+” plates on both.  The company mentions typical marketing-sounding statements about being able to store loaded without worrying about the feed lips, and makes statements about drop tests, and I can confirm dropping and banging these things around both at the range and on an outdoor concrete slab wasn’t able to cause an harm to them in any way or cause any failures, but I just thought this was worth noting.

GLK18 In AR_zpscxxoq9cj

At ~ half the price of equal sized OEM Glock magazines, I don’t mind using these for practice, but I’m not sure I’ll trust them for carry until I’ve had the chance to beat them up a bit more and see how they old up.

Edit: Having now had about 1,500 rounds through them feeding an AR9 with no failures, I know they’re at least reliable at that, and they’ve held up to getting lightly banged around.
 

Magpul AR Furniture, Finishing Touches

Windham Carbon SRC Project, Part III

IMG_1914

Alright, so we’ve got the rifle, we’ve got the free float handguard on there, now lets get this thing dressed right.  Don’t get me wrong, the OEM Furniture Windham ships on their rifles isn’t bad as far as standard AR furniture goes.  Standard A2 grip and milspec style handguards with internal heat shields.

DSC_0061
DSC_0059

But, there’s always room for improvement.  I’d already decided to go with Magpul furniture, they make a solid product with a lot of nice features, and it gave me the style I was going for- they even had it in a pleasant OD Green shade I liked.

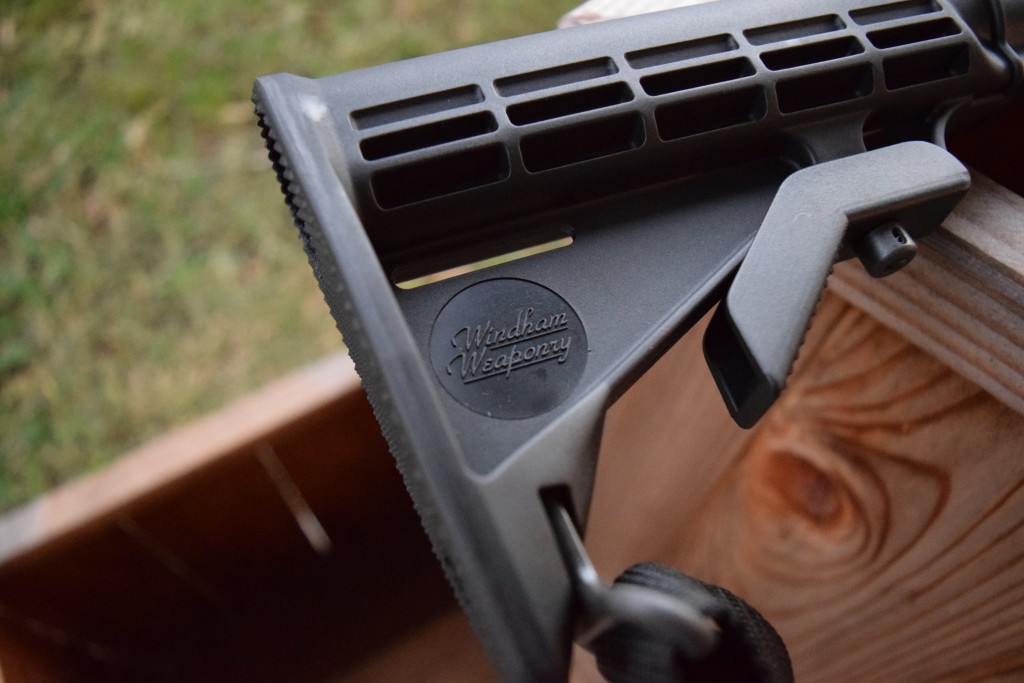
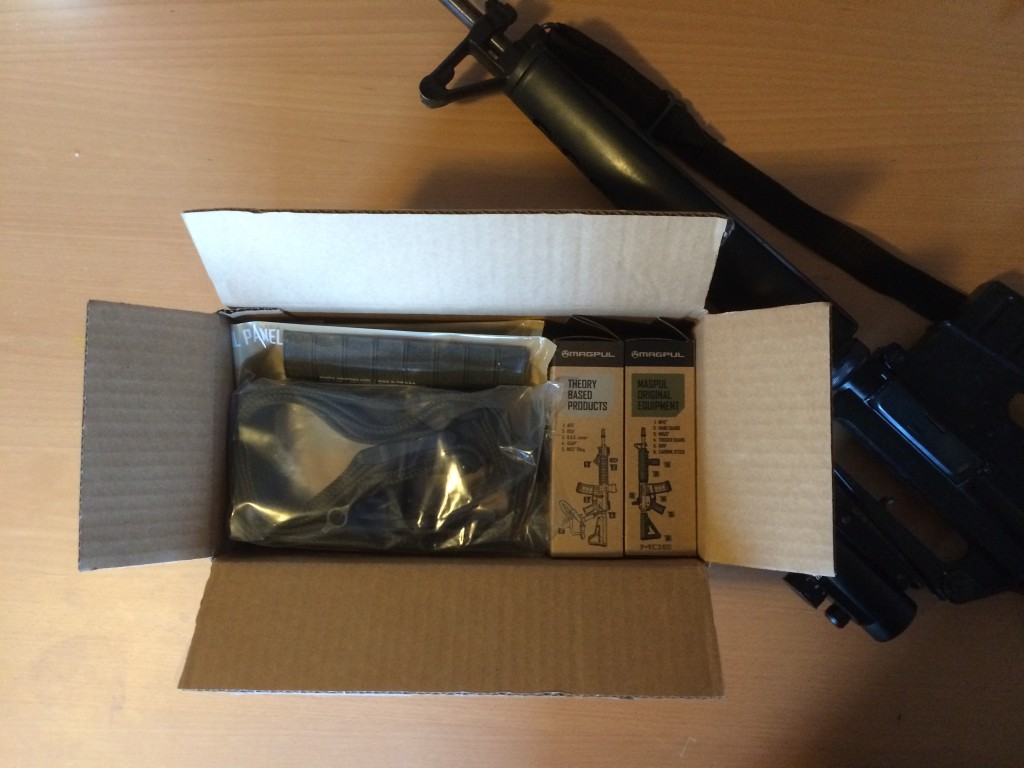
magpulI’d also been wanting to try out an Angled Foregrip (AFG / AFG-2).  In addition to the above, I also ended up picking up a Ranger Green MS4 Dual QD Sling from Magpul that’s a combo 2-point / 1-point sling, and allowed me to make use of my QD points on the CTR stock and Midwest Industries free float tube.
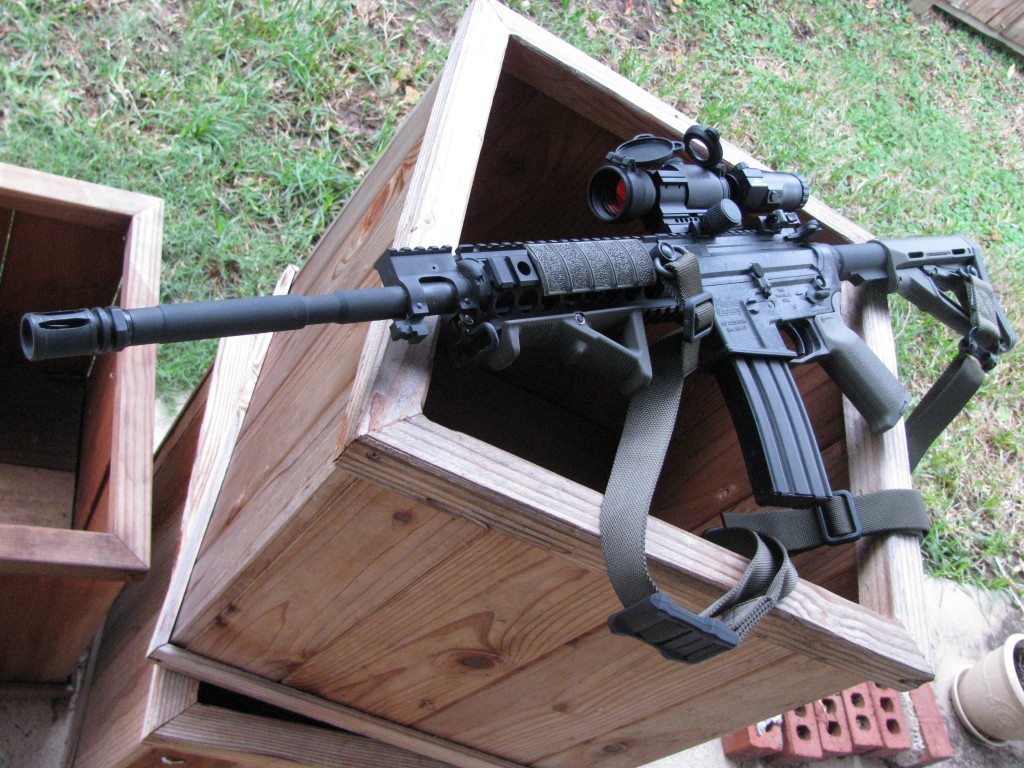
It’s definitely worth pointing out that the Windham rifles all use Commercial Length buffer tubes.  This is a fairly important distinction when buying furniture.

IMG_2224

Install of everything was easy enough, no additional modifications required.
IMG_1915 IMG_1916 IMG_1917

That’s that.  Looks good (to the end user, anyway), feels good, and after a range day test, shoots plenty good.  I’ll have a full review to come shortly.  I may also do individual upcoming reviews of the additionally pictured Aimpoint PRO, Burris AR Tripler, and Lancer L5AWM Magazines.

IMG_2237

Midwest Industries Gen2 Two Piece Free Float Handguard

Windham Carbon SRC Project, Part II

IMG_1970

I was initially going to do a review and write up on the base rifle prior to doing anything to it.  I think I’ll change that up a bit though, and get it put together before testing extensively, killing two birds with one stone.

That being said, the first thing we’re going to do is get ourselves a base platform to work from, which means getting the factory handguards off of this thing.

The rifle shipped with a decent enough set of standard AR handguards, heatshielded and whatnot, they’d get the job done if that’s all you wanted.  But that’s what not we’re going for here.

I wanted to stick with something that is an easy enough install for most readers, but still gives me what I was looking for in this build.  Specifically I wanted a free floated tube that was lightweight, didn’t require removal or alteration of the Front Sight Base (on this case, worked with the integrated railed FSB), and VERY specifically in the case of this rifle, it needed to install on the factory barrel nut, rather than use one that’s proprietary, as many do, as Windham uses a barrel nut on the Carbon SRC whose external dimensions are standard, but the threading size is different, part of the reinforcement done on their carbon rifle vs. others in the market.  Finally, I wanted one that had integrated QD mounting points.

With those requirements, my best choice was a carbine length (7″) so as to not alter the FSB, and keep the weight down.  That’s still plenty of room to get what I need on there.   Additionally, I’d be going with a 2-piece, to keep things easy on the install.  Lastly, as mentioned, I’d be going with one that would use the OEM barrel nut.  I narrowed my search to two options:

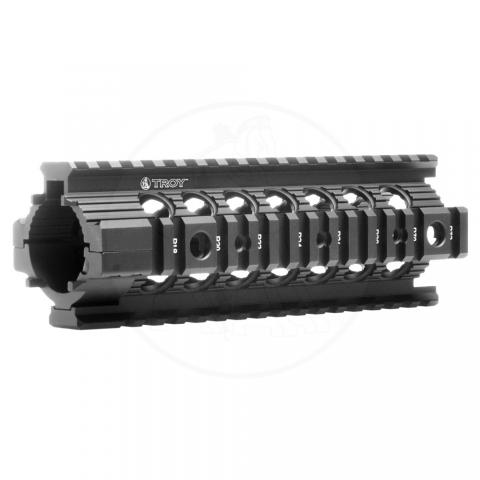
Troy 7″ MRF 2-Piece Free float

165_1

Midwest Industries Gen2 Two Piece Free Float, Carbine Length

ffg2car_41

Both seemed decent enough options, but just based on price, and a friend’s report of great customer service on Midwest’s part, so that was that.  **DISCLAIMER: Installation of this part involves very slight modification to the upper receiver.  As I haven’t yet received a yay or nay from Windham Weaponry on whether or not modification in this area is advisable, I have to note that this is done at you own risk.**

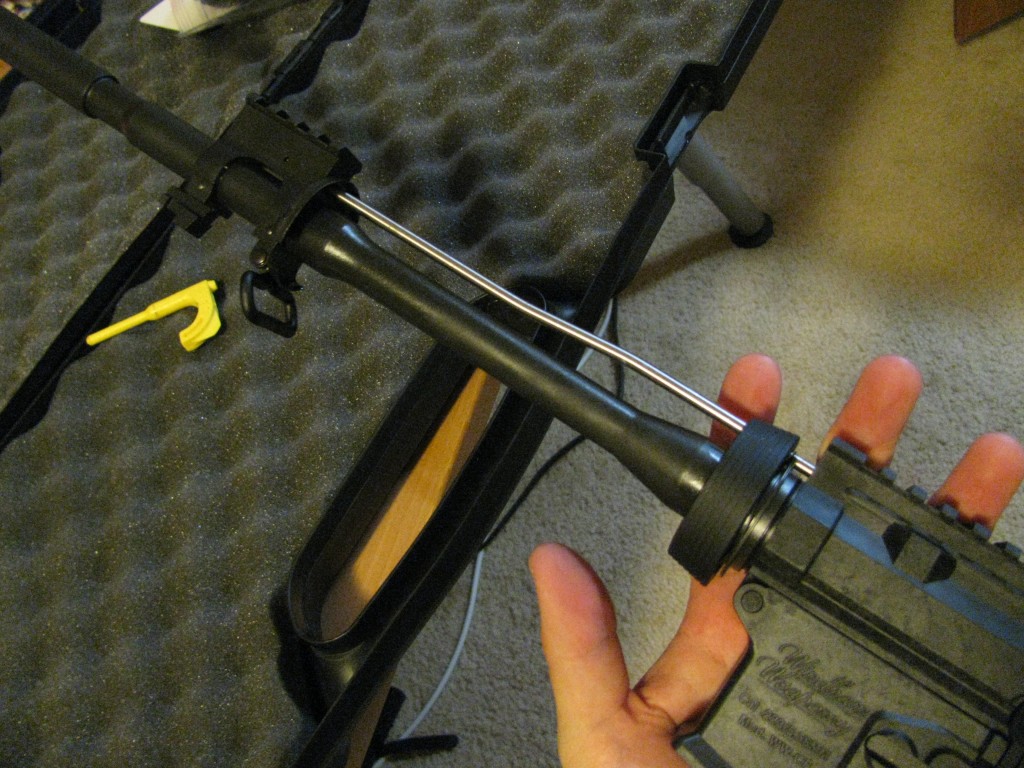
The install was easy enough, but did require a bit of cutting to remove the aluminum factory Delta Ring.

IMG_1905

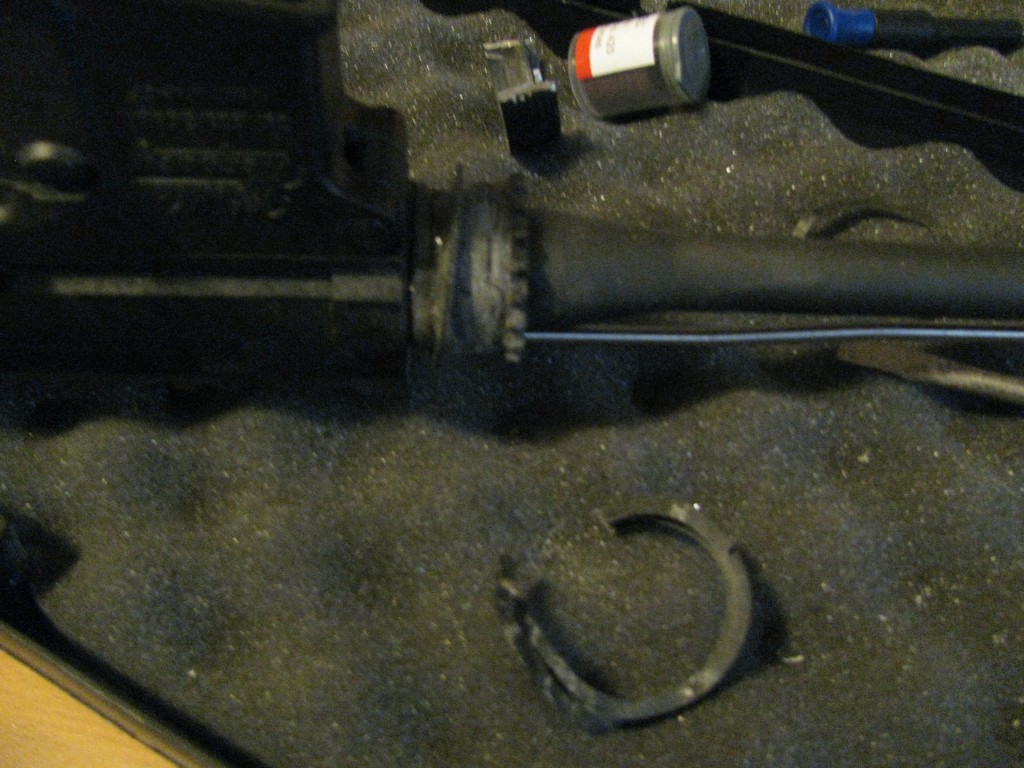
The ring is aluminum, whereas the spring and barrel nut are steel.  Using a Dremel or rotary cutter with a metal cutting disc, it should slice through the Delta ring like butter, without harming the barrel nut below.  Pro Tip: Wrap plastic or some other material around the barrel, FSB, and receiver nearby, there *will* be debris, lots and lost of aluminum dust.  You don’t want that all over the place on your rifle.

IMG_1909

You’ll want to make 2 straight cuts on either side of the Delta ring.  It’ll get hot, so be careful.  Just cut through, being careful not to mar your receiver, especially being that it’s Carbon Fiber and would easily get cut here.  If you’re generating sparks, than you’re too deep, but the sparks should be your disc, not the steel.  Be extremely careful, however, to cut on the sides, not the top and bottom, you do *not* want to damage your gas system.

IMG_1910

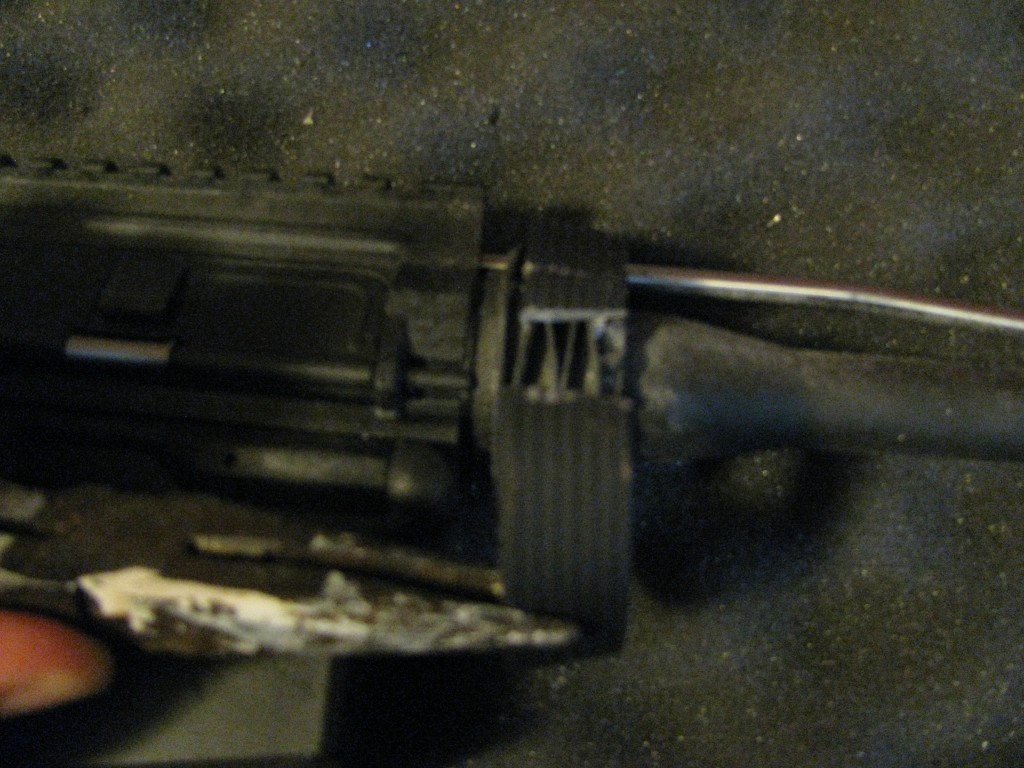
Once you make the cuts, that thing will break off with a pair of pliers with no problem.  Next up is removing the spring.  Just bend it off of there with the pliers, it wont be “easy” but it’ll come off with a bit of effort.

IMG_1971

Alright, so you’re ready to go.  *One* minor issue specific to the Carbon SRC- this handguard includes “anti-rotation tabs” meaning it grabs the receiver on either side right below the barrel nut near the pivot pin.  The Carbon SRC, being additionally reinforced in certain areas, is a touch more material here than a normal AR.  Approx 4mm needs to be removed from the corner in these spots.   **Disclaimer: I did stay in touch with Windham and verify a few things prior to this build, when I was initially making making inquires about the barrel nut dimensions.  I don’t have a firm answer on whether or not this is advisable, as this area received additional reinforcement.  At this time, as I have not heard from Windham one way or the other on whether or not this is advisable.  PERFORM THIS AT YOUR OWN RISK.**

Once this is done, its easiest to fit the top first, then the bottom.  It won’t *completely* seat together at first, there may be a millimeter-ish gap at the rear, though this should only occur on the Carbon SRC due to the tight fit where we took material off, this likely wouldn’t be the case on a standard AR.

Finally, you’ll want to insert and tighten the set screws, getting them in, then tightening each a little at a time until they wont turn any longer.  It would be a good idea to use the included VC-3 Threadmate adhesive.

Alright, we have our base for adding accessories.  Next up, lets take care of getting the furniture on there.  Stay tuned.

IMG_1926


Windham Carbon SRC Project Teaser

DSC_0060I’m aware that I’ve been absent for a while, but thought I’d come back with a bang.  Since prices have finally settled back to reasonable levels, I’d been doing some AR shopping, and an extremely reasonably priced option caught my eye.

Windham Weaponry, an outfit run by the original Bushmaster team before they got bought out, has an interesting offering in the form of their Carbon SRC (R16M4FTTCF1).  I first ran across one at my local Academy Sports for what I believed was quite reasonable, until I checked Bud’s Gun Shop and found it for what felt like a steal.

I’ll go into more depth about the rifle, as well as all that I plan for it, in later posts, but just a short blurb about the rifle itself- The SRC stands for “Sight Ready Carbine”, and designates is their line of no-sight optics-ready rifles, passing the savings on to you, as it were.  As far as it being a Carbon Fiber AR… I’ll go into more detail, but put shortly, this one stands out from others on the market, and it looks like a lot of attention to detail went into addressing the shortcomings of others out there.

Based on the price, this makes for a great base for a easy-on-the-wallet project.  So, pay attention, things are in the works.

IMG_1928

More to come shortly.

Just Say No… to Nitesiters

DSCN1738

Right, so you’ve got yourself a new handgun and think “What if I had to shoot this thing in low light conditions.  Well, even with a flashlight / weapon light, all I’d get would be a bright area in front of me, but my firearm would still be pretty dark- hell, darker because of the contrast.  Wouldn’t it be just swell if the sights kind of glowed a little bit for me, so I could line ’em up well when my weapon is bathed in shadows?  I wonder if anyone has ever thought of this before!”  Well yes.  Yes they have.  Quite extensively.

The problem?  Those things are expensive!  Who wants to drop a significant percentage of the price you paid for the handgun on some sights that glow in the dark, when I might never even shoot in low-light conditions anyway.  To put people even more on the fence, during bright conditions those dots aren’t even going to be as effective as the bright white markings on your OEM sights, am I right?

Well, some industrious fellow decided to address all of your concerns by coming up with an alternate solution to a couple of miniature radioactive isotope filled vials-  Why not just use a tiny version of those glow-in-the-dark stars that kids put on their ceiling?

DSCN1756

So, granted, “glow in the dark” tech has come a long way since those glow in the dark plastic cars and Halloween masks of the 80’s and 90’s, or at least some of the products available on this awesome site would make you think it.  But is it suited to replace the always-on consistency of tritium firearm sights which last years before dimming out and needing replacement?

Well No.  No it isn’t.

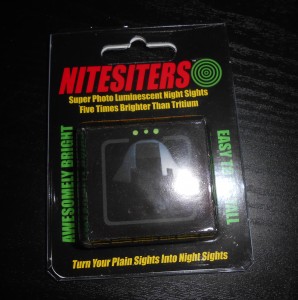
So, to step back a bit and actually show you how these work (and prove I actually gave the things a fair shake), let’s see what comes in the kit, priced at $11.98.

DSCN1742

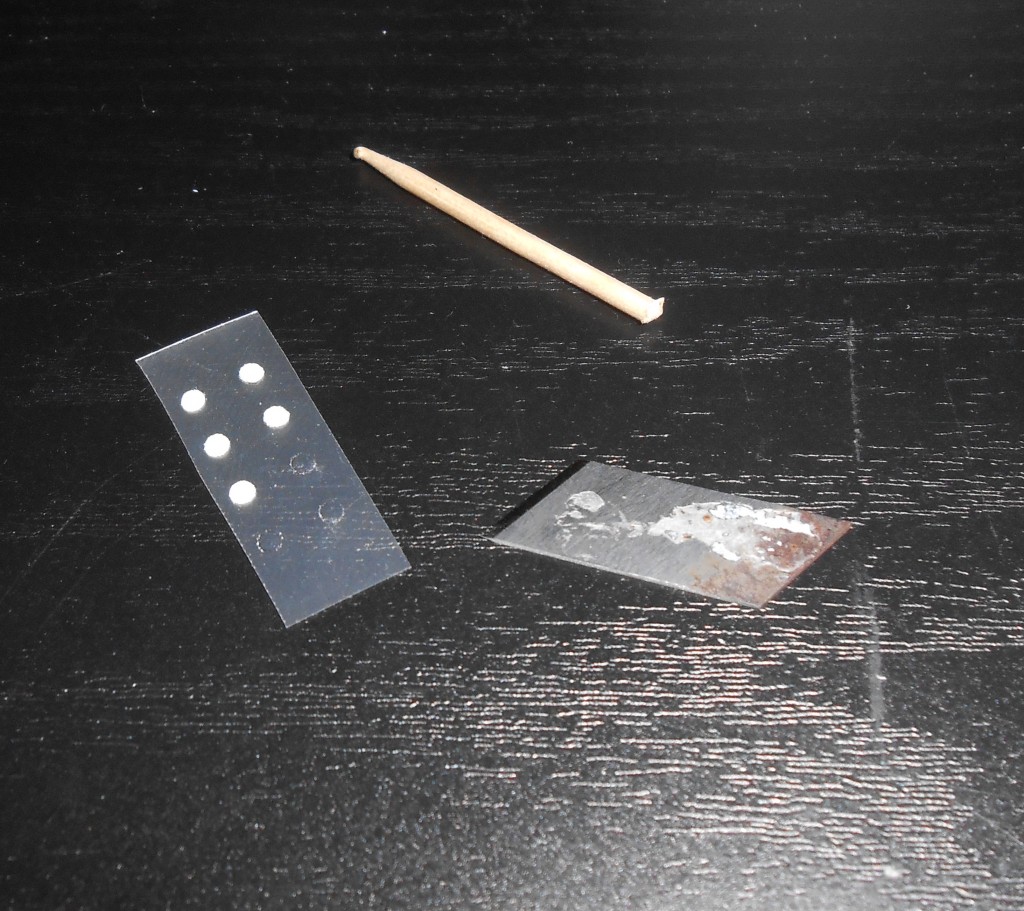
The basic premise here is: Here are some little dots, made up of photoluminescent paint over reflective material (to pick up and reflect any ambient light back through the luminescent layer), and a coating of clear polymer to protect it.  On the back side, is industrial adhesive.  What really qualifies an adhesive as industrial?  I guess that it’s used in any industry, including the ‘cheap glow in the dark stickers for your firearm’ industry.  You get 8 dots per kit, and peel ’em off of the clear plastic film using the provided pre-rusted razor blade, and use the included compact tactical toothpick to assist in positioning, and if necessary, cramming that little sticky dot into the dimple on your handgun’s sight (as I had to do with the sights on my Colt Commander).  Just to be thorough, the kit comes with a couple of tiny sealed alcohol swaps to clean your sights prior to mounting.  Also included is a tiny tube of Crazy Glue, in case the industrial adhesive isn’t quite being industrious enough.

DSCN1744

And it wasn’t.  After the first trip to the range, my 1911 had lost it’s front Nitesiter.  After this, as much as I was loathe to use superglue on ANY part of my $1k Colt, per the directions, I gave that a shot.  Let it never be said I don’t do crazy things for you people!  The results of my next range trip: Front sight stayed put, rears were both gone.  Not wanting to waste all 8 on one gun, I decided to hold off and see how that front one did with the superglue.

DSCN1749

…it lasted another 100 rounds of 230gr FMJ before it went MIA.  So as far as I’m concerned, use of these things on a “real” handgun is out of the question.

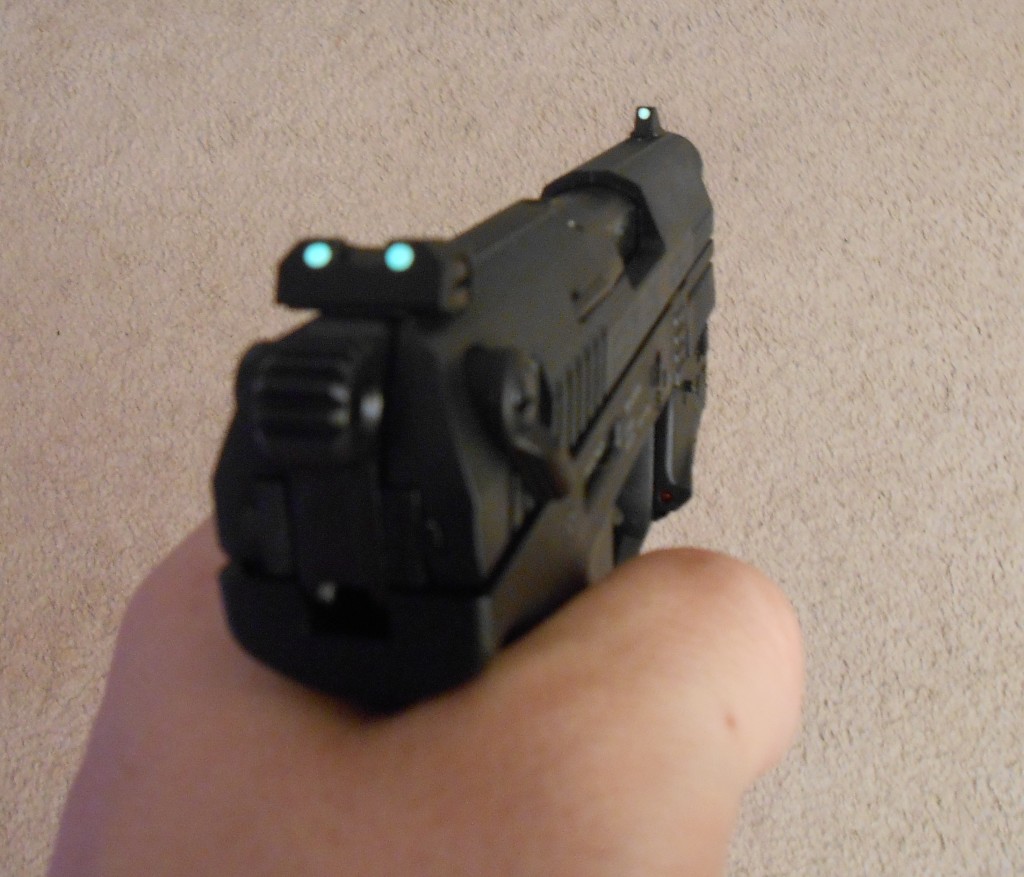
That being said, I went ahead and mounted 3 of the 4 remaining ones on a Walther P22, as this would give the added benefit of slightly larger white dots even in daylight.  The sights on the Walther were flat already, and not dimpled, so I figured that would help as well, and it seems to have- as these have managed to stay put after one trip shooting 150 rounds of CCI Mini-Mag.  Edit: They were all gone by the end of the following range trip.

DSCN1770DSCN1759

So, they work on a low-recoil toy with optimum existing mounting conditions, but how does the brightness compare with tritium?  Well, the website would have you believe that they compare like so:  “5 minutes of sunlight, close lamp light, or Ultraviolet light is all it takes to provide many hours of luminosity.”

DSCN1758DSCN1766

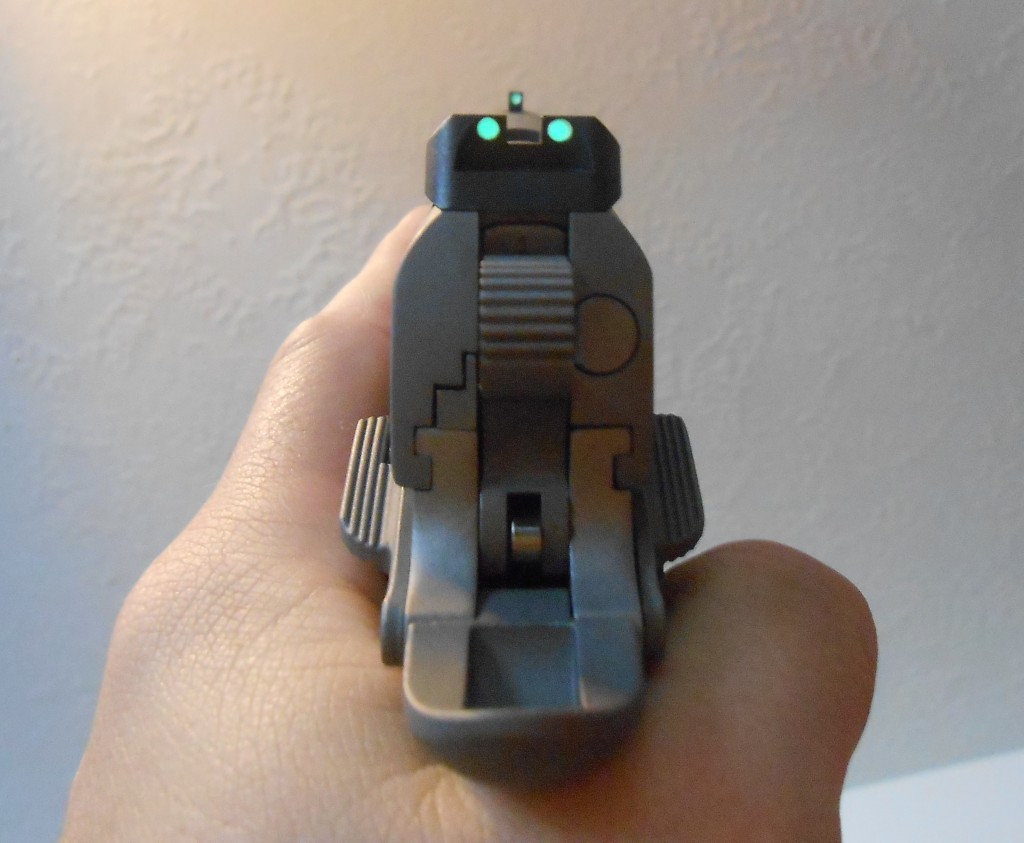
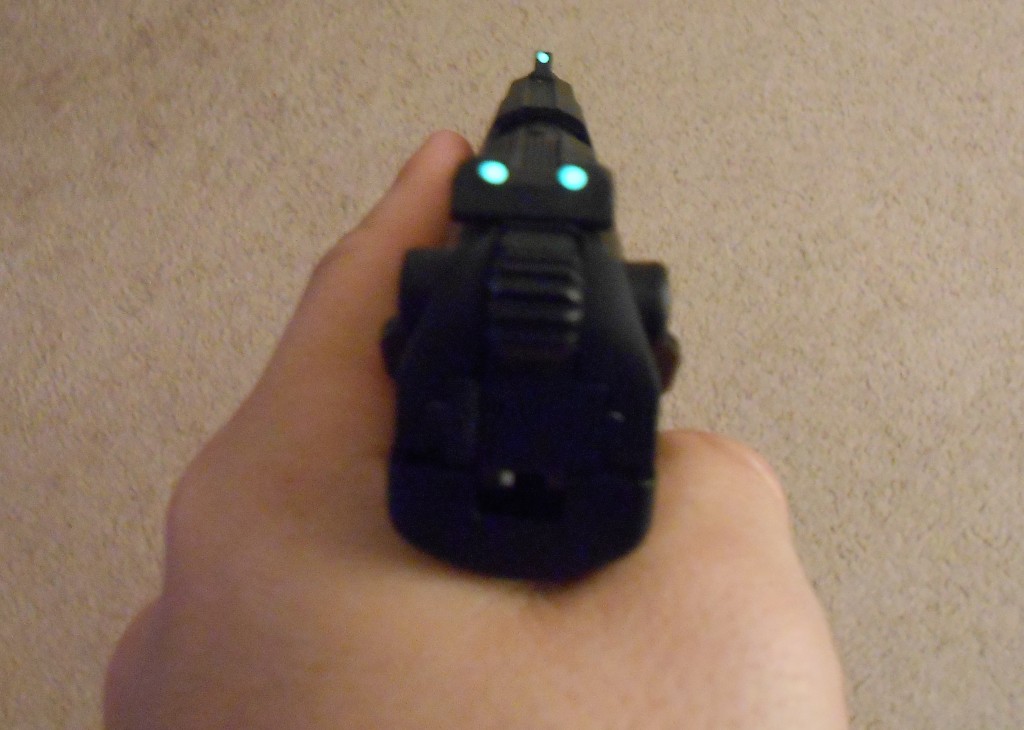
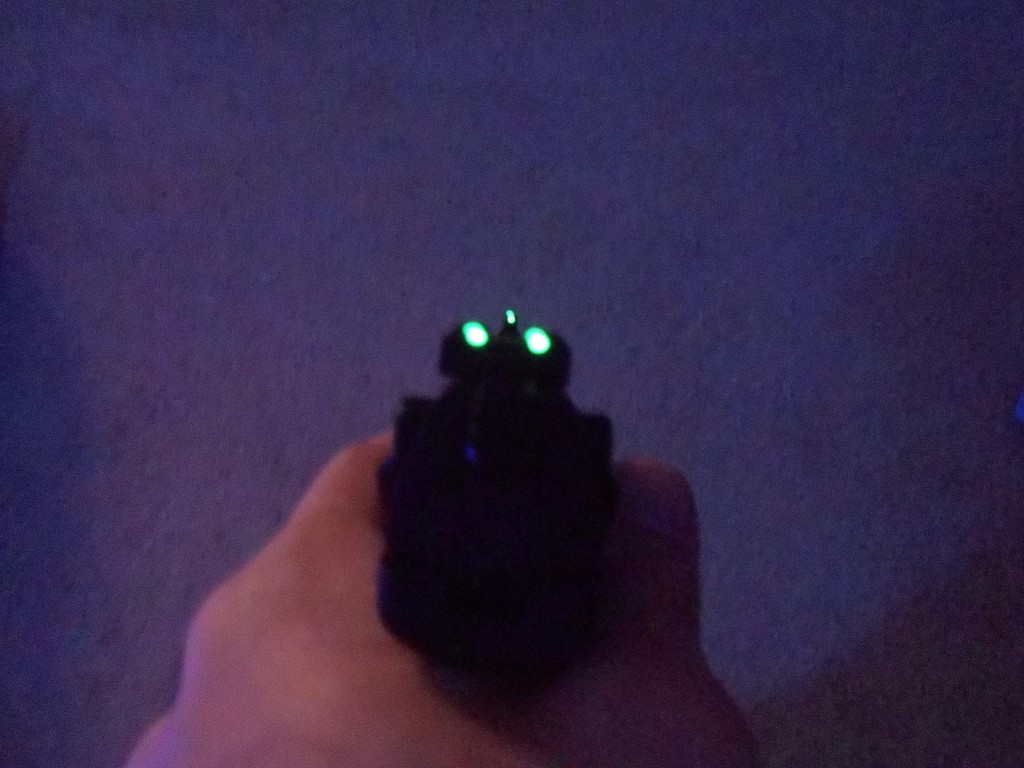
And honestly, they do.  For about 30 seconds after having a UV light flash them briefly (tested using a fluorescent blacklight on the Walther P22), or have a bright tactical light (as used in pictures of the Colt) shined on them for about 20 seconds.  After that, they peter out pretty quick, to just barely noticeable for about an hour.  Seriously, BARELY detectable.  Then after about 2-3 hours, they’re completely inert.  Yes- the website specifically said “5 minutes of sunlight, close lamp light, or Ultraviolet light” was “all it takes” to get it going- well I gave it that chance too, but if someone breaks into my house in the middle of the night, or I pull my firearm out of a holster under my car seat at night, I doubt I’m going to have 5 minutes to charge my sights.  But just to be diligent here, I left them out to gather sunlight for a few days and nights, and kept checking them over a couple of days, just to write off them having to break-in or something, and giving them adequate light to charge.  No change.  Just for the record, all of the shots taken of these glowing were taken within 20 seconds of charging them for at least 30 seconds.

So, the verdict?  If you really need glowing dots to help with a low-light sight picture, stick to the tried and true, get yourself some Trijis or Mepros, and save the glow in the dark stickers for your kids’ bedroom ceiling planetariums.

Edit: In updating this article, I noticed a new similar product that seems to have better reviews, and seems to be a paint, so maybe that would correct the adherence problem.  Maybe I’ll give it a review to see if it does any better than these did.

Kimber Rimfire Target Conversion Kit Review

DSCN1719

Well, the ammunition prices after the last big scare are just starting to settle down again, finally, though as with any of these, things are never going to return fully back to where they were.  Luckily, one of the most common victims to this, the ubiquitous .22lr finally seems to be returning to regular stock levels.  This means using this cheap round for practice via conversion kits is economical again, bringing me to my next review item.

DSCN1736

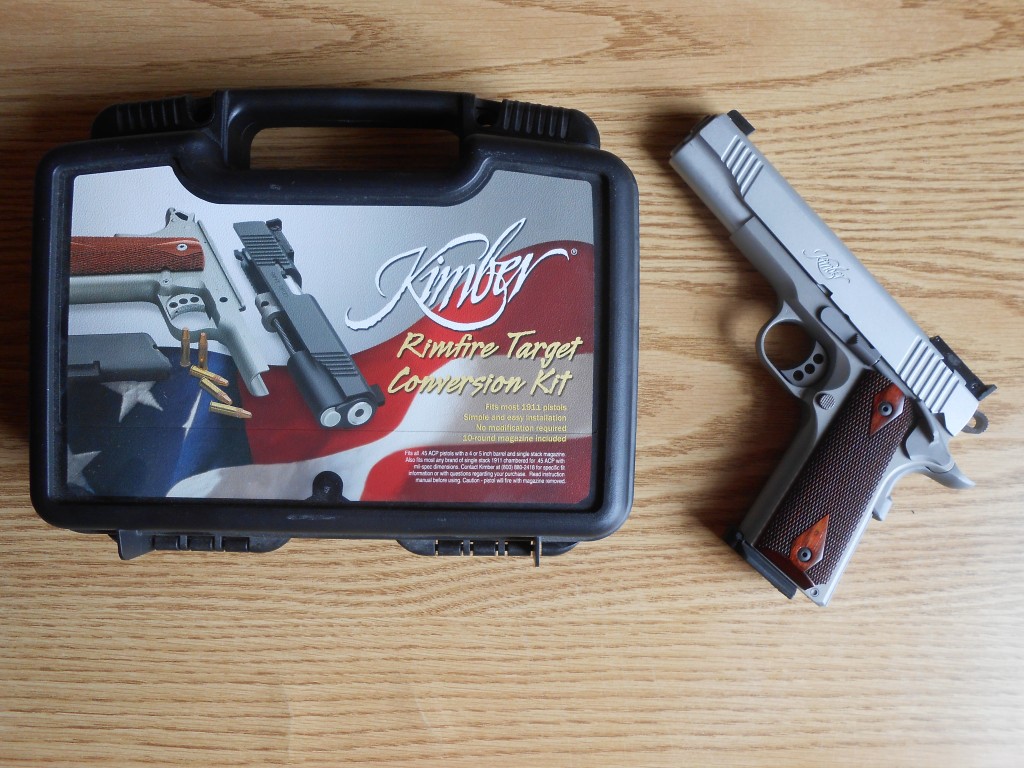
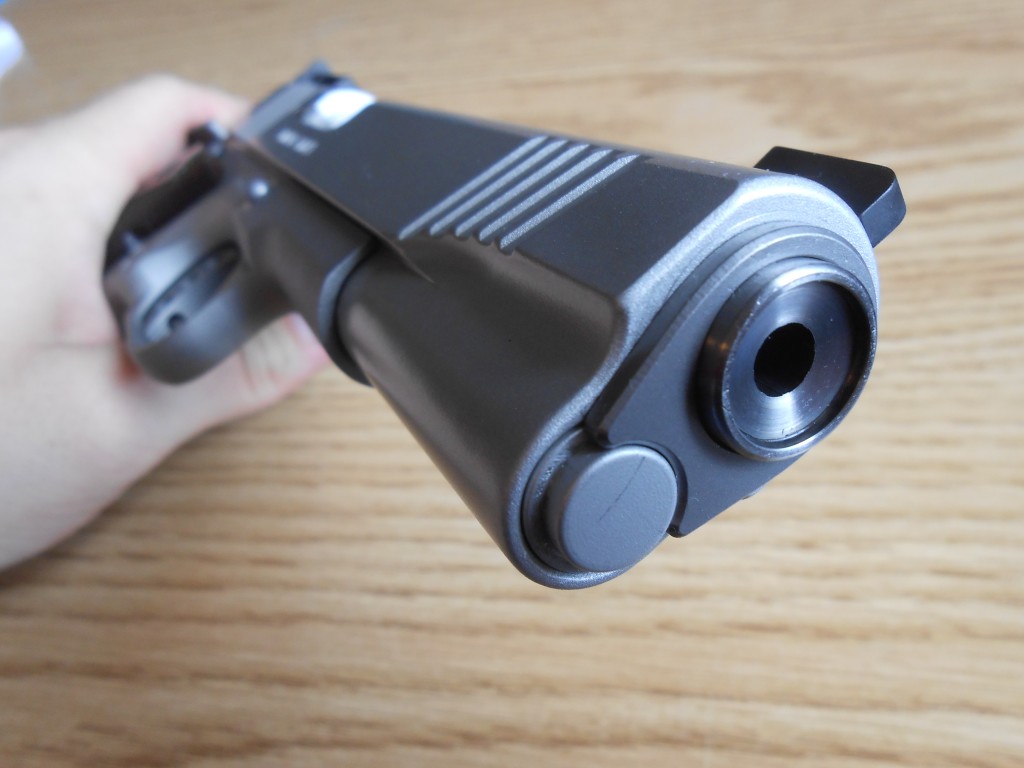
Enter the Kimber Rimfire Target Conversion Kit, for the 1911 of course.  Available in both full size (5″, Govt. length slide) and Compact (4″ slide).  As an added bonus, the full size 5″ kit, thanks to an extended dust cover (as seen in pictures below), fits both Govt and Commander length frames.

Kimber on Rock Island

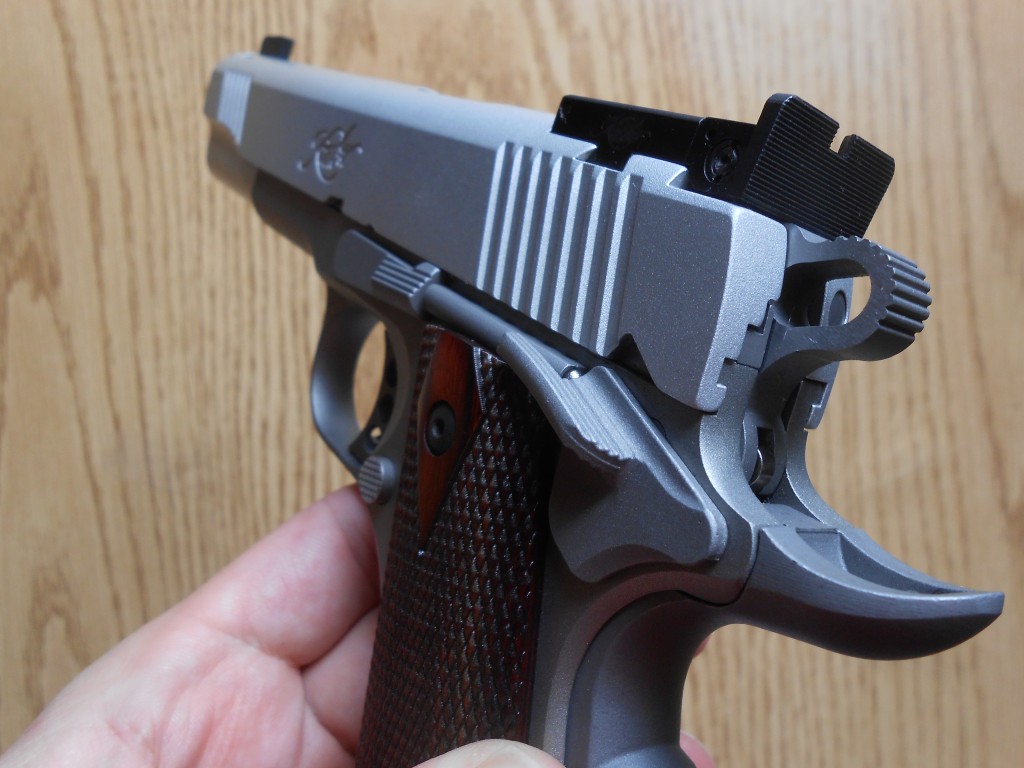
Not only is it easily the nicest looking .22lr conversion I’ve seen available for the 1911, with it’s Satin Silver or Black cerakote finish, ridged adjustable target sights, and overall apparent fine engineering, but it’s a breeze to install, even at the range or in the field.

DSCN1732

Simply strip the slide from your 1911 of choice, and slip on the Kimber upper, using your 1911’s slide stop, and you’re ready to go.  Despite my skepticism, this kit cycled all tested .22lr ammunition flawlessly in both a cheap Citadel/Armscor 1911 Govt, and a Colt Lightweight Commander.  I honestly didn’t think it would cycle properly given how light the slide was and how heavy the hammer on both of those felt, but I was proven wrong.

DSCN1731 DSCN1730 DSCN1729

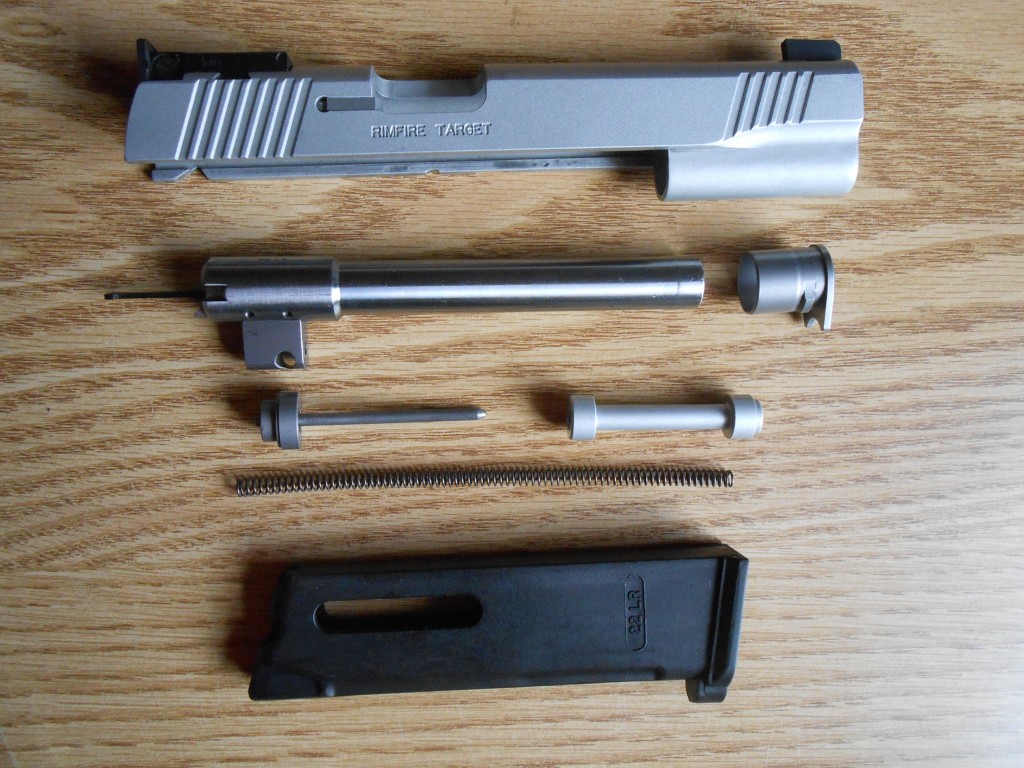
Field stripping this kit for cleaning is similar enough to doing so on the parent firearm, the major difference being how the recoil spring is contained and attached to the barrel lug.  Easy peasy.

DSCN1726DSCN1720

Additionally, it comes with one polymer 10 round magazine, though for practice sake I tended to load it to 7 or 8 to match the capacity of the magazines I use with the parent handgun.

DSCN1724

Just for the record, this kit was tested with the following ammunition, again no failures present, period:

  • CCI Minimag
  • CCI Velocitor
  • Eley Subsonic
  • Winchester 555 box (36gr)
  • Colt (relabeled Aguila 40gr)

So, despite the dropping prices of common ammunition, it’s still nice to save a few cents and make use of one of these .22lr kits just to keep sharp on the cheap, every bit of muscle memory you can give yourself helps.  I found this kit also very useful for getting someone comfortable with the 1911 platform without their first interaction being the gruff handshake of a 230gr FMJ recoil shock, to which they may not be accustomed.

The downside?  Price.  This thing is a Kimber, afterall.  It can be had for the MSRP of $339 from Kimber directly, or via Cabela’s, the later of which frequently has it on sale, more so than other vendors where I’ve seen it.   Also, whatever you do, don’t try to save money and order from Botach Tactical, I wasted about 2 weeks before finding out it was on back order (despite being charged and their website not indicating such).

More Grip for the G42

v5In my previous post reviewing the Glock 42, I mentioned one of the minor drawbacks of the handgun, and a drawback of all subcompact handguns, being that the grip was too short to get your entire hand around.  Even with the tiny hands this gun was meant to fill, you’re left with a pinky hanging off.  Most smaller handguns come with, or at least have an option for, a magazine with an extended floor plate to give you that extra bit, the Walther P22 and Beretta Pico, for instance, come with both types of magazines.

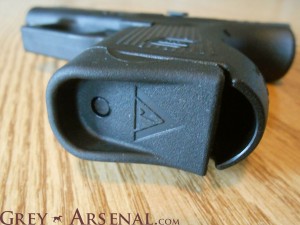
v7While Glock currently offers an extension for sale, it’s not quite as, well, aesthetically pleasing, as a set I found on Glockmeister (where you may remember me finding the parts needed to complete my Glock 19 brass-to-face fix).

v1Enter the Vickers Tactical (produced by Tango Down) Glock 42 floor plates.  These give just enough extra to get your last finger on there, without adding too much to the dimensions of the gun.  The taper was a great touch, adding just a bit of functional flair, without looking too out of place.

v3 v8Until there’s an available +1 or +2 floorplate to get that capacity up to something respectable, these will be a fine addition.

v6They’re also easy to install (despite the “Gunsmith Only” warning on the package).  Without going into too much detail here, simply use your Glock Armorer’s Tool to push in the tab on the bottom of the magazine, go in all the way to the handle of the tool, squeeze on either side of the magazine and pry forward with the tool.  Once it starts sliding off, remove the tool, block the bottom with your thumb (or the spring will come flying out) and slide the old floor plate off.  Slide new plate on until it clicks into place, done.  If there’s a request, I’ll do a follow up on how to do this with picture, or a video.

v4So that’s it, for the record, addition of these removes one (-) from the Glock 42 scorecard.

Glock 42 Review

IMG_0759

Well, let me first say, I hope everyone had a good Holiday season.  It’s been a busy few weeks for me, but we did at least get a chance to get to the range and break in one of my significant other’s Christmas gifts.

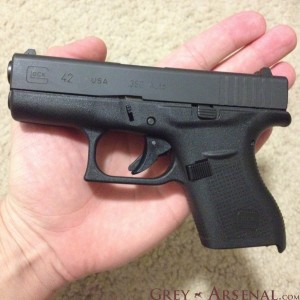
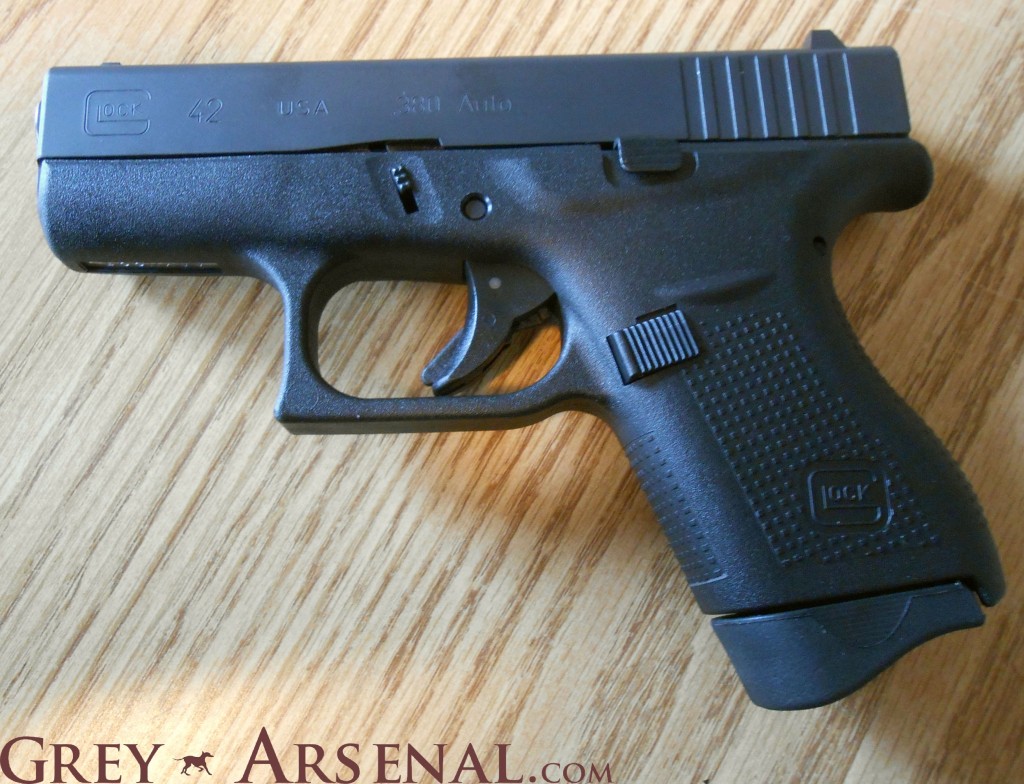
Enter the Glock 42.  I know this thing’s been out for a bit of time now and a review on another .380, the Beretta Nano, would probably be a bit more useful to early adopters, but I also know that before purchase, I scoured for reviews on this thing, and every point of data counts.

Shooter1

Right onto it: Why the Glock 42?  Anybody who personally knows the end user in mind here will know that she has tiny hands.  TINY.  She also has really taken a liking to Glock handguns since being introduced to them- the light weight, the balance, the easy controls, the easy-to-use sights, everything combined to let her shoot more accurately (mostly due to genuinely enjoying practicing with it) than nearly anything else we own aside from a tricked out Kimber Custom Target II.  The problem is, Glocks are fat.  Her shooting was decent, despite not quite being able to get a proper grip on any Glock she’d tried due to the size.  So short of radius-ing the hell out of the grip and hoping to make it a low enough diameter to get her hands around, she’d always end up with sub-standard grouping because of having to reach for the trigger or a bruised right thumb joint from improper grip.  The Glock 42 solved these problems, for the most part.

IMG_0760

First of, it’s tiny, not quite Colt Mustang Pocketlite / Ruger LCP / Beretta Pico tiny, but compared to most subcompacts, this thing is quite the mouse gun.  More importantly, it’s slim, especially for a Glock.  This allows shooters who might be hand-size challenged to get a proper grip on the thing, which is exactly what we were going for here.  Now, there are positives and negatives to this- while it fit her tiny hands perfectly, it still has the same sub-compact issue of length of grip, even her pinky hangs of slightly.  This is easily remedied, however.  The other thing I noticed, was with a proper thumbs-forward grip, this thing sunk so much into my paws that I had to make a conscious effort to not hold the slide release down.  This wasn’t an issue, however, when shooting one handed with either strong or weak hand, and this thing was a pleasure to shoot one handed- this would be a great backup.

IMG_0744

As for functionality- pretty impressive.  It’s not *fully* broken in yet, as we’ve only put 200 rounds through it for our first test.  We used 100 rounds of Aguila 95gr. FMJ as our opener, and 100 rounds of cheapo Academy sourced Monarch 94gr. FMJ to see how low we could go with ammunition quality (while still sticking to factory loads).  In the 200 round breakin, we had a single FTF about 40-round into the down and dirty Monarch stuff, which had been notably weaker than the Aguila.  For a short .380, this thing grouped very well, right in line with other compact Glocks.  One minor nitpick, the 6-round magazines- it’s a tad difficult to get that last round in, as the .380s are short to the point that when loading, the round beneath tends to dip in the front rather than be pushed down, and it takes a bit of effort on that last one.  Due to the difference in Magazine here, the standard Glock speedloader (or SLINO if that’s your opinion on the thing) doesn’t work, and they don’t yet have one out for the 42.  But this is a practice/training issue more than anything.

IMG_0762 IMG_0763 IMG_0761

Mechanically, this thing is just standard Glock, but scaled down.  Not much to say here- disassembly is identical to any other Gen4 Glock.  A note on that- while the 42 uses Gen4 features, technically (at least per a Glock rep I spoke with) it’s a first gen, as this is a new gun.  Whatever… built with Gen4 features, I’m still going to refer to it as a Gen4.

The Scorecard:

+ Size/Dimensions (Great for an EDC)
+ Price (Typical Glock pricing, not LCP cheap, but quality for the $)
+ Manual of Arms (Same as other Glocks, know one, know all)
+ Accuracy (No sacrifice for size, typical Glock sights)
+ Comfort (Despite being as light as it is, very little recoil)
+ Reliability (Only 1 FTF on break-in, otherwise no issue)

– Magazine (6+1 Capacity, really?  Also mentioned loading issue)
– Size? (Might be a bit tiny for big hands without mag extensions)
– Price? (It’s not AS cheap as some other subcompact .380s)
– .380 (Some might complain about this not being a 9mm)
– Reliability issues with early models (not experienced on ours)

shooter2

Surprises for Shooters: Holiday Gift Guide

DSCN1699

Thanksgiving is over, Black Friday and Cyber Monday have passed, and if you still don’t have a little gift or two for your loved ones, your time is running out.

So to give you a hand in shopping for the gun owner in your life, or maybe to find yourself a little something on the cheap- I’m going to make a few suggestions for something that would be nice to find under the tree on Christmas morning.

First thing’s first, whether for yourself to help you do your holiday shopping for cheaper, or for someone else you know does a lot of online shopping, an Amazon Prime membership is well worth the price for the free 2 day shipping, as well as other sale prices and whatnot that you wouldn’t normally get.  Be cautious though, I’ll make you buy A LOT more stuff from Amazon that you wouldn’t before.

71KMppUPcxL._SL1242_Alright, so I did a previous article on cleaning kits with plenty of links, and it’s still a good read since I mention technique and whatnot, but to make things easier for this gift guide, I found a couple of pretty neat sets with tools needed for detailed cleaning and maintenance/gunsmith work for specific firearms.  I’ll link a couple, and you can find the rest by following the links from there.

AR15, Sig P226, Glock

But these wouldn’t be complete without solvent and lubricants.

41KgKDaffWL

As mentioned in my previous post, I’m a big fan of Mil-Comm products after some buddies turned me on to them.  See my cleaning kit post for more details- but this is the set that won me over.

Another good gift idea is storage for all the of the above, or for the ammunition that would otherwise be sitting around in piles.

51YbSpI7-rL._SL1000_

I personally have a couple of these, and will probably end up with more.  They’re a good size, easy to carry, and have a top tray and lid compartment for smaller items.  It’s nice to have a few so you can keep types of ammunition separate, as in I have one with me I’ll grab when going to the rifle range, one if I’m going to take my shotgun out for some sporting clays, and another if going to the handgun range.

Speaking of going to the range- in sports a lot of people like to take pride in their preferred brand, and shooting is no different.  It’s always a good gift to get some swag adorned with the logos and slogans of your gunmaker or accessory company of choice.

41piTw5V8fL41TDrRLkIeL31sgWjqGCrL._SL190_CR0,0,190,246_61Q36R1nojL._SL1000_

Beretta, in particular, has a pretty good assortment of both casual and competition wear on their website, and their style in quality is second to none.  They have a lot of sales too.

Another great gift idea, along the same lines as the Flambeau containers, is a good gun/equipment case, and nobody makes them better than Pelican.

51N5isWFMVL 81vQchsPl9L._SL1500_

Granted, they’re a bit pricey, but worth every penny.  They’re also good for any other equipment, specifically cameras and accessories.  If you’re taking some kind of expensive and/or delicate equipment camping, these things are the way to go.

**Be sure to check back in the days leading up to Christmas- I’ll be sure to keep updating with good deals as I run across them.**

Fouled Cylinder Chambers from using .38 in .357

DSCN1676It’s fairly common to shoot .38 Spl from a .357 Magnum revolver for practice or competitive shooting events, as it’s cheaper, and has significantly less recoil, without much difference in accuracy (despite the “jump” it has to make).  This leads to an often brought up topic of fouling making it difficult to load .357 Magnum cartridges after prolonged bouts of shooting .38 Spl.

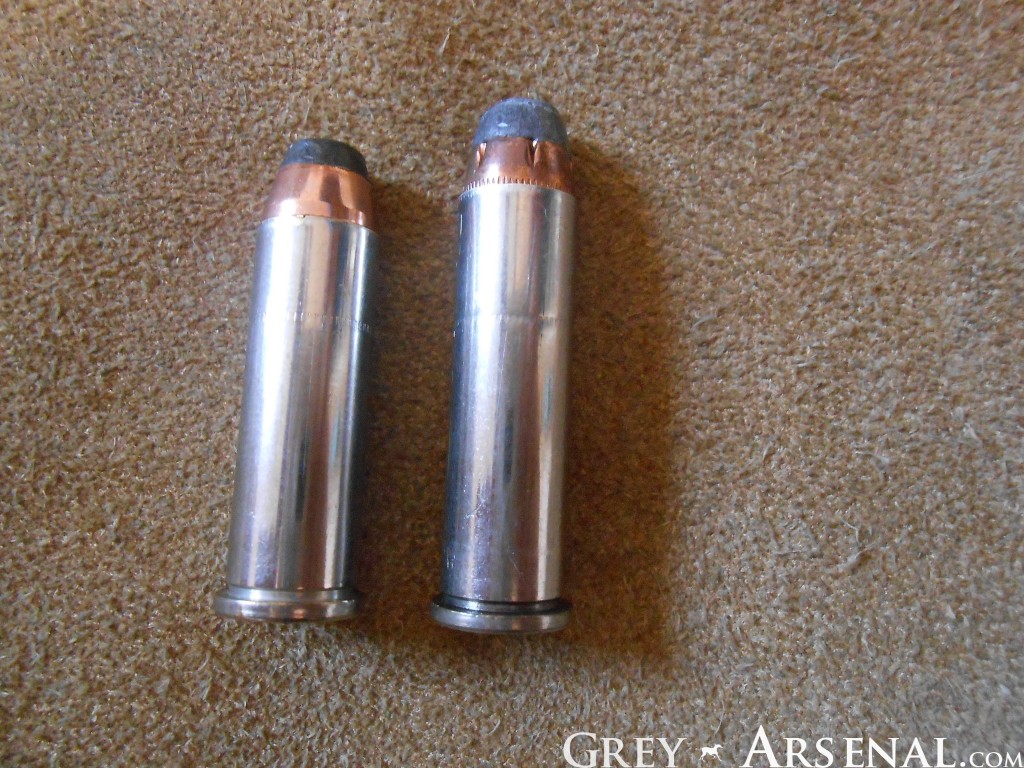
The problem comes from the fact that the .357 Magnum cartridge is a bit longer (and miniscule bit wider) than a .38 Spl cartridge.

DSCN1675

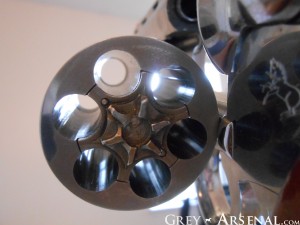
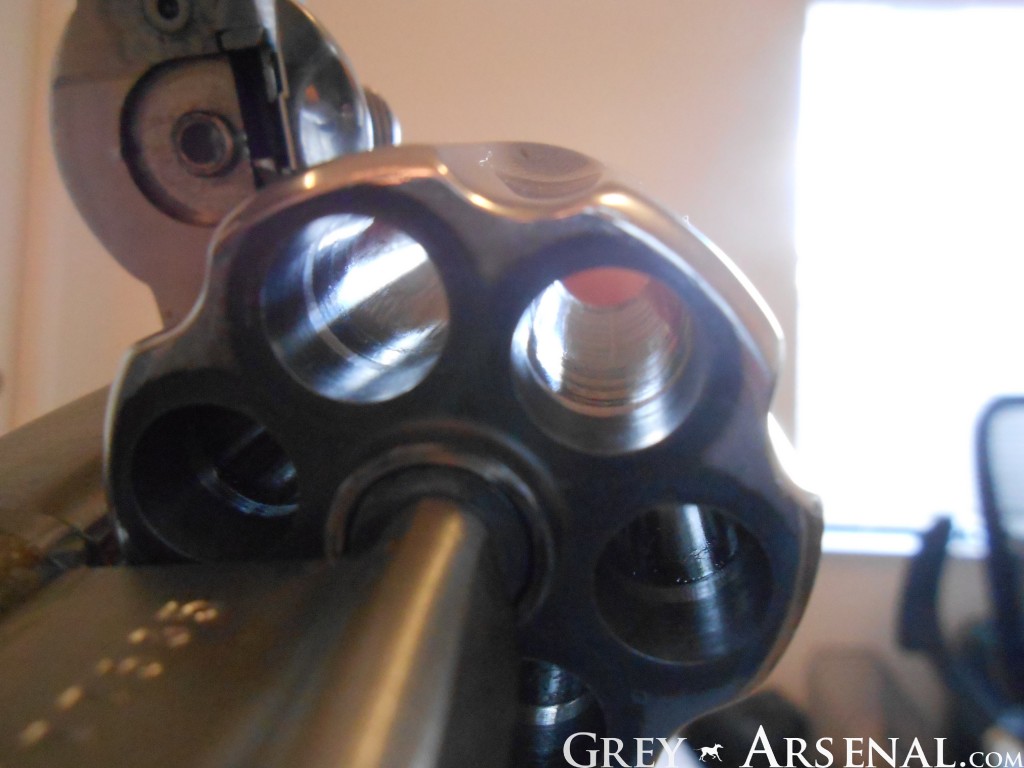
This means the .38 Spl bullet has to jump a bit through the cylinder chamber to get to the forcing cone and into the bore.  This means there will be fouling at a lower point in the cylinder, and that build up and burn in over time (sometimes even after a hundred or so rounds during one session) and make loading of .357 Magnum cartridges difficult to impossible.  See the image below to see a ring of where this buildup was removed from the chambers.

DSCN1678

What you end up with is a .357 Magnum Revolver that doesn’t seem to want to accept .357 Magnum cartridges.  Not cool.

DSCN1697

Luckily, it’s not permanent.  Even if cleaned normally after shooting .38 Spl, you still may need to go a bit further to remove this fouling.  You could use a slightly oversized brass brush (for instance, a .40 S&W brush in a .357 Cylinder) soaked in solvent and just have at it for a while.  A serious while.  It takes A LOT of effort to remove this fouling this way.  Luckily for you, I’m going to show you the easy (well, easy-ish, more on that at the end) way.

Things you’ll need:

DSCN1672

  • Electric Drill (preferably newer than the one pictured)
  • Brass brush of required size (in this case a .40 S&W sized one)
  • Solvent (Hoppe’s 9 / CLP work well, MC25 doesn’t break up the lead as well)
  • Tools for disassembly of your firearm

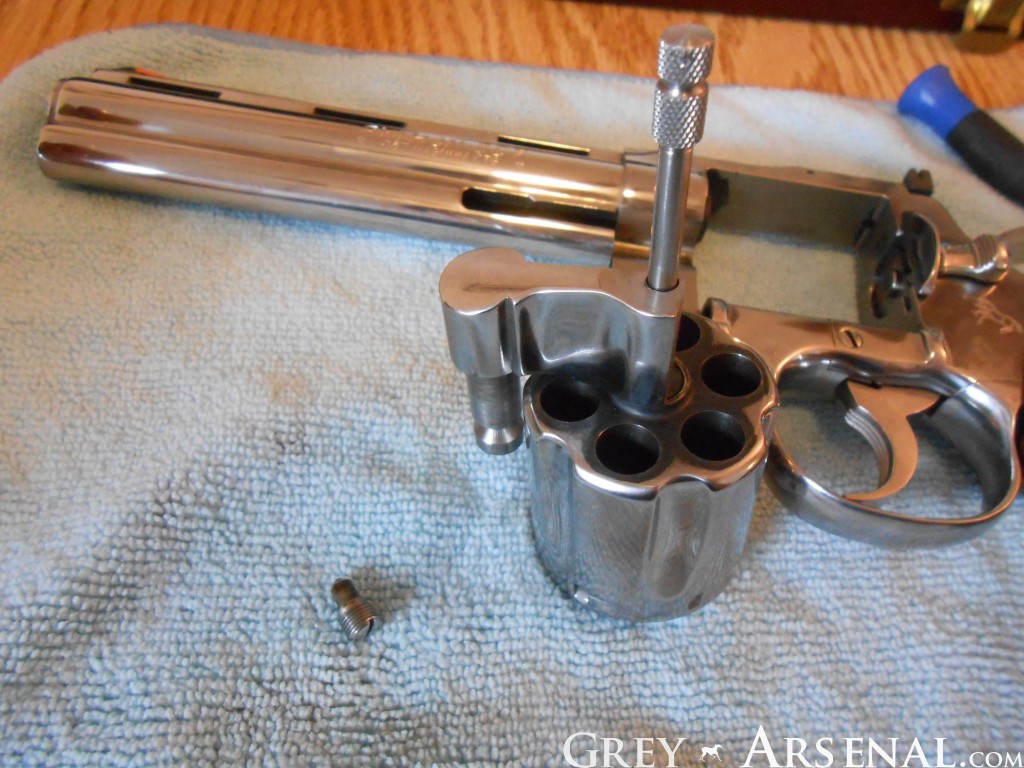
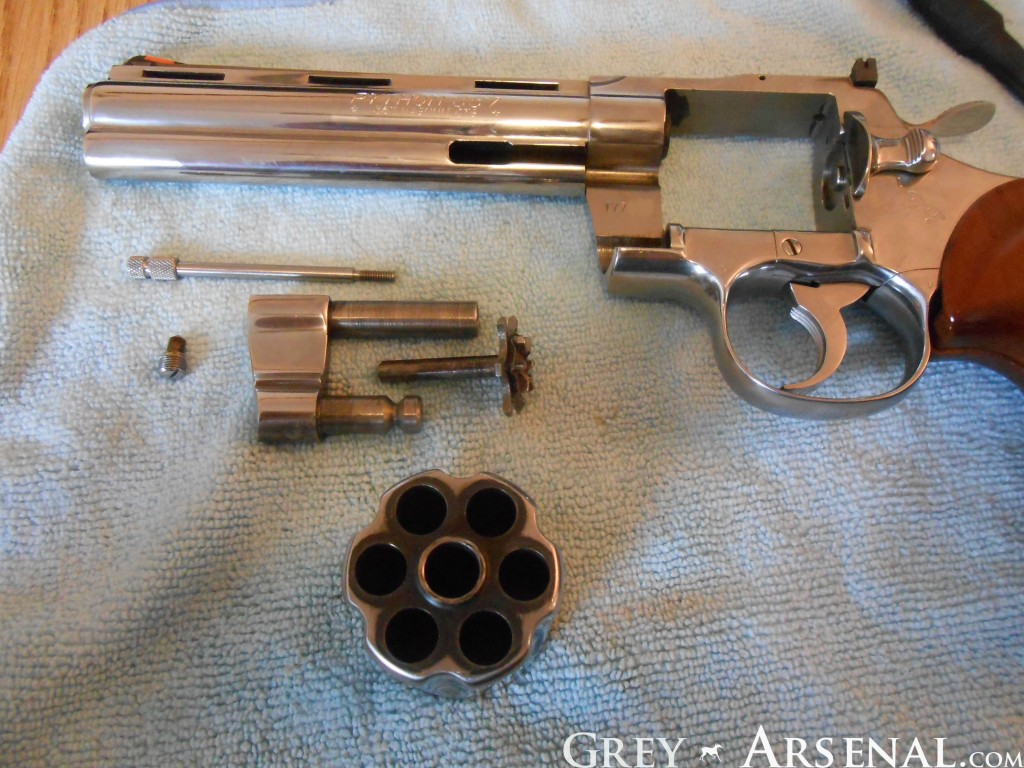
Naturally this will vary by firearm, but what you’re going to need to do is remove the Cylinder.  My sample here is a Colt Python, so here you’ll get a bonus Colt Python Cylinder Removal quick-guide.

  • Carefully LOOSEN this screw enough to easily turn by hand:
  • DSCN1682
  • Remove by hand while minding that a very tiny spring and plunger sit inside of it.  It’s not under pressure, but may fall out and be a PITA to find.
  • DSCN1683
  • Use spur to open the cylinder action, and slide forward off of the frame.
  • DSCN1685
  • Unscrew the Extractor Rod and remove, along with the parts that are now freed up by this.
  • DSCN1687
  • Complete.

Yes, that cylinder has some serious burn rings on the front as well.  This Python may have the appearance of a safe queen, but she gets worked out quite a lot thanks to being such a pleasure to shoot.  If there’s interest, I’ll do another quick article on getting THOSE rings off, but the long and short- lead remover cloth, or scotch pads and Hoppe’s 9.

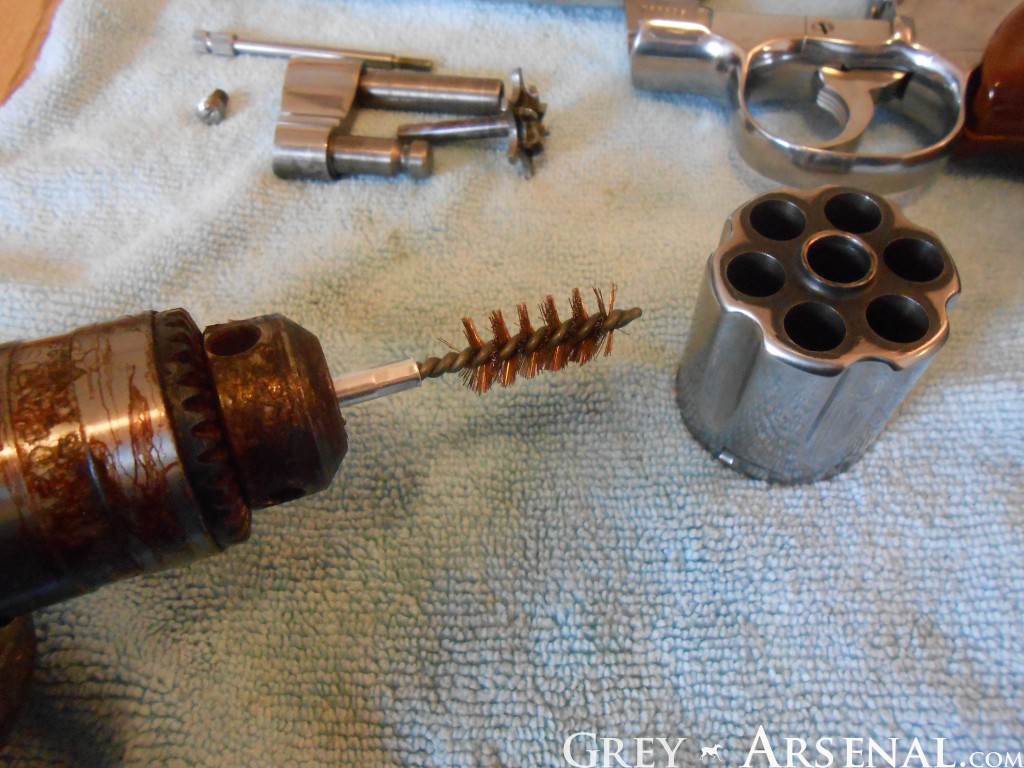
So, what we’re going to do here next is go ahead and chock that brush into your drill.

DSCN1689

Soak the brush in the solvent of your choice, and holding your cylinder in one hand and the drill in the other, get that brush in there and let ‘er rip.  This may seem harsh, but the brass stands no chance against the steel inside of your chambers, you’re not going to damage it, but you will break up the fouling like a boss.  For extra-bad fouling, you may want to tilt the drill a touch in circles to apply extra pressure, but not too much or you’ll bend up your brush too much.

DSCN1690

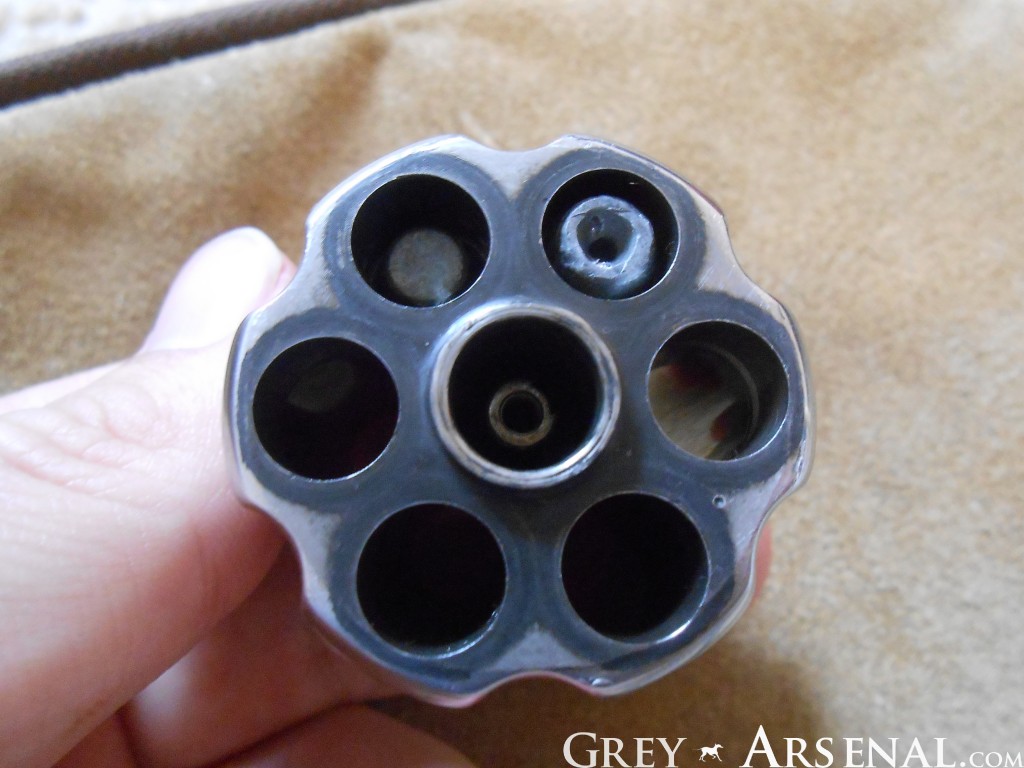
When this is done, you’ll have A LOT of dirty solvent all over that cylinder.  Give it a good wipe and normal cleaning.  Once that’s done, move to your test area (because I KNOW you didn’t have ammunition near your work space, right?) and let’s see what happens.

DSCN1691DSCN1693

Ta-da!  Your .357 Magnum is back to being a .357 Magnum.

Now, about the EASIEST way of doing this that doesn’t involve jury-rigged powertools.  Just buy this.  Brass screen over a rubber piece will get that fouling out in one pass.  Also works very well at cleaning bores and getting your forcing cone clean.  As a bonus, this is a 9mm size, it works for .38 / .357 / 9mm just like brushes / bore snakes, and one tool for multiple guns is always the way to go.