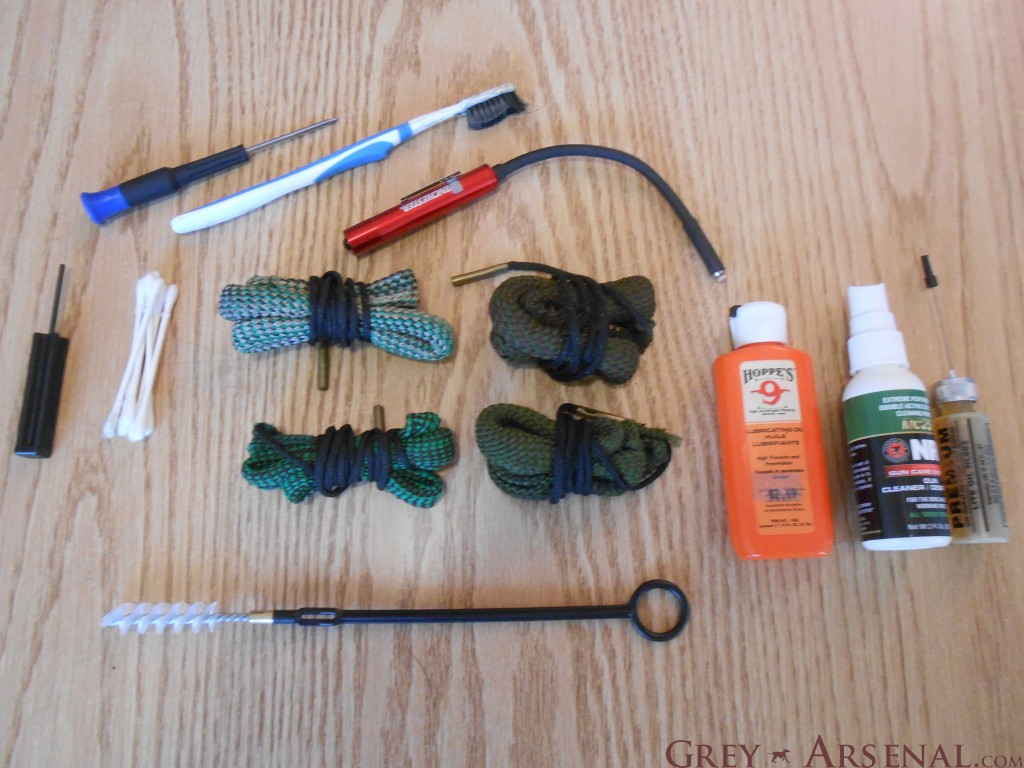
Well, I said I would get to this eventually so here goes. How to get a new shooter up and running with a basic cleaning kit. I’m not going to go into detail here on the cleaning process, that would best be covered in individual guides- but we’ll do a basic overview of the process and what bits and pieces you’ll want in your kit to let you do so.
So first off, basic break down of the process you should be following as soon as possible after shooting.
- ALWAYS Verify firearms are unloaded and remove any ammunition from the workspace.
- Field Strip (or as far down as you’re personally comfortable with and feel is necessary at the time, the deeper the better) firearms used one at a time.
- Give all parts a brief wipe down with a clean and dry rag (or cloth patch if you like).
- Spray parts and surfaces down with MC25 Solvent (my preference, plus it smells nice) and allow to set briefly, or, if you like, simply spray or wipe with a rag/patch soaked with CLP.
- Spray chamber and inside of barrel liberally with solvent of choice.
- Wipe Solvent / CLP soaked parts with clean rag / patch to remove initial fouling. Repeat above steps until rag / patches return clean results.
- Use CLP soaked (followed by dry) Q-tips (seriously, click link, way better than the ones for your ears) to detail clean Chamber, Breechface, Lugs, and other detailed areas. Use pipe cleaners (the absorbent kind, not craft pipe cleaners) to get into harder to reach spots. Additionally, a toothpick or dental pick wrapped in one layer of thin cloth works pretty well for buildup in tight crevices. Use solvent-soaked toothbrush for very fouled areas, especially fouling on intricate areas.
- Run caliber–correct Boresnake through barrel at least 3 times, ALWAYS from Chamber -> Muzzle. NEVER pull through from Muzzle end to Chamber. Wipe down the feed ramp with CLP soaked rag / patch again, just for good measure.
- Wipe all parts down with dry rag / patches. At this point, there should be minimal to no fouling showing on any cleaning material after wipes.
- Lubricate per needs of your firearm with oil and/or grease*
- Reassemble firearm and wipe off excess oils. You may elect to SPARINGLY apply a bit of CLP to a rag and rub a protective coating on the exterior metal surfaces of the firearm. This will depend on storage and intended further use, but can be of benefit when the firearm is going back in a safe for a while.
- Cycle the weapon’s action liberally to distribute lubricants.
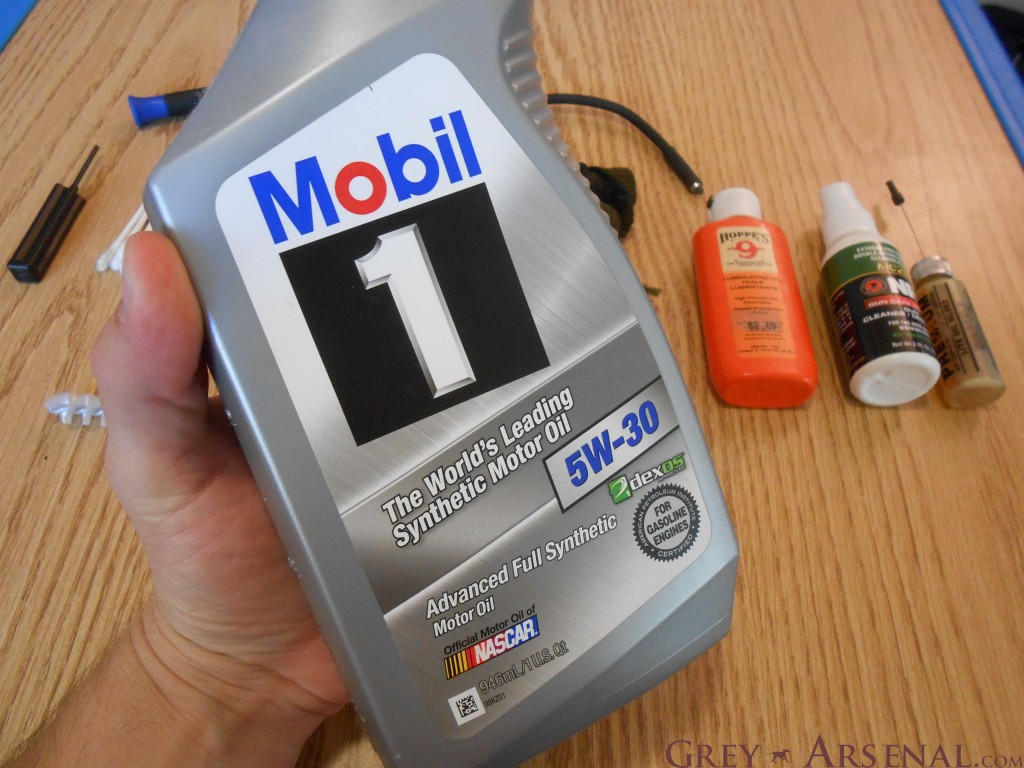
*Opinions on lubricants is another hot-button issue. My personal theory here: If you have the money to spend, by all means, Mil-Comm makes great products, and my friends who’ve used their stuff where their life depended on it swear by it. BUT, on a budget, I figure any jackoff in their basement can slap a cool logo and guarantee on a bottle of mineral oil and come up with a story on how long they spent researching it, then charge an arm and leg for it. Know who does spend a ton of verified money on high-performance lubricants that need to hold up to a variety of environmental conditions for thousands of hours of intense use? Automotive lubricant companies, that’s who. Enter the cheapest-per-volume high-performance firearm lubricant you’ll find, and likely one purchase will keep you lubing for years:
That’s right. It’s good enough for moving parts in a metal box full of explosions driving a shaft to several thousand revolutions per minute for ~450,000 hours before you should replace it, in nearly any environment you’ll find on Earth. I think it’ll hold up just fine keeping a couple of surfaces and moving parts slick over the course of a few hundred cycles before it’s wiped off and reapplied. Similar logic applies to grease- Mil-Comm stuff is the shit, and recommended by SIG for their products. But Lucas Oil White Lithium Grease is hard to beat with it’s track record and price point.
Additional thoughts-
- A brass brush, and traditional steel rod with brush attachments are still good to have on hand in case of heavy fouling.
- A bottle of Windex (or generic ammonia based glass cleaner) is good to have if you’re planning on shooting corrosive surplus ammunition. Just be sure to clean properly afterwards. The ammonia doesn’t replace a step in the process, only adds one before you do the first round of solvent.
- Seriously CLP is awesome. Have some. Have extra. This stuff works for all kinds of stuff, from sticky door locks, to bicycle maintenance.
- A box of some sort is nice. I honestly can’t remember from where mine originally came into being. I believe it was a hard case for one of my father’s old electric grooming devices. Perfect size for the range bag though, so it just kind of stuck. Small tool or tackle boxes work pretty well though.

- Medical exam gloves are awesome to use while cleaning. You will get fouling all over your hands. You will get solvent all over your hands. You will get lubricant all over your hands. The pleasant smelling MC25 isn’t too bad to get on yourself, but still best to avoid getting most of these chemicals all over yourself. Use protection my friends.
- A Bore Light, such as the one mentioned in a previous post, is a great additional tool to have in the kit, so you can have a look in tight places, and check how spic & span your barrel interior is after running those boresnakes through.
- As far as a toothbrush, a military-style one that has the large and small bristle area is awesome, but what do I always have around? Worn out former dental toothbrush, after good cleaning of course. They last about the same interval anyway.
- Additionally, a small screwdriver set and punches (as needed by your particular firearms) are good to keep on hand in your kit.
Enjoy, and shoot clean.

