Basic How-To, Mossberg 500

DSCN1478

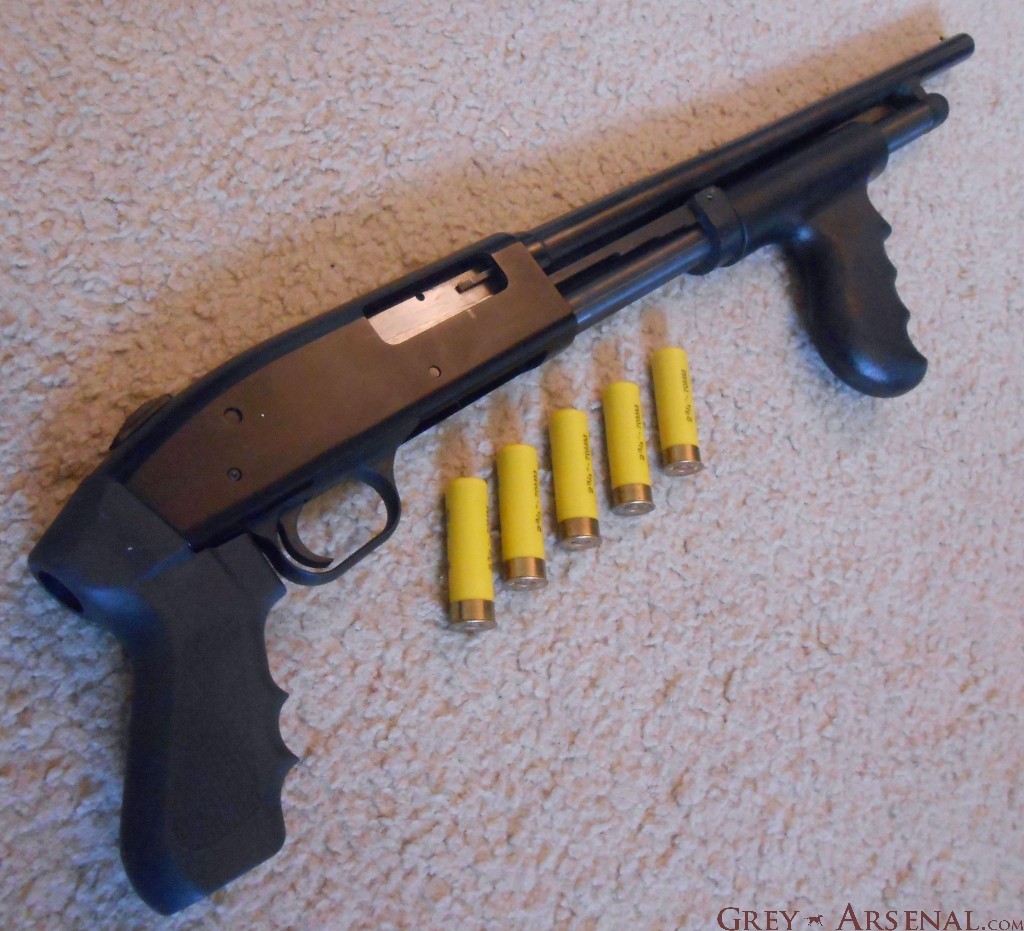
Alright, this one is going to be short, but I got a request from a new Mossberg 500 owner (and new shotgun owner in general) without a manual who wanted some basic instructions, such as safety, loading, unloading, that sort of thing.  This user is already aware of basic firearm use and safety.

So, right to it- most important is Safety Lever location, which is pretty obvious in this case.DSCN1479Rear for Safety ON, Forward for Safety OFF (pictured) showing red.

  • The Mossberg 500/590 line varies in magazine capacity, so here’s a breakdown of Capacity by model for 2 3/4″ and 3″ shells:
  • 835 Models: 5+1
  • 535 Models: 4+1
  • 500 Models: 5+1, 7+1 with high-capacity Magazine Tube
  • 505 Models: 4+1
  • 590 Models: 8+1

Note: As mentioned in the manual, many are shipped new with a wooden dowel rod in the end of the magazine tube to limit magazine capacity due to Migratory Bird Laws (capacity limit for hunting).  Additionally, “Bantam” models include a dowel that limits capacity to 1+1.  If there’s demand for it, I’ll expand this post with removal instructions.

On to LOADING:

There are two parts here that I’ll be showing, which makes it less confusing than the way it’s laid out in the manual.

The first part is if you would like to load to maximum capacity, having one round in the chamber, action cocked, and kept with the Safety ON.  This is how you would want to load the firearm if you were intending on carrying and using it, for instance when going out hunting, so that you can employ the firearm quickly and relatively quietly by just throwing the Safety OFF and ready to fire.

PART I: PRE-CHAMBERING A CARTRIDGE (if desired)

  • Ensure the Safety lever is ON (rear, NO RED DOT)
  • Cycle the action open (pump to the rear)
  • DSCN1482
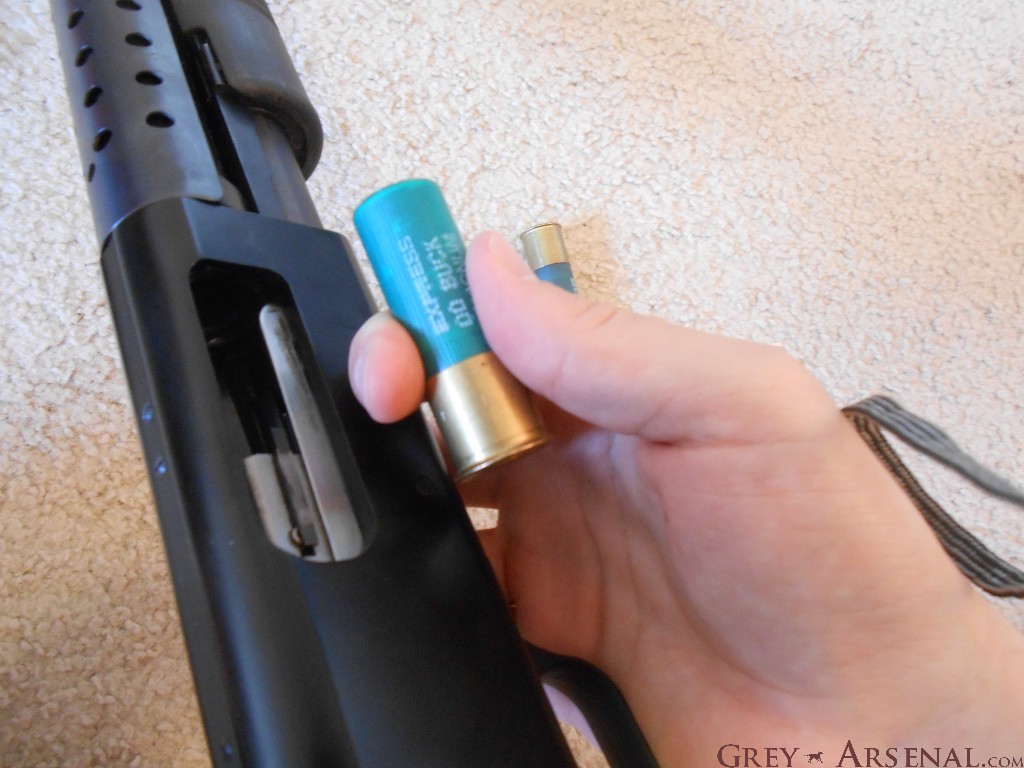
  • Place one shell, facing forward, in to the Ejection Port, letting it fall and rest on the Loading Ramp.
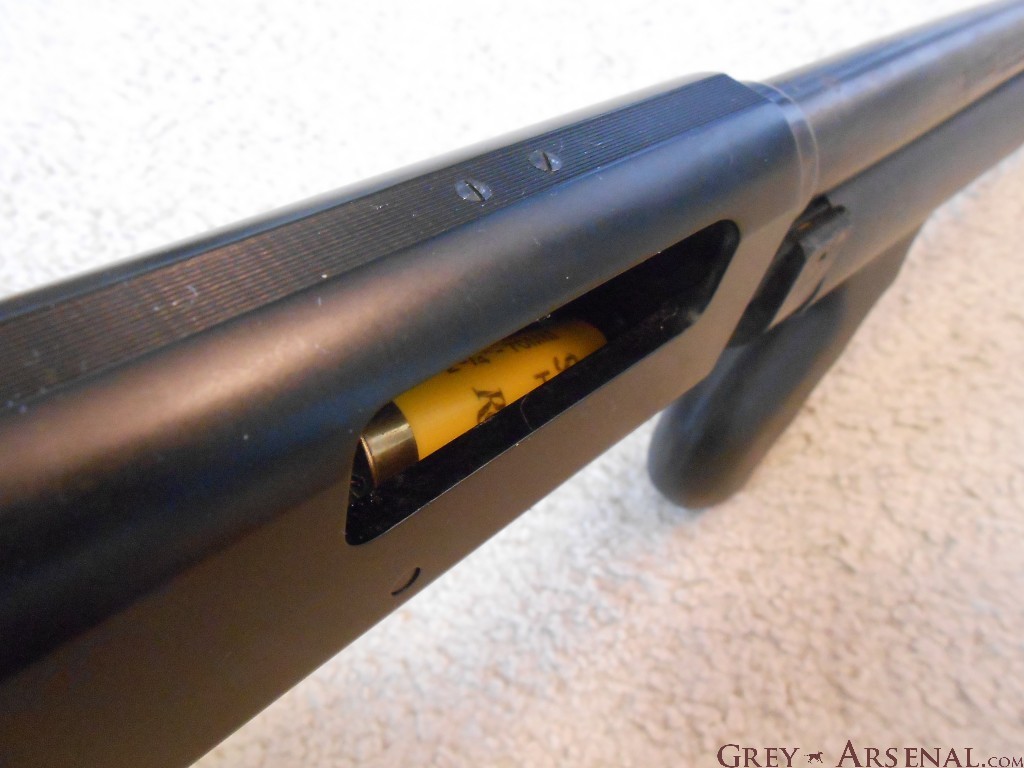
  • DSCN1483
  • Cycle action closed (move pump fully forward), chambering the shell.
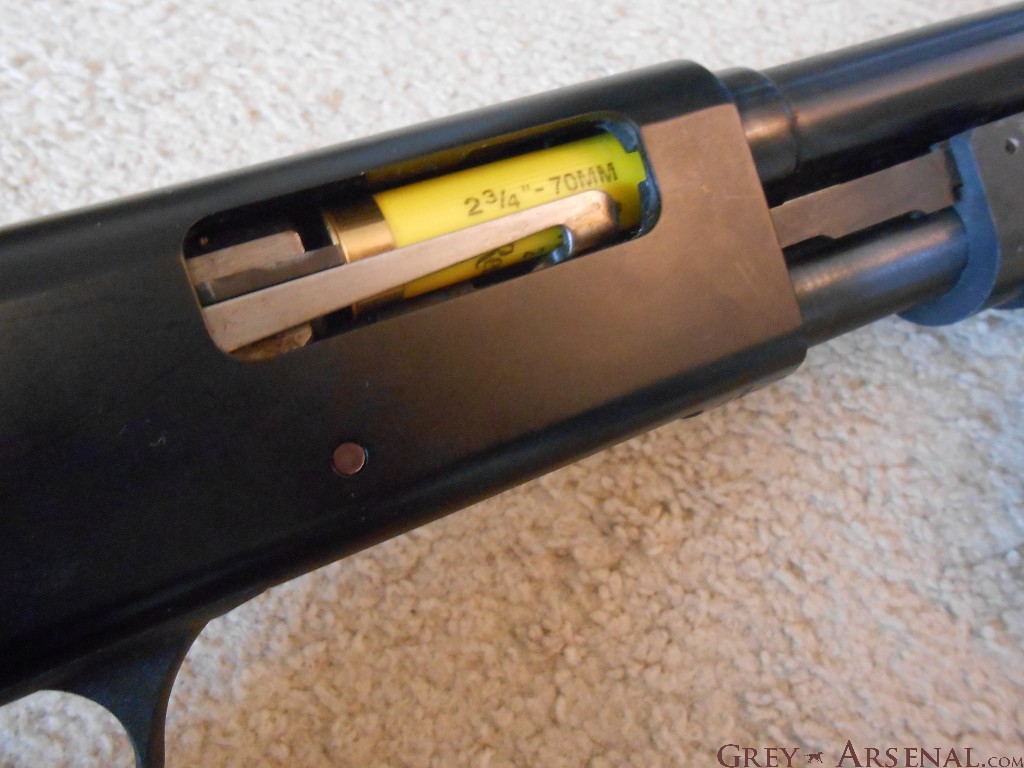
  • DSCN1484
  • DSCN1478

The second part is how to load the magazine tube.  When done in addition to the above, you’ll achieve maximum capacity, and are ready to fire by simply switching the Safety Lever OFF.

Additionally, you could do this on it’s own without loading a round into the chamber.  This is generally how most people keep the firearm if kept loaded to be used in a home-defense role.  It’s thought of as *safer* and if needed, all that needs to be done is cycling (racking) the action.  It’s often stated, but quite debated, about the psychological effect of a shotgun racking sound as a criminal deterrent- personally if they’re already in MY house, the best warning they’ll get is a Safety clicking OFF if they’re listening really closely, but to each their own.

PART II: LOADING MAGAZINE TUBE

  • Rotate (cant) the weapon so that the Loading Port is accessible.
  • DSCN1486
  • Place shells facing forward into the port one by one, sliding them into the Magazine Tube until they’re secured by the Cartridge Stop (visible in picture above as a tab on the right side of the cartridge rim)
  • DSCN1485
  • Do this until you’re reached capacity.  You’ll know you’re at capacity when you can no longer completely insert another shell.

UNLOADING:

Just like loading, unloading is done in two parts depending on whether or not there is a round chambered.  First, I’ll cover removing the chambered round, as you’ll want to do this before further handling the firearm to unload the magazine.  If stored WITHOUT a round chambered, skip to Part II.

PART I: UNLOADING THE CHAMBERED ROUND (and ensuring the next round in the magazine is not chambered)

  • ENSURE SAFETY LEVER IS ON (REAR, no Red Dot)
  • You’ll notice that you’re unable to cycle the action after it’s already cocked.  In order to do so, you’ll have to depress the Action Release Lever to the left of the trigger.  This is also a good visual indicator of whether or not the firearm’s action is cocked.
  • Depress the Action Release Lever while slowly opening the action (moving pump to the rear)
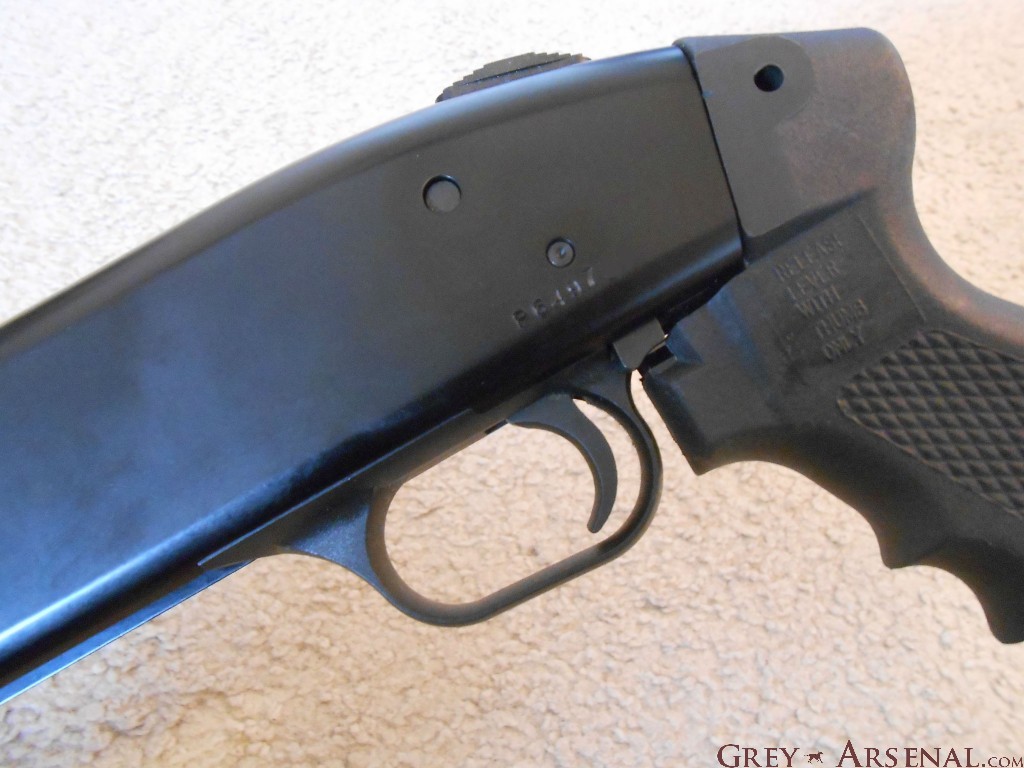
  • DSCN1480
  • DSCN1481
  • With the Ejection Port facing downwards (towards a surface onto which you would like to eject the cartridge), complete cycling the action open (moving pump fully to the rear).  This will cause the chambered round to eject from the firearm.
  • This sets up the Feed Ramp to begin loading the next cartridge from the Magazine Tube, which we want to avoid.
  • SLOWLY move the action just slightly forward, so that the next cartridge is released from the Magazine Tube on the Loading Ramp.
  • DSCN1492
  • While in this state, rotate the firearm over so that the cartridge can drop free out of the Ejection Port.  It’s important not to move the action too far forward.  If unable to be removed from the Ejection Port, just move the action slightly back toward the rear until it is able to be dropped free.
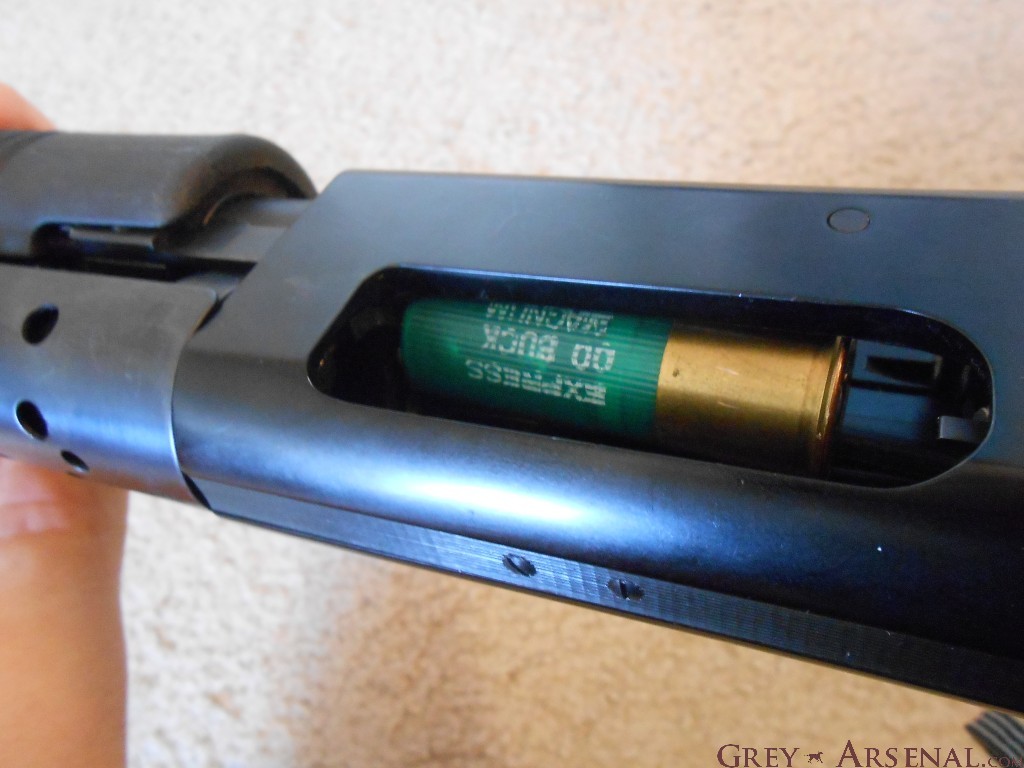
  • DSCN1493
  • DSCN1494
  • After this is done, close the action (pump fully forward), while observing that no round is chambered.  Proceed to Part II.

PART II: UNLOADING THE MAGAZINE TUBE

  • This part’s easy.  Rotate (cant) firearm so that the Loading Port is accessible.
  • DSCN1486
  • Remember I pointed out the Cartridge Stop earlier?
  • DSCN1488
  • Well you’re going to press on it (easier to do if you press closer to the round).  With each press, the next cartridge in the Magazine Tube will pop out into the Loading Port, allowing you to remove it.
  • DSCN1489
  • Repeat until all rounds are removed and you can clearly see the Magazine Tube follower instead of the rear of a cartridge.

Well, there you go.  If anyone would like any more detail, please let me know.  I may eventually expand this post into maintenance / disassembly instructions, and how to remove the dowel rod from the Magazine Tube to increase capacity.

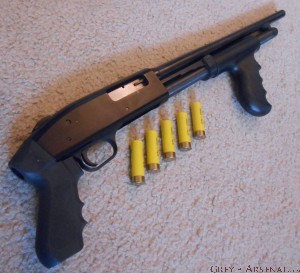
Also, see my previous post reviewing the Kicklite stock / Ultimate Arms Gear kit for the Mossberg.DSCN1491If you liked the foregrip shown on the 20ga Mossberg 500 in this review, check it out here.


Trading Guns the Texas Way

guns_money_5162303_std

When it comes to buying on the cheap, a firearm is a lot like any other big ticket item in that the MSRP tends to be a lot higher than what you actually pay, and it depreciates immediately as soon as it’s not “new” anymore.  Not by much, mind you, as anyone searching listings will see “New-in-box condition” or “only xxx rounds fired” and demanding retail prices, but these still tend to sell for 10-20% under retail.  Obviously, like anything else, it feels great to go to a store, pick the one you want, and get it new with all the assurances this grants.  But don’t discount buying “pre-owned” or even better, trading.

tgtEnter Texas Gun Trader.  Obviously, there are other avenues for getting like-new firearms at a discount.  You could visit a local gun store or range, which always have used/consignment sales, and it’s the next safest to buying new in a store, but you’ll be paying inflated blue-book prices, so it’s the costliest.  The next option is buying online, at places like Gunbroker, which I’ve used in the past.  This place is great since it’s like ebay, you can usually find what you’re after, and pay a decent price, but then you have to deal with shipping and arranging an FFL transfer, which will usually cost  you from $35-50 on average, and in a growing number of states in the northeast, much more.

premierarms

Texas Gun Trader is different, in that it’s merely a place to post ads for FTF (that’s, Face-to-Face) transfers or trades, which are legal in Texas.  I’ve used this successfully on several occasions both selling, and in the last two cases, trading.  You can either post what you have for sale and list the price or trades in which you’d be interested (WTS ad), browse sale ads to find something in particular if you’re buying, post a WTB ad with what you’d like to buy and what you’re offering, or if you have something you’ve lost interest in and want to see if anyone is looking, just search for it and see if it shows up in an ad as something someone wants, and see if you’re more interested in what they’re trading.

Obviously, this is place where you’re most likely to get a deal that would be favorable to you, but it’s also the riskiest.  You’re meeting someone you don’t know to trade big-ticket items and/or large sums of cash, usually on (hopefully) neutral ground, and you have no guarantee of the condition of what you’re getting aside from what you’re able to determine in a quick inspection.  Additionally, some sort of instrument of legal protection is always a good thing,  on which I’ll also shed some light.

Things to consider:

  • Always meet in a well lit public place (if at all possible, during the day).  I don’t mean go do a gun deal in a Starbucks or anything, but a well lit parking lot with some activity does nicely.
  • If cash is involved, bring a Counterfeit Detection marker.  A few dollars here will save you a hell of a lot of headaches later.
  • Bring a flexible bore light (which you should have in your cleaning kit already) to help inspect the firearm you’re acquiring.  Be sure to check up ahead of time on things to look out for and instructions on basic field strip.  If the other party declines on letting you field strip (or doesn’t at least offer to do it for you), walk away.
  • Always, always, always, complete a bill of sale, and get one in return if guns are trading hands both ways.  Texas Gun Trader has a good simple one to use posted on their site.
  • Don’t shortchange yourself.  Don’t take the first offer you get, unless you’re really in a rush to make a deal.  You’ll get a lot of crap offers, but might get something you weren’t considering that will surprise you in a good way.
  • Remember that this is about trading- that means if you want something and don’t necessarily want to add cash to the deal, substitute ammunition, especially if you’re trading out of that caliber already, offer it up as part of a deal.  For example, I’ve gotten particularly good deals by offering up .40S&W ammunition after I’d sold or traded off my firearms in that caliber and no longer had need of the small stockpile.

That’s about that.  Enjoy and be safe.  If you have related experiences you’d like to share, or knowledge of other trader sites like this available to residents in states other than Texas, please leave a comment!

(Two Photos used in this article were sourced from Premier Arms, LLC.  If requested, I will remove and replace them ASAP, but I just wanted to be sure to give them proper credit and go as far as imbed links to their homepage with the images)


Walther P38 / P1 Compare & Field Strip

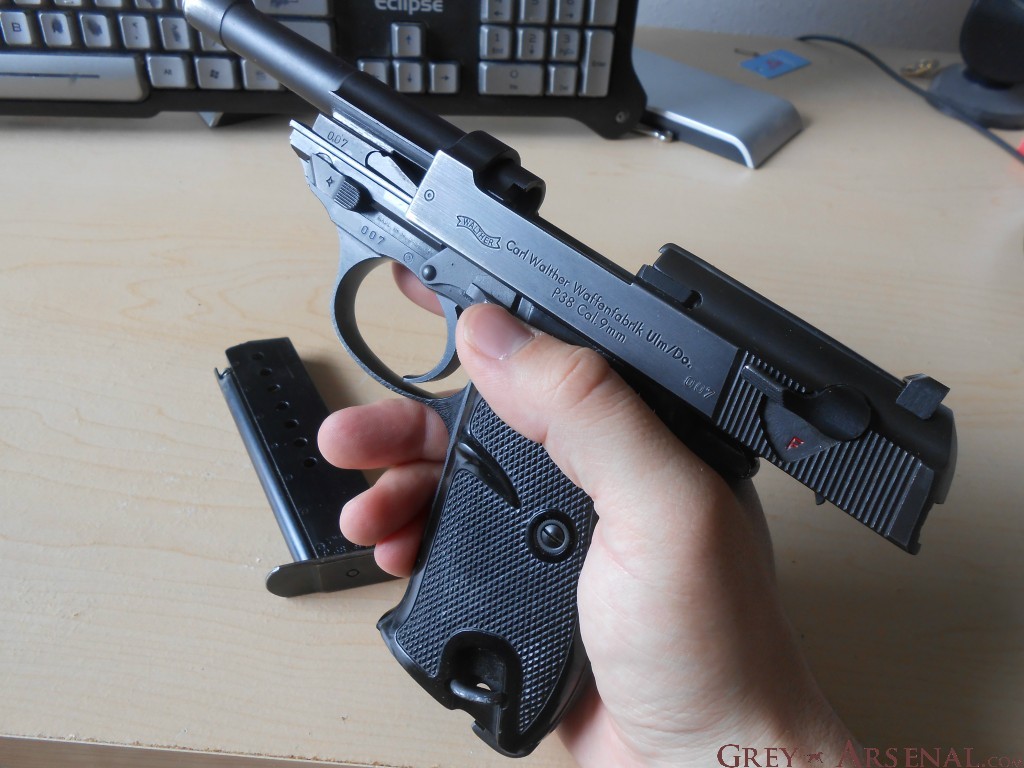
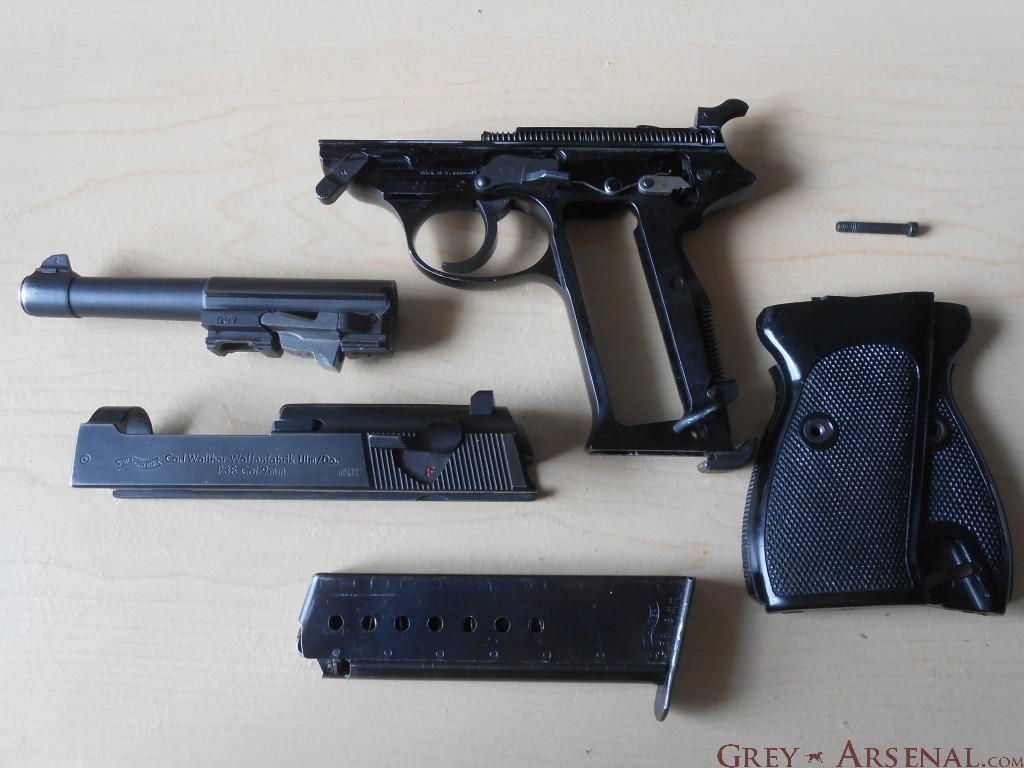
DSCN1447Lets move on last week’s post in France to wartime Germany where we’ll be getting intimate with the Walther P38, and it’s post-war relative, the P1.  First produced in 1939 by Walther Arms to serve as the service pistol of the Wehrmacht, the P38 is a first-of-it’s-kind locked-breech semi-automatic pistol with a DA/SA trigger.  This is also the earliest handgun I’m aware of which includes a Loaded Chamber Indicator (in this case, above the hammer).  More on that later.

DSCN1451

Chambered in 9mm Luger similar to their previously used P08 Luger, this was a more powerful handgun than the other Walther issued to the Wehrmacht, the PP/PPK.  The original wartime P38s were produced from 1938 to war’s end in 1945.  17 years passed before the Bundeswehr announced that they would be adopting the P38 as their service pistol, and in June of 1957 production of the P38 recommenced.  These were produced until 1963, when an updated design was adopted, referred to as the P1, which was finally phased out completely in 2004, replaced by the HK P8/USP.

DSCN1452

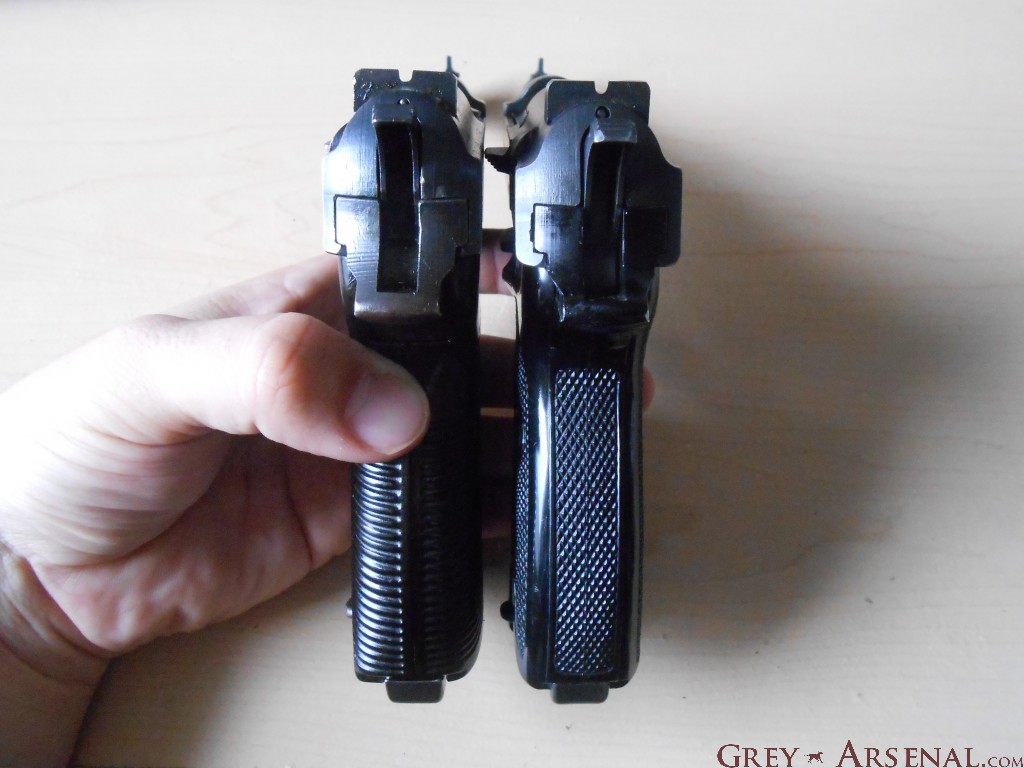
The major difference between the earlier P38 and the P1 variant is construction of the frame, which was switched to Aluminum in the P1.  As is visible, the grip design also changed from grooved to checkered.

DSCN1448

DSCN1447

The top example is a wartime P38, and the bottom is a P1 produced in late 1968.

They’re still considered to be great shooters, and while not having the greatest DA trigger pull in the world, their SA trigger pull is extremely crisp, and has the shortest reset I’ve personally experienced.  They’re well balanced, and even the aluminum framed P1 has very comfortable recoil.

ipb-walther-p38

Right, onto the tear down-

  • Remove the magazine via the bottom magazine release, and open action to ensure that the firearm is unloaded.
  • DSCN1454
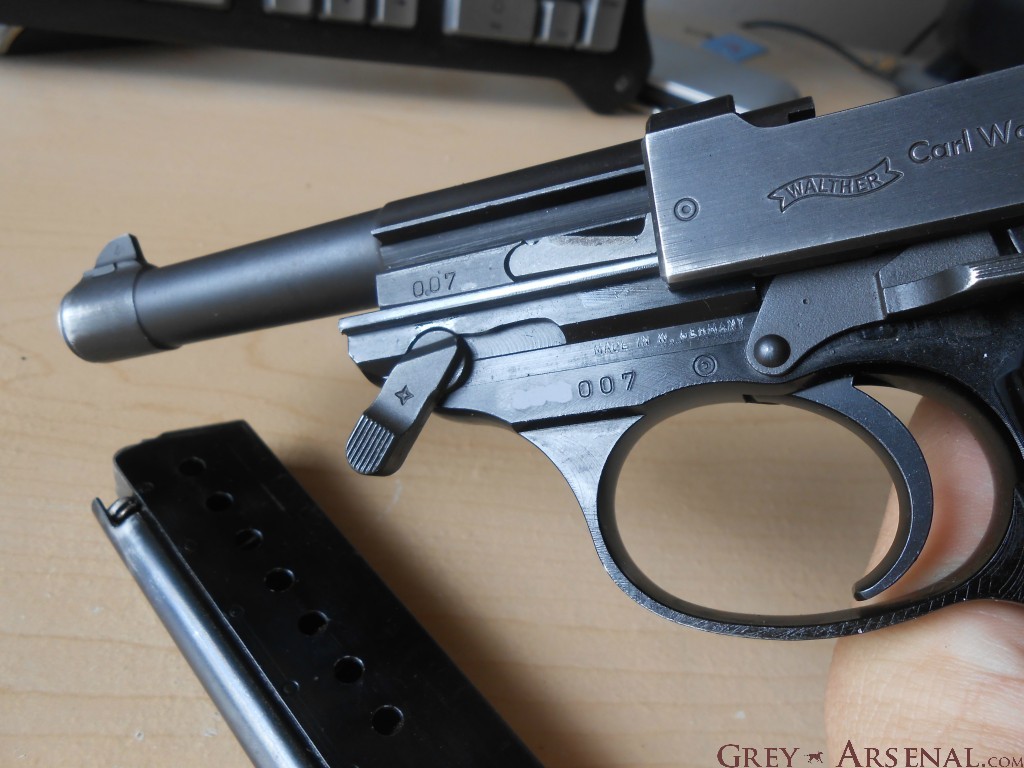
  • Swing the slide release located on the front left of the frame down and forward, noting how it aligns to allow the slide move forward and off the frame.
  • DSCN1455
  • Disengage the slide lock if necessary, and move the slide forward only to the point where it would normally rest.  At this point, de-cock the hammer to allow the slide to be fully removed from the frame.  The de-cocking lever may be used carefully, but it’s preferable to just lower the hammer gently while using the trigger.
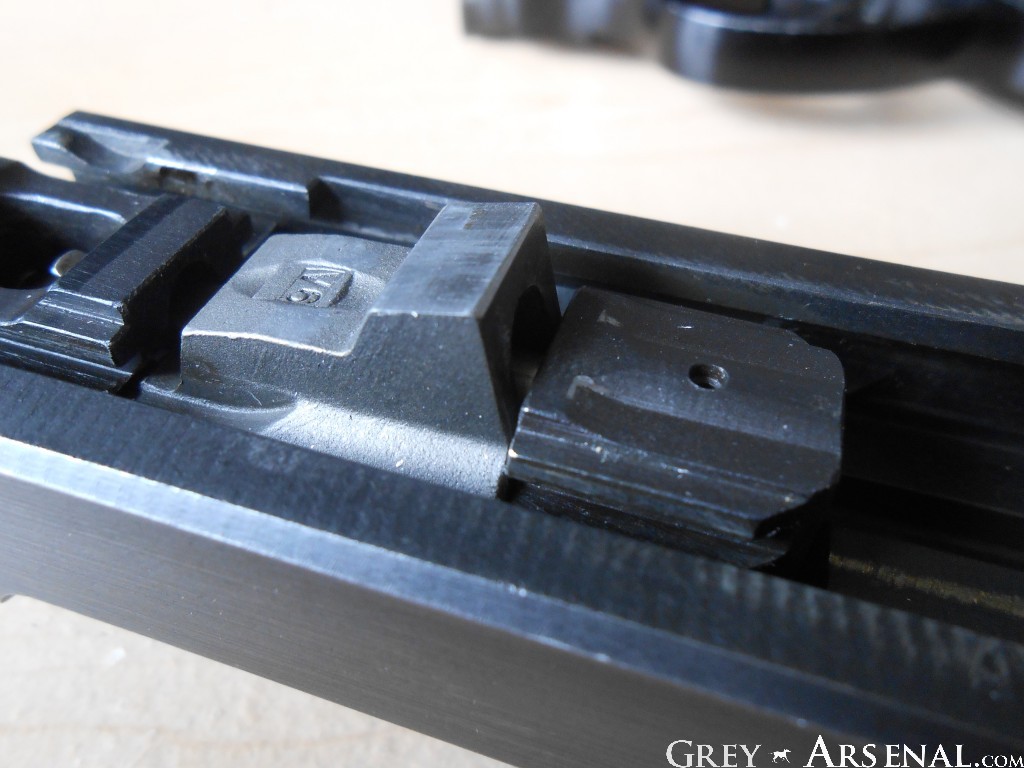
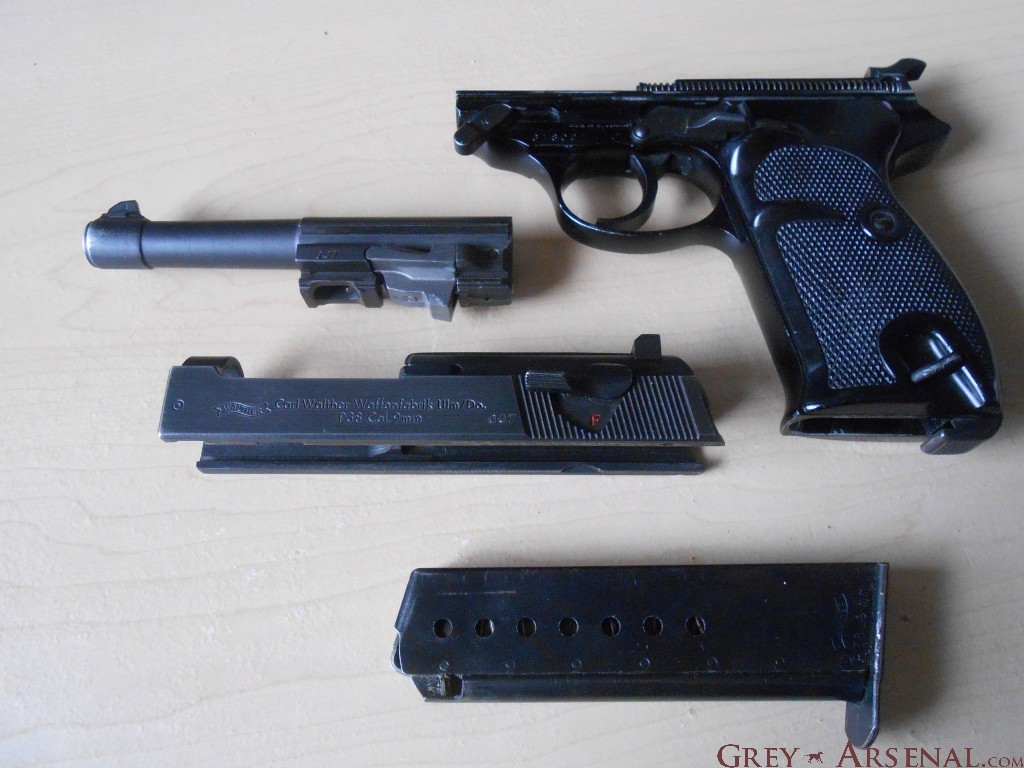
  • To remove the barrel from the slide, simply push the “button” (locking block operating pin) visible at the rear of the barrel assembly, which will push the locking-block wedge out a bit, allowing the barrel assembly to be withdrawn from the front of the slide.
  • DSCN1458
  • DSCN1459
  • DSCN1460
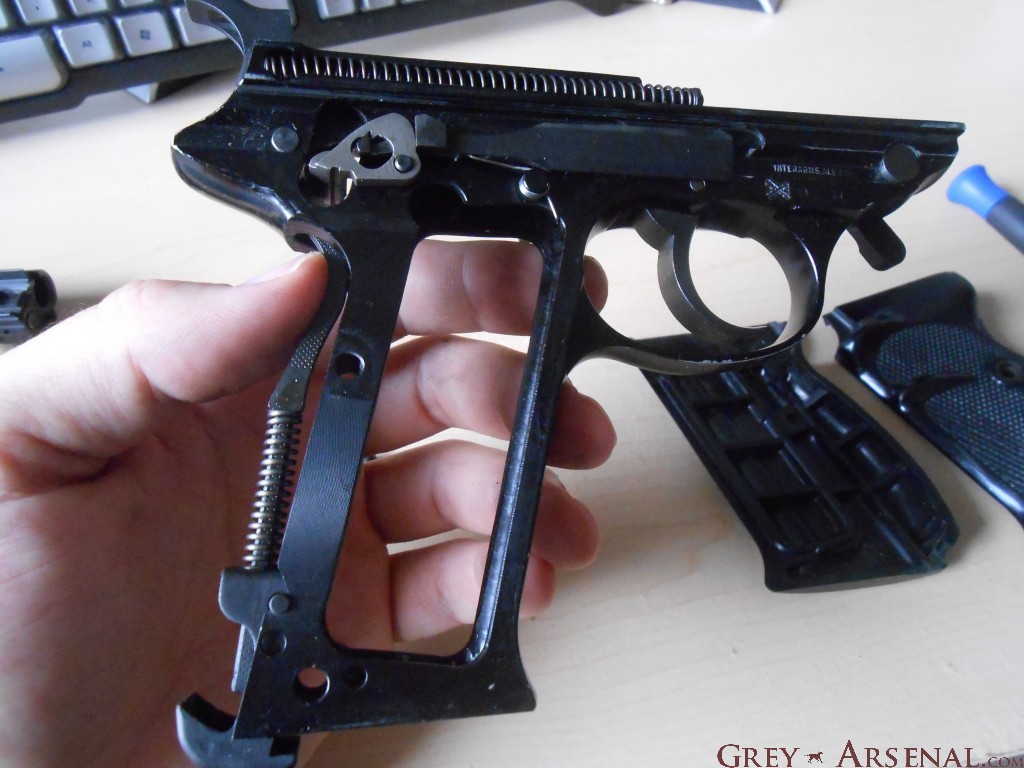
  • At this point, you have access to everything you need for a decent simple clean ‘n lube.  Notice the unique dual recoil springs on either side of the frame.  These can be removed, if desired, by either using a small tool to pull the spring back away from the contained rod at the front far enough that you can remove the rod, then withdrawing the spring OR using a tool to push the spring forward a bit from the rear until it can be extracted from the wider area at the rear.  I prefer the first method, but didn’t bother showing it, as it’s rarely necessary, and pretty easy to figure out.
  • One thing I would check out while you have it apart, however, is the Trigger Bar and Sear are interacting correctly.  To get access to this, use a small flat-head screwdriver to remove the Grip Screw from the left side of the firearm.  Remove the right side grip panel first, then maneuver and remove the left side panel, taking care not to damage it on the slide release.
  • DSCN1461
  • DSCN1464
  • What you’re looking for is on the right side of the frame, previously covered by the right grip panel.
  • DSCN1463
  • The grey part with the hole there is the Sear.  A problem I’ve seen develop with the P38 is the Trigger Bar spring coming loose, and not forcing the “duck bill” hook of the Trigger Bar from interacting with the corresponding notch in the Sear when pulling the trigger.  This can lead to a dangerous situation where you pull the trigger, no bang happens, and the weapon is now Condition 0, and has a malfunctioning trigger, a VERY dangerous situation.  A weak/worn spring can also cause this.  To check, be sure the spring is where it should be, then cock the hammer, and slowly pull the trigger (lowering the hammer with your thumb) to watch the action of the trigger bar on the Sear.  Watch out for this:
  • DSCN1465
  • If, when you pull the trigger, the Trigger Bar hook doesn’t positively catch the notch in the Sear, you have a problem, and should find a replacement Trigger Bar Spring.

Reassemble in reverse order, making note to insert the barrel assembly into the slide with the locking-block pushed out (that is, button pushed in so the locking-block is lowered), and when replacing the slide to the frame, make sure to push the locking-block back up so that it’s able to stay with the slide when you retract it far enough to re-engage the slide release.

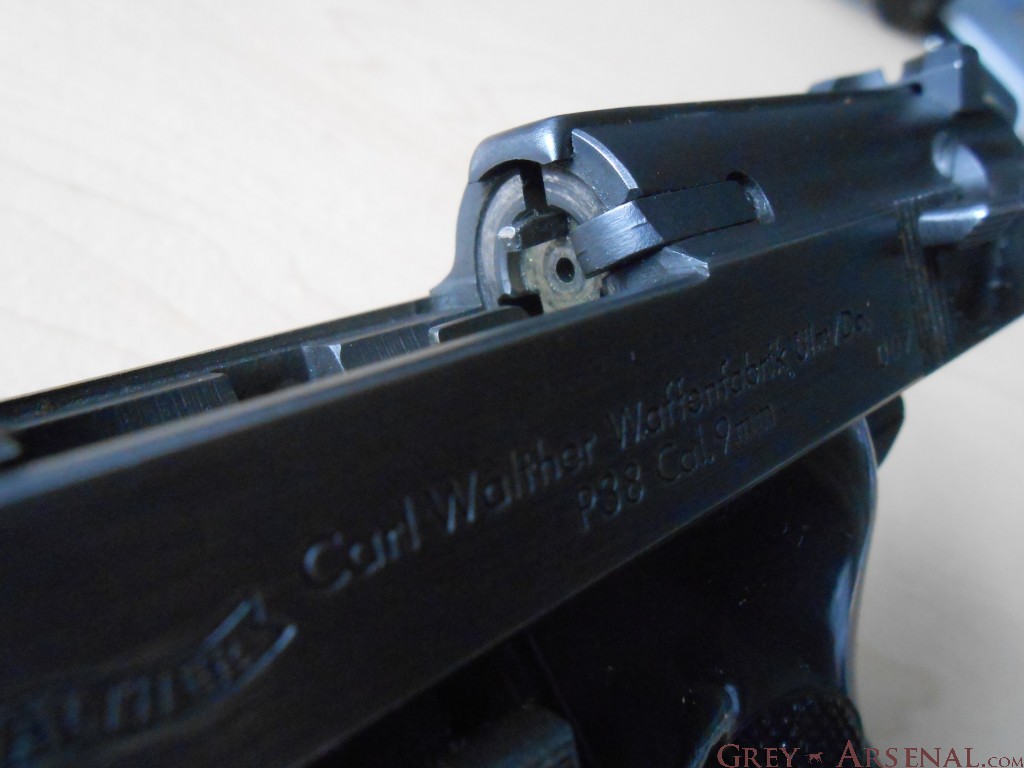
Oh, one more thing to share!  The Loaded Chamber Indicator I’d mentioned.  Pretty interesting really:

DSCN1467

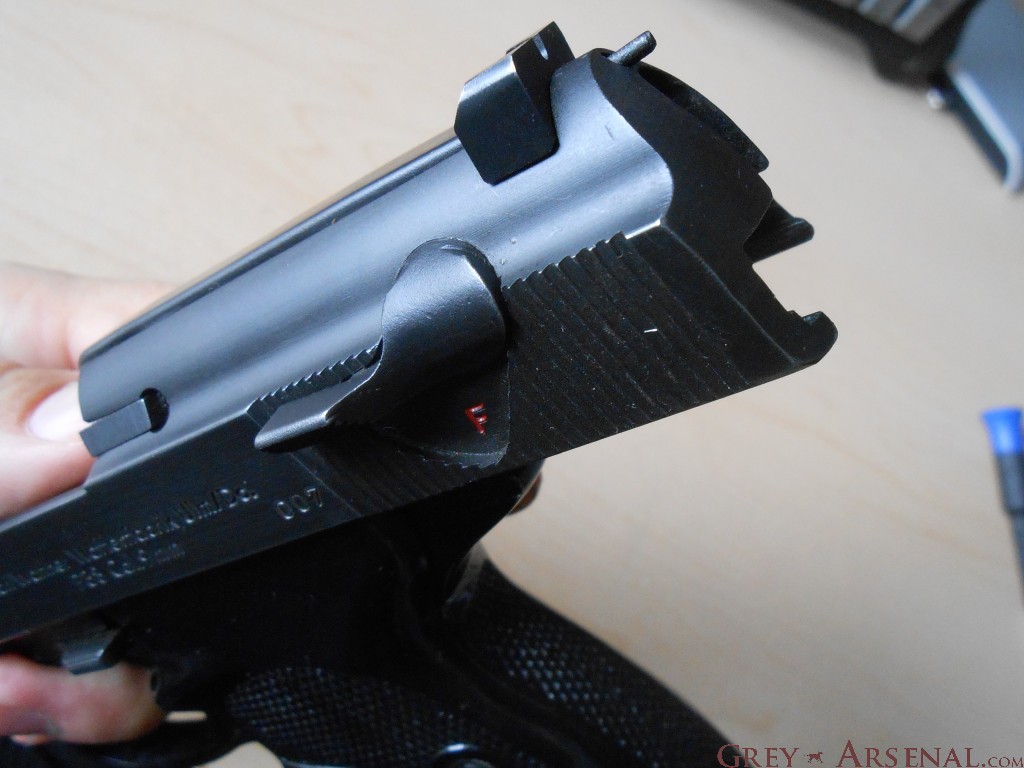
Note the protruding post at the top of the breech face?  When a round is chambered, that rod is pushed back against a weak spring, and out of a small hole above the hammer on the rear of the slide, making this visible:

DSCN1468

There are slight differences between the P38 and P1 in the design of the “Cartridge Indicator Pin” channel (as evidenced below), but it works the same way on both.

DSCN1450

Next week, I think we’ll get back to a more familiar end of the 20th Century.