All posts by James

SecureIt Answer 12 Pro

I’ve been wanting to reorganize my storage for a while, and really liked the idea of something much more akin to straight-line access you get in a full on gun room. I also wanted something that’d fit neatly under the shelf in a closet without protruding into the space too much. Ergo – I’ve been wanting something like the SecureIt Answer series.

While they’ve got a full line of products ranging from small strong boxes to full size actual safes, I opted for a balance of the two and did some inventory checking to see how much storage I needed. The Answer 12 was it.

I’ll start with the cons first.

  • Yes, let’s get it out of the way “it’s not a Safe, it’s a Residential Security Container.” Sure, but that sounds dumb to say, so I’m going to use the term “safe” in this article, okay? It’s 12ga steel and weighs 400lbs.
  • SecureIt is very proud of their products, and the price reflects it.
  • Freight shipping will never not be an expensive hassle.
  • No backup key entry.
  • While it weighed 400lbs, unless it’s bolted down or until you get some serious weight of items inside, it’s front heavy with the doors open and will tip forward. This was negated with a few boxes of ammunition, and a complete non-issue once it was fit out. That said, you’ll probably want to bolt this thing down if at all possible…
Old Dominion Freight Shipping left much to be desired, I was afraid we weren’t off to a great start. Luckily it was packaged very well.

Okay, now the pros.

  • …and bolting it in place is easily accomplished thanks to the pre-drilled holes.
  • SecureIt should be proud of their products, from my initial impressions, it’s extremely well made, top notch fit and finish, and it has a ton of neat features.
  • The CradleGrid™ is neat. It’s like playing “lego armory” and I dig it. The long guns sitting a bit out towards the front allowing shorter profile shelving behind them is a fantastic use of space.
  • Speaking of “Pro”, the Pro models of their safes come with a bunch of the accessories you’d end up getting to fit it out. While I didn’t use everything in my setup, what I did use would’ve cost more than buying the parts a la carte.
  • The SECURAM SafeLogic keypad is easy to use and lets you change the battery externally. You also get the ability to set 2 different codes. While not everyone will have a use case for this (such as setting one admin code, and one user code that you can give out and change as needed to restrict access) – I imagine for those with a use case, it’s appreciated. My only very minor nitpick is the keypad layout – if it was a standard numpad / phone layout, I’d have appreciated the muscle memory for quickly typing a code.
  • The shallow, wide layout is fantastic for use of space compared to standard large square safes.
  • Internal power box with power and usb outlets is fantastic. You can charge accessories / etc. inside the safe, and use it to power lighting, such as their motion-activated magnetic light bars.
Not going to lie, configuring and loading this out was pretty fun.

As far as pricing goes – they’re currently on a “Black Friday Early Access” sale. My Answer 12 Pro was $400 cheaper than list price. They indicate that the freight shipping time is typically 2-3 weeks, but their current sale is on inventory, so there shouldn’t be any lead time involved – mine shipped the day after I ordered it, and a friend had his shipped within a couple of days.

Final thoughts.

Do get the higher density horizontal pistol peg racks. The pro models come with 2 single-peg mounts. If you’ve only got 5 pistols to store, great (2 on pegs + 3 on the door organizers), but if you’ve got more, you’ll want a couple of the 2-slot 4-peg or 6-slot 11-peg mounts.

I’d also strongly recommend getting lighting in here. I went with 2 of their magnetic light bars, but you could also easily rig up some cabinet lighting solutions since you’ve got power outlets.

PSA “Blem” 10.5″ Upper Review

Just in time for Palmetto State Armory’s Memorial Day Sale, I was able to get my hands on one of their “Blem” complete uppers, so I figured I’d do a short review.

Regular price on these are $349.99 when they have “blemished” ones to sell, and in checking over the last few weeks they haven’t not been in stock. As is typical, after careful inspection I haven’t been able to find the “Blem” anywhere, so whether this is clever marketing on their part, or their QC is just that strict, I’ve always felt like I’ve gotten a good deal in buying their “Blem” items.

Note that with the current Memorial Day sale, these are currently going for $169.99 and free shipping. (Currently out of stock)
Non-blem versions are currently on sale for $179.99.

Palmetto has always been pretty quick about their shipping, and it showed up in a discreet cardboard outer box, with this one inside.
Opening that finds your upper ready to go.
As mentioned, I tried my best to find the “blemish” and came up blank.

Disclaimer – As this is a 10.5″ upper, current legal situation where it is, I’m using it on a registered SBR. Reviews for the product show a ton of folks using ’em for braced pistols, but I’m definitely not in the business of giving legal advice. Follow all relevant laws, etc. etc.

That out of the way, I was able to drop it right in place on my preferred lower which started it’s life as a Ruger AR-556. I simply swapped over the Bootleg Adjustable BCG and charging handle, and functionally, it was ready to go.

Except it wasn’t. Yet. While this upper has an A2 front sight, it’s got a flat top at the rear, so a sight was needed. There were a lot of ways I could go with this, but since I’ve already got a “modern” SBR, and I’ve got an affinity for retro ARs – I figured I’d lean that way with this one.

The “Mekut’zar” look is a good look.

So, detachable carry handle it is. Palmetto was out of stock on their detachable carry handle, so I went with this one from 80% Arms (also currently subject to a Memorial Day 20% off, code: MD20). To stick with the retro look, I also went with one of these slings, which will look familiar to readers of my XM177E2 review.

As I’m already running a 10.5″ Faxon Pencil’ed upper with modern optics, I figured it was time for another retro rifle.

And finally, to finish it out, while I wanted to leave the A2 birdcage for the aesthetic, I also wanted to be able to run my Rugged Razor 762, and I’ve been looking for an excuse to try out their lightweight M2 Brake mount.

So then, the big question – how does it shoot?

Pretty darned good. In setting the Bootleg BCG to Unsuppressed and going for it, I got through several magazines of both Winchester White Box .223 and IMI m855 with not a single issue. This was doing absolutely nothing aside from what was mentioned above, checking the bore for obstructions, and function testing it. I didn’t clean it. I didn’t lubricate it. I just attached the stuff right out of the box, checked it, and let ‘er rip.

Through a mix of luck, and I suppose some quality work on both Palmetto and 80% Arms parts, the irons were just a hair right of bullseye at 25y, and that’s good enough for me. Next up was running it suppressed. Rugged Razor attached, and BCG set to the same position I use with my Ruger (“3” or just one mark shy of full suppressed). Again ran another 6 mags, 3 of each ammunition I was testing, without failure. Ejection pattern was perfect, and minimal gas to face, and no noticeable POI shift.

For a total cost of $208.98 with the Carry Handle / Sight, this thing’s a steal, and ran flawlessly. If anyone’s looking for a great budget shorty upper for an SBR build, don’t sleep on this one while they’re on sale.

Specs:
Barrel Length 10.5″
Carbine Gas System
Nitride finish Barrel
4150V Chrome Moly Vanadium barrel steel
5.56 NATO Chamber
1 in 7″ Twist Rate
Chrome Lining – None
Barrel Extension:  M4
Handguard Type: PSA Classic Polymer
F-Marked Front Sight Post
Muzzle Thread:  1/2-28
Muzzle Device:  A2 Flash Hider 
Receiver Material: Forged 7075 T6
Overall Length:  18.5″

AR-10 / LR308 Lower Assembly Guide *No Video!*

With “Ghost Guns” coming up so much lately, I wanted to ride the wave and do something relevant to that discussion. I’ve also been looking for an excuse to put something together off of this 80% Arms .308 lower that I’ve had finished for a while. True to what this website was intended for, here’s a no-video step by step assembly guide.

I’m using an Aero Precision M5 .308 Lower Parts Kit, minus FCG/Pistol Grip, as I intend to supply my own trigger (and you should too). Also needed is a receiver extension / buffer assembly – I’m using an Aero M5 .308 Carbine Buffer Kit, which also includes the end plate and castle nut.

Tools needed:
Screwdriver – whatever kind you need for your grip screw, varies.
Castle Nut Wrench – only if using a carbine receiver extension.
1/16th Punch – Not necessary, but definitely helped a few times.
7/16th Roll Pin Punch – Same as above, not needed but helped.

We’ll start with the Magazine Catch.
You’ll need the Magazine Catch Body, Spring, and Button.

Drop the Body into the recess on the left side of the lower.

Then put the spring to recess on the opposite side, and push the button in on top of it.

Here’s first fun part. You’ll want to push the button in while holding the body on the other side, and push the body out slightly while holding the button. This should push the body out of the recess. Rotate it a few times clockwise (about 3 turns) so that it’s started and you don’t have to worry about losing it.

Now, use something that wont mar the finish to push the button further in that you can by hand – a dowel or plastic pen work. I used a 7/32 roll pin punch to do it. With the button pushed in as far as it’ll go, continue screwing the body in until another rotation would be scraping the receiver (don’t do this), and let go. Done.

Next, the Bolt Catch.
We’ll be using the Bolt Catch, Buffer, Spring, and Roll Pin.
Note: LR308s, including this 80% Arms lower, generally use a threaded Bolt Catch pin. The Aero kit doesn’t include this, and honestly a roll pin works fine here, just as it does on an Armalite AR-10 or an AR-15. But if you’d rather use a screw, you can buy one here.

Put the buffer into the spring, and drop that spring-side-down into the hole here.

Put the magazine catch into the recess, and simply push the roll pin in, wiggling things as needed until it goes all the way through. Use a small punch to push it in just a tad deeper than you can with your finger, and that’s it. Tension from the spring will keep it in place.
Note: If you’re using a screw instead of a roll pin, simply thread it in using the proper size hex wrench.

Now, the hard part – Pivot Pin Assembly.
We’ll be using the Pivot Pin, Pivot Detent, and Pivot Spring.
Note: The detent and spring for the Pivot and Taketown pins are interchangable.

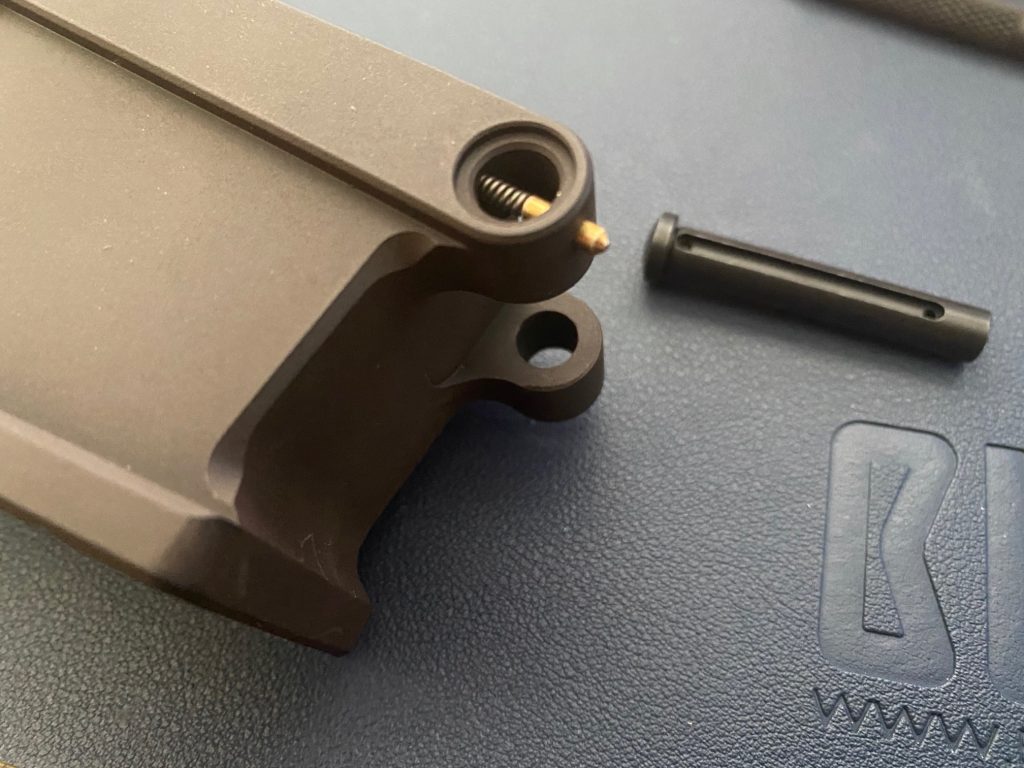
See that little hole in the front there? Put the spring in through there. It’ll go right into a recess in the receiver behind it. Now, the trick here if there is one, is to put the spring in partially, then follow it with the detent, then slide the whole in through in one motion by following it with a 1/16″ punch or similar. Try your best to do this in under 30 attempts.

Isn’t it great that those detents are brass, and thus easy to find when you drop ’em the 7th @#$%ing time?

Now, with it held in place (it’s okay, I know that took a few tries), start the pivot pin in with the groove facing the detent. When you’ve got it started and it’s pushing against your punch, in as smooth a motion as you can manage, remove the punch and push the pin in. With luck, you’ll get a satisfying *click* and can then push it through the rest of the way with another *click* when it seats all the way through.

That was the hardest part, honest. It’s all downhill from here.

The next bit includes a few things done at the same time.
Takedown Pin Assembly, Safety Selector, and Grip.

Important note – as mentioned at the start, I’m using a trigger other than the one included in a standard lower parts kit, and wont be covering it’s installation in this guide. It is at this point in the process that you will install your trigger. Proceeding past this point without installing a trigger will require you to remove the safety in order to perform the installation.

For instructions on install of my preferred trigger, see this post, and start at step 7. Instructions are the same for Timney (and most other) drop in triggers on both AR-15 and AR-10/LR-308 platforms.

Okay, back to business –

First get the above parts ready – The Takedown Pin, Pivot, and Detent, and the Safety Spring and Detent.

Put the Safety Selector in, and set it to Safe. Then, put the Takedown Pin into this hole, groove side down (relative to the receiver). Next, put the detents into these holes, pointy side towards the parts you just installed.

Now, get your grip and screw ready, this will take a touch of finesse to not bend the springs, but isn’t too difficult. Put the Takedown Pin spring into the hole in the receiver, but put the Safety spring into the hole in the grip. Slide your grip on, while making sure the Safety Spring lines up, and push it home being careful to compress, but not bend, the Takedown spring.

Now, tighten the grip screw. In my case it was a hex head.

Almost Finished!

Finally we’ll be installing the Receiver Extension & Buffer Assembly.
I’m using a carbine buffer kit, which has a few extra steps. If you’re using an A2 length extension, you can mostly ignore the bits about the End Plate and Castle Nut.

First, thread the Castle Nut onto the receiver extension with the deeper notches facing the rear, like so. It’s okay if you run it all the way down and off of the threads.

Then, slip the End Plate on, dimple facing this way, down onto the extension by lining the notch up with the grove in the threads.

Now, place the Buffer Retainer Spring, and Buffer Retainer into the hole in the threaded area of the receiver.

Thread the receiver extension into the receiver until it touches the Buffer retainer, then back it off just as much as is needed to have it oriented correctly.

Slide the End Plate down until it mates with the receiver. The notch+cutout and dimple+recess will ensure the extension is properly indexed. Now, simply thread the Castle Nut back in the other direction until it’s tight.

You’ll want to use a castle nut wrench to torque this down to about 40lbs, then stake it using the forward facing notch if you’re so inclined.

Finally, run the spring and and buffer into the extension, and it should click in place over the retainer. Install your desired stock (or brace) if you like, and you’re done with the basics.

Note that I didn’t include the trigger install. That’ll be along with a review coming up shortly – but if you know how to install an AR-15 trigger, it’s pretty much the same. In the meantime, see my review of the Timney Targa drop-in trigger for the basics on installing a drop-in trigger to an AR, it would apply here.

FAQ
“My lower parts kit came with a very tiny screw, where does that go?”
That’s a 4-40 set screw for the takedown pin detent hole. On fancier receivers, that hole is threaded and you can compress the spring and thread that in with a hex screw instead of pushing it in with the grip.

Holiday Gift Guide – 2020

Year of Hell Edition!

So, 2020 has been fun, right!? While I’m sure most of us have sat around at home engaging in firearms related retail therapy since mid-March (don’t worry, your secret is safe with us) – Thanksgiving, Black Friday, and Christmas is just barely visible on the Horizon. So here’s an early jump on some Christmas 2020 gift ideas.

Note that some of these are recycled from last year’s list because they’re still good ideas, some even better buys this year than last year.

Stocking Stuffers

Maglula UpLULA Magazine Reloader – $29.99

This image has an empty alt attribute; its file name is image-2.png

If you don’t alreadyhave one of these, or know someone who shoots and doesn’t already have one of these – this is a no brainer. Trust me.

Bushnell Magnetic Boresighter – $27

This image has an empty alt attribute; its file name is image-3.png

I recommended this last year, and I’m doing it again, but for a slightly different reason – with the increased focus on “things you can do at home”, this is a good tool for doing all you can at home and maximizing the time you’re out at the range, letting you get a pretty good boresight on a new scope without leaving the house.

Strelok Pro App – $11.99

This image has an empty alt attribute; its file name is image-4.png
Worth. Every. Penny.

So this might be an odd choice for a Christmas list since it’s not a physical good – but getting someone a Google Play / iTunes gift card for this one and giving them the link would be a great gift for anyone who’s thinking of getting into long range shooting. This app is phenomenal.
Available via Google Play Store or the App Store, for Android or iOS, respectively.

Under $75

OSAGE RIVER Range Bag – $52.99

This image has an empty alt attribute; its file name is image-5.png
Available in a few colors in different sizes.

Everyone can use a good range bag or 2. Or 3.


Plano 1612 Water Resistant Field Box – $16.99

This image has an empty alt attribute; its file name is image-6.png

These make great ammunition boxes, among other things.

EDR Bleeding Control Trauma Kit, Basic Trauma Pack – $59.99

I wanted to include something like this in the list – and this particular one is an update to one I included last year. If anyone with more experience using this stuff has any better suggestions in this price range, let me know!


For People You Really Like

MagnetoSpeed Barrel Mounted Chronograph – $179

This image has an empty alt attribute; its file name is image-7.png

If you’ve seen my review, you already know why I recommend one of these for anyone getting into long range / PRS, esp. if you’re going to work up your own loads. This thing has been indispensable.

and on that note…

Lee Precision Breechlock Challenger Kit – $199.99

We all know that getting our hands on ammunition lately has been a bit of an issue. This is the workaround.

or, the upgrade –

RCBS Rock Chucker Supreme Master Kit – $602.99

The Lee kit is much cheaper, but is definitely the “get your feet wet” setup. This is what you want when you’re serious about it.

Caldwell Precision Shooting Rest – $98.99

This image has an empty alt attribute; its file name is image-8.png

Caldwell makes more than just sandbags for shooting rests. This is a nice middle ground between nothing and a full lead sled rig.

LaserLyte Laser Trainer – $94.99

This image has an empty alt attribute; its file name is image-10.png

So these are pretty neat – works like a snapcap, but flashes a laser point roughly where the point of impact would be – granted there are more expensive options with more features, but for the price, and following the 2020 theme of “stay indoors” – these are pretty neat. You can also get some accessories for it.

Sig BDX Combo Kit – $1399.99

This image has an empty alt attribute; its file name is image-9.png
I’ll take one too, if you would.

Repeating from last year – here’s the crown jewel of the list. If you’ve got someone you really want to make smile, this is an awesome piece of kit for the money. I could probably spend a whole article on this one and what it can do, but go check it out. Also worth noting, while the price has actually went UP since last year (as has most things on this list) the list price here on this one is $1679.99, get it while it’s hot!

Armson Gen II Retro OEG

After quite a bit of shooting the previously reviewed Troy XM177E2, I’d gotten interested in getting some type of retro optic on there. While I was initially leaning towards the Brownells Retro 4X, finding one in stock (even before COVID has been clearing the shelves) proved nearly impossible.
Edit: Naturally, now that I’m writing this, they’re in stock.

On the strong suggestion of this website’s occasional other writer, I looked into another period-correct option – an Occluded Eye Gunsight. These are essentially the predecessor to the modern red dot – rather than having a see through tube, you have a black tube with a fiber optic (and optionally, a tritium lamp) in the front. When viewed with both eyes open, it projects the sharply detailed, but “soft” red dot over the target. This is very similar to using an Aimpoint or other red dot with the front cover closed, and keeping both eyes open.

While this sounds like a huge disadvantage, upon using it, you’ll immediately find that it has several advantages over a modern red dot, not the least of which is the fact that it’s always on, and it’s brightness is never a factor since the eye witnessing it is always against a solid black background, so when your brain combines the image, the dot will always be visible. You can be looking directly into a light source, and still see that dot. It’s also never too bright for a situation. It’s always just a perfect, soft red dot.

If you get one with tritium (and you should), this extends to low-light shooting as well. The tritum lamp provides just enough illumination to the fiber optic to give you a visible soft red dot that wont interfere with your eyesight in low light.

This is where this gunsight really shines, and why it happens to be “historically correct” on this rifle – during the Son Tay raid, commercial off-the-shelf Single Point OEGs were used. During the practice for the raid, it was found that these drastically increased hit probability at night – and thus we got (as far as I can tell) the first use of a red dot type sight in combat.

The only real drawback is in the potential difficulty in zeroing. For what it’s worth, I think I got lucky and mine was almost dead on at 25y out of the box – but it definitely helped that the M16 carry handle mount mine came on allowed viewing of the iron sights through a channel under it. One of the quirks of how these sights work with your brain is, if you try to actually focus on the dot, it’s likely to “move around” as your brain tries to reconcile what’s going on. What this means is, you have to keep both eyes on the target, not focus on the dot, and make fairly quick shots as soon as you bring the rifle up. These sights are intended for fairly close range work, however, so just getting it in the ballpark of center of mass at 25y is plenty fine – and once you get a bit more used to using it, you shouldn’t have too much trouble getting it zeroed more precisely if you’d like. My OEG came with instructions on how to do this.

As a final shoutout, Armson’s customer service is fantastic. I had a brief email exchange with Mr. Hatcher about my sight and ended up with a real “this thing was built specifically for me” feeling from the whole interaction. While they are a bit pricey for something that can be considered such old generation tech – M16 Gen II Retro = $209.95 + $40 for the tritium – these clearly fall into the “don’t build them like they used to” department… even though Armson definitely does continue to build ’em like they used to. It’s also worth noting that they will replace / retrofit older OEGs with new tritium, as well as upgraded adjustment knobs.

MagnetoSpeed V3 Review

Alright, vote obligated discontinued retro rifle review out of the way, let’s get into my current jam – precision rifle shooting. Full disclosure – I’m an amateur – this is a new hobby I’ve been wanting to get into for a while, and thanks to our other contributor here, I’m now geared up for it.

So, super basic initial things to do:

So, need a rifle, know the basics of how to use it, have something to plug numbers into for the purposes of weaponizing math, and get the initial numbers to plug into it – so it looks like we’re missing a piece of equipment here – the chronograph.

Ballistic chronographs come in a few types, but the basic is one like the Caldwell unit above that uses two screens and an optical sensor. These are fairly cheap and easy to use, but have to be set up in front of your shooting position, and are dependent on proper lighting. Additionally, while they’re very close, they’re not really giving you a true directly-at-the-muzzle velocity.

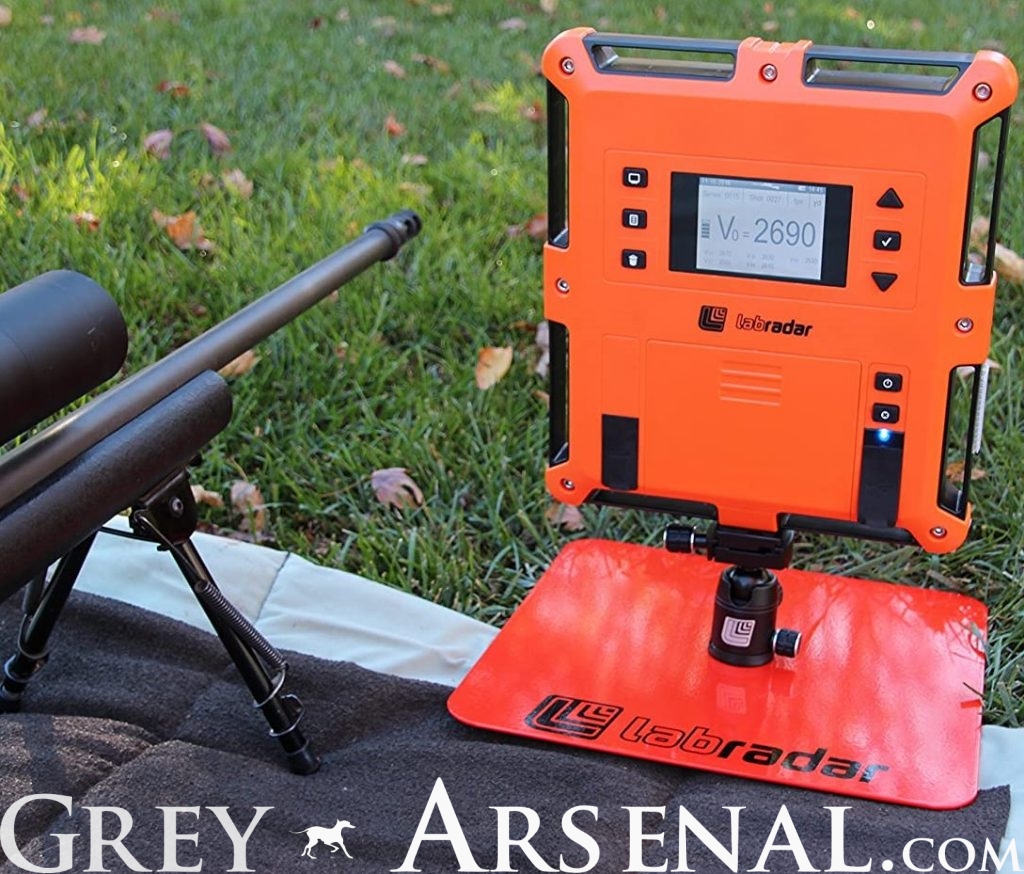
A more high tech, and significantly pricier option, is a doppler radar chronograph, like the Labradar example shown below. These sit on the ground or bench next to your firearm, and use radar to detect the projectile’s speed. Fancy. Interesting to note though – that while testing the MagnetoSpeed chronograph for this article, a ran across another shooter who had both the Labradar chrono and a MagnetoSpeed. When I told him I was using my MagnetoSpeed for the first time, he mentioned he was too, as his Labradar is normally fantastic, but didn’t work on our club’s 100y range with their newly installed steel “no blue sky” baffle system. Reviews also show that they seem to have problems with people using suppressors, though I can’t really figure out why that’d be the case.

So here we are with the “just right” option – a magnetic chronograph. In this case, the MagnetoSpeed V3. This unit consists of a “bayonet” that attaches directly to the barrel of your rifle (or suppressor, pistol, or to a rail, depending on options) and uses 2 magnetic sensors to detect the bullet’s velocity. Not only are you getting direct at-the-muzzle readings, but this unit allows for fairly rapid fire without missing a shot, as optical chronographs are known to do.

Please ignore the crazy window blinds, my dog likes to watch what's going on out there.

These come in 2 flavors at the moment, the V3 as pictured, and the Sporter, which seems fine as a bog-standard unit that’ll do the needful, but I wanted the additional mounting options and ability to attach to a suppressor that comes with purchasing the V3.

Mounting was pretty straight forward, the unit comes with several spacers, you hold the unit up against your barrel, check clearance with the provided rod (showing you the proper distance the “deck” of the bayonet should be from the bore / bullet flight path), and add/remove spacers as needed. Then simply throw the strap around the barrel, get it hand tight through a clasp, and turn a thumb screw on the bottom to snug it up. I had no problems with it moving during use, but I was also using the included suppressor heat shield, despite not needing it, because it seemed to add a bit of traction. Note that this seems to be a quick-fix for people who use the Sporter version and have issues with it shifting, using a bit of rubber strap.

This was fantastically quick and easy to mount at the range, and didn’t involve carrying around a traditional chronograph and tripod, or the need to call the firing line safe if adjustment or troubleshooting is needed. The only thing needed after attaching to the rifle is using one of the included cables to attach the control unit, which automatically powers on when it detects that it’s connected.

So here’s where I got uneasy – this thing was so simple in setting up. Heck, it even looks cool. So come on… this thing’s not really going to work, is it?

It was almost boringly reliable. It performed flawlessly for me in testing during two shooting sessions. Attach, plug in, fire away. Numbers show up, give average and standard deviation (SD) as needed. I was plugging the numbers directly into the calculator on my phone, so no need to use the optional data storage via SD card – but that’s an option available on the V3.

Note: Just look at that Standard Deviation – and this was Federal Gold Medal Match. I guess I’m going to have to get into hand loading now…

One drawback I’d anticipated, and did notice even at 100 yards – having something hanging on the end of my barrel, as light as it may be, did affect my group size. In my case, during the 5 shot group to get the data shown above, my shots strung vertically. That can be seen below in the center group, compared to the other groups.

So, worst case – you fire a few shots for data, then fire separate groups to zero. So far I’ve met 2 others at my club’s range that uses these, one had the same issue I did, and one didn’t seem to be affected. It’s by no means a deal breaker for me though.

As far as accuracy, the provided data has worked out to be accurate for me insofar as the velocity + my Strelok Pro had me on target when I moved out to 300 yards, so that works for me. Here’s a longer read on an accuracy comparison done against a top-of-the-line traditional chronograph. Note the fact that the MagnetoSpeed V3 caught a lot of the shots the optical chrono missed.

The MagnetoSpeed V3 currently retails for $399 MSRP, but can be found on Amazon for $380, available with both a hard, and soft case option.

The MagnetoSpeed Sporter currently retails for $189 MSRP, and is available from Amazon for $179.

Stay tuned for more on my adventure into chasing longer and longer shots.

Troy XM177E2 Retro Review

Important Note:
Unfortunately, by the time I got around to publishing this review, this Troy has discontinued it’s ‘My Service Rifle’ line of retro rifles. That’s a shame, as this example had some great features not in other production retro rifles.

Lets face it, iconic guns are fun to own. And since many of us don’t have $20k to go dropping on an original, it’s usually down to waiting for a usually-still-overpriced reproduction, or spending the time part hunting to roll your own.

The Colt Commando (Model 609) / XM177, is one of those iconic guns. From the covers of books about the men who first carried ’em in Southeast Asia, to numerous classic action movie scenes.

Credit to IMFDB.org for the movie pics.

Even for practical reasons, the attributes that led to it’s military adoption (and eventual evolution into the M4 Carbine) make it a light weight, handy, reliable example of the AR platform.

So why did I go with Troy over the other available production reproductions? Well, not going to lie, price was definitely a factor. As shown above, Colt’s reproduction was just massively overpriced, so that was a non-starter. Brownell’s clone, the XBRN177E2, currently retails for $1397.99. The Troy rifle shown here was available at a much better $899, while it was still available new. It’s worth noting that Brownell’s occasionally runs sales on their retro rifle line.

So what about the features I mentioned that set the Troy rifle apart from others such as the Brownell’s example?
Both have a short (12.5″ for the Troy, and 12.7″ for the Brownell’s) pencil barrel, with pinned & welded muzzle device that are a decent replica of the original Colt moderator.

Both feature the correct ‘teardrop’ forward assist on a fixed carry handle upper, with nice details such as the bayonet lug delete.

What sets the troy apart slightly is the use of original vintage grips from surplus stock, whereas the Brownell’s uses a reproduction of noticeably different quality. The grey color of the receiver is also present on the Troy, whereas it isn’t on the XBRN177E2 – though it appears to be a (at least decently tough) coating. Additionally, the Troy uses a metal stock like the original, rather than the polymer reproduction used on Brownell’s rifle.
There are also small touches like the faux giggle-switch bits and pieces, and receiver markings.

The Troy rifle also came with a nice load of accessories, such as a reproduction ‘field expedient’ sling (which are still available), cleaning kit, and some reproduction booklets, including the M16 ‘comic book’ manual, and an official manual in a military FM format. That was a nice touch.

Right, how does it shoot? Is it reliable? Seems to be just fine for me – though it’s worth noting that their QC may have seen a few dips, as can be found in some threads about these on arfcom. FWIW, I’ve had zero issues with mine, nor seem to have any of the fit and finish problems. It’s a light, nice handling rifle that definitely doesn’t feel at all like a 16″ AR.

Like the originals, these stocks are 1-position, open or closed.
Firing @ 25y one handed and resting on a bag – note that the muzzle device, while not actually reducing report like the original Colt moderator, does a great job as a linear comp, throwing the sound forward – this is appreciated on the 12.5″ barrel.
Apologies for the world shaking with every shot – here’s a side angle where the POV doesn’t benefit from the linear comp effect of the faux moderator any longer, and it was an unsupported phone simply leaning on an ammo can.

I guess I’ll wrap it up by just saying – it’s a shame these aren’t available new any longer, but if you want a decent XM177E2 reproduction, it wouldn’t hurt to keep an eye on gunbroker, etc. for one of these.

Holiday Gift Guide – 2019

It’s about that time of year again – so here are some holiday gift suggestions. I’ll also be listing some early & upcoming Black Friday sales shortly!

Edit: I’ll probably be adding to this over the next few weeks as I run across things or people make suggestions on our Facebook page.

Stocking Stuffers

Ammunition

A box or two of ammunition is always a great option for something that fits just fine in a stocking. Lately I’ve been doing most of my buying from SGAmmo, Target Sports USA, and Lucky Gunner.

Bleeding Control Kit / Basic Trauma Pack – $69.99

I wanted to include something like this in the list – and this particular one seemed to be pretty well reviewed. If anyone with more experience using this stuff has any better suggestions in this price range, let me know!

Maglula UpLULA Magazine Reloader – $27.49

If you don’t already have one of these, or know someone who shoots and doesn’t already have one of these – this is a no brainer. Trust me.

Under $50

Bushnell Magnetic Boresighter – $27

Especially if you’re getting someone some new optics (or know they’re getting or likely to get some for Christmas), one of these is handy – and will at the very least give ’em something to do with the rifle until they can get out to to the range to finish sighting it in properly.

Strelok Pro App – $11.99

Worth. Every. Penny.

So this might be an odd choice for a Christmas list since it’s not a physical good – but getting someone a Google Play / iTunes gift card for this one and giving them the link would be a great gift for anyone who’s thinking of getting into long range shooting. This app is phenomenal.
Available via Google Play Store or the App Store, for Android or iOS, respectively.

OSAGE RIVER Range Bag – $44.99

Available in a few colors in different sizes.

Everyone can use a good range bag or 2. Or 3.

Plano 1612 Water Resistant Field Box – $18.99

These make great ammunition boxes, among other things.

For People You Really Like

MagnetoSpeed Barrel Mounted Chronograph – $179

Caveat – I haven’t gotten a chance to use one of these myself yet, but they’re well reviewed, and for rifle shooting anyway, seem more handy than a traditional shoot-through chrono. If one of you do decide to get one of these, be sure to let me know what you think of it!

Caldwell Precision Shooting Rest – $59.61

Caldwell makes more than just sandbags for shooting rests. This is a nice middle ground between nothing and a full lead sled rig.

LaserLyte Laser Trainer – $98.99

So these are pretty neat – works like a snapcap, but flashes a laser point roughly where the point of impact would be. Granted – it’s a laser, there’s no drop, so this is more of a “make sure you’re not jerking the thing off target” than “practice at home” thing – but still pretty neat. You can also get some accessories for it.

Sig BDX Combo Kit – $1149.99

I’ll take one too, if you would.

So here’s the crown jewel of the list. If you’ve got someone you really want to make smile, this is an awesome piece of kit for the money. I could probably spend a whole article on this one and what it can do, but go check it out. Also worth noting, the list price on this one is $1679.99, get it while it’s hot!

Timney Targa Drop-in Trigger – Install and Review

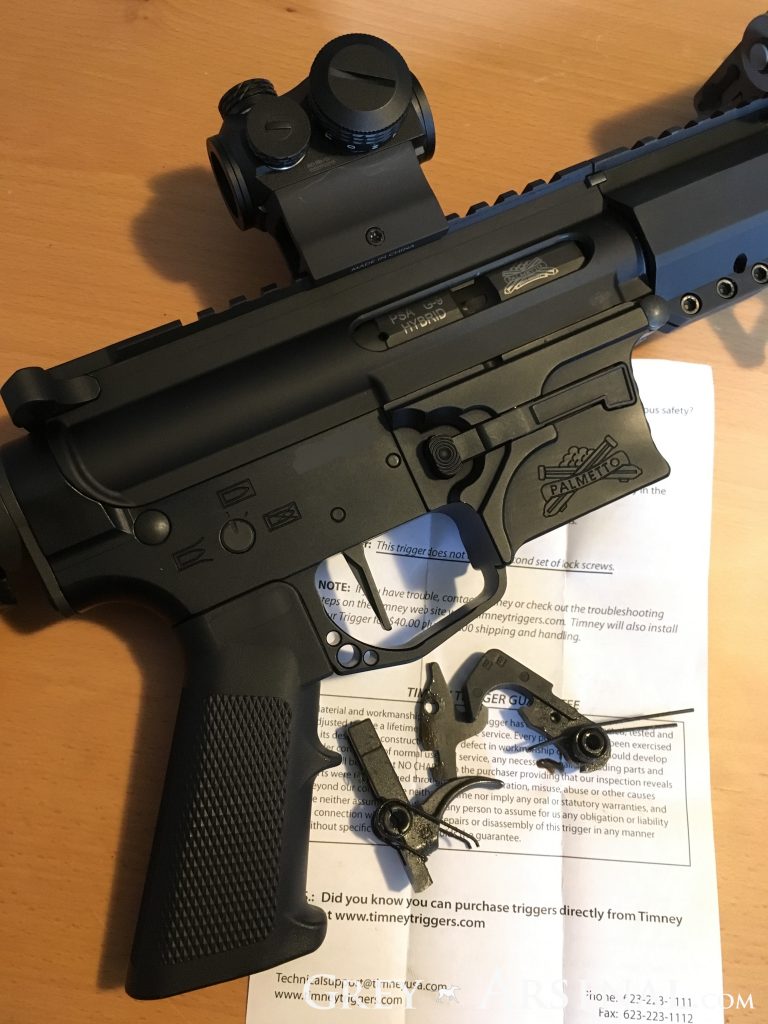
Though Geissele seems to dominate the topic of aftermarket AR triggers, I’ve long been a fan of Timney Triggers when it comes to other applications, so I figured I’d give them a try when it came time to upgrade the trigger on the AR9 project gun.

That Milspec trigger from PSA won’t do.

So, after watching for deals for a bit, I ended up snagging one for a decent price from grabagun.

I went with the flat bow rather than curved, but even their curved one is quite a bit straighter than many AR triggers.  This is mostly personal preference.

So, the neat there here is – compared to many other AR triggers available – these units are pre-assembled in an aluminum housing that just drops right in place.  Not only does it make them a snap to install, but you can swap them out just as easily.

Here’s what’s included

How to Install:

      1. Typical safety disclaimer:
        Make sure the firearm is unloaded, have no ammunition in your work area, wear protection, look both ways, etc.
      2. Remove the upper receiver.
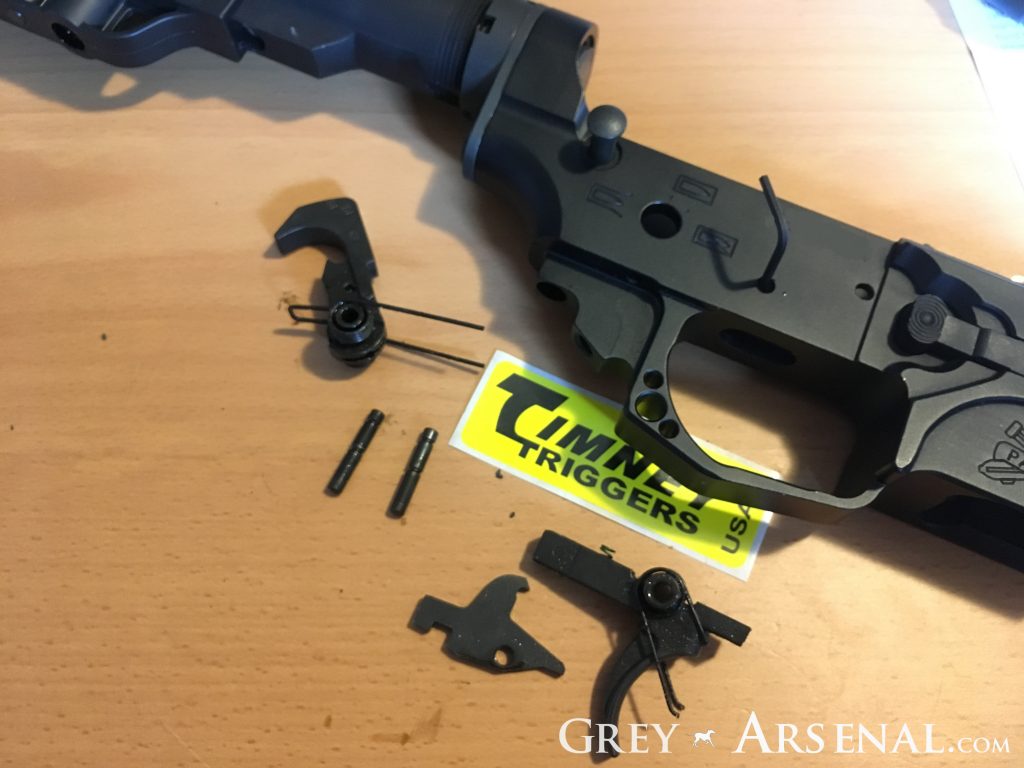
      3. Remove the Grip, being careful not to lose the Safety Detent & Spring.
      4. Carefully remove the Safety.
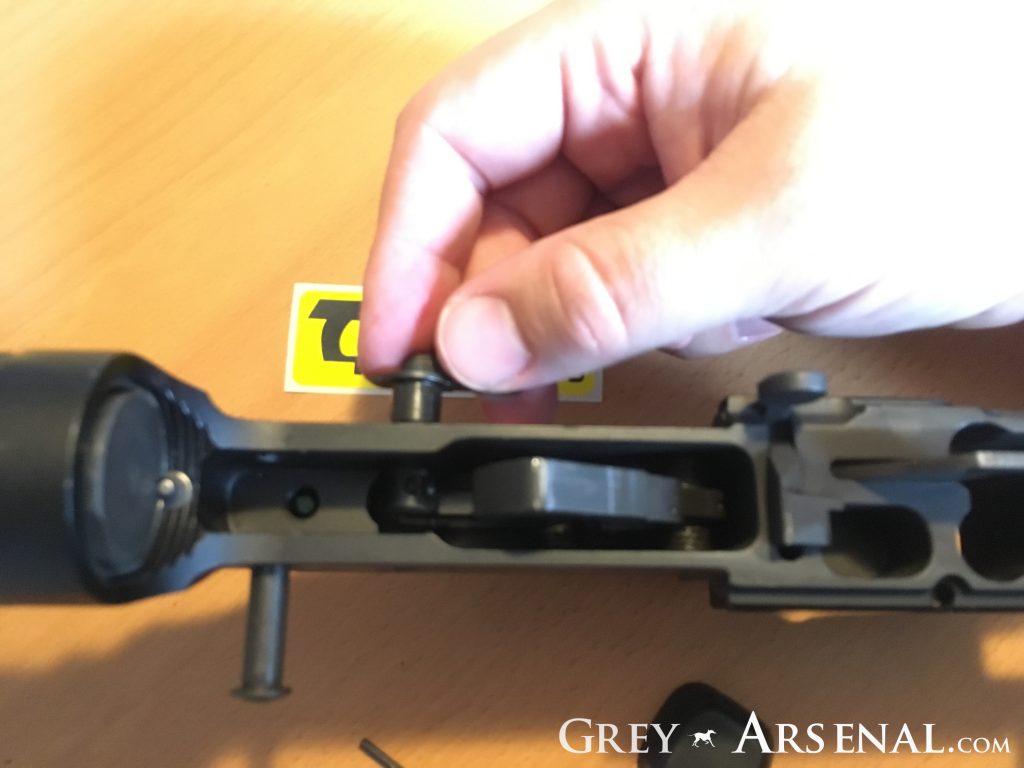
      5. Remove the remaining pins holding the trigger assembly in place.  You’ll need these when installing the new trigger.

        You could use a punch to remove these, but they were easy enough to nudge out with the included Allen Wrench
      6. Remove the trigger assembly, and toss into the parts bin / trash.   Seriously though – you probably wont want them again after shooting with a proper aftermarket trigger.
      7. Enjoy the satisfying *thunk* from dropping your Timney Targa trigger into place.
      8. Line up and replace the pins.  Note that there won’t be much tension on these yet to hold them in.  We’re about to remedy that.
      9. Using the provided Allen Wrench, tighten the set screws in the bottom of the trigger module housing.  There’s one on each side.
      10. Replace the Safety.
      11. Replace the Grip, being sure that the Safety Detent and Spring make it back in there.
      12. Function test the trigger and safety, then do a standard AR function test once you replace the upper.


Listen to that gorgeous reset and hammer fall.

I can’t wait to try out the Timney trigger I’ve selected for another project, currently being worked on by our other writer.

Huge improvement over the standard Milspec trigger.

Ordering a CMP M1 Garand

Get off my lawn.

As a special Memorial Day themed post, I thought I’d give a rundown of cheapest way to get yourself the rifle you’ve seen in at least one movie today, if you do Memorial Day correctly.

There are, of course, easier ways to get your hand on an M1, simply purchasing at a gun show, or an LGS if they have one would be easy enough, and ordering online from gunbroker or a builder such as Fulton Armory would take just slightly more effort.

But if you want both the benefit of paying as little as $650 for an M1 that’s in guaranteed usable condition, the novelty of legally ordering a battle rifle direct to your door without going through an FFL, the Civilian Marksmanship Program is the only way to go.  As an added bonus, you get to support a really great organization that was legislated into existence with a really great goal – getting surplus military arms into the hands of qualified US citizens in order to ensure the future of marksmanship and gun safety.  Or, I guess, you can check out their actual mission statement.  I was close enough.

Enough babbling.  So, in order to make the cut, you need to meet similar requirements that you’d need to make any 4473 purchase, with 3 additional reqs:

  • Be a US Citizen, Over 18 Years of Age
  • Be a member of a CMP Affiliated Organization
  • Show proof of Marksmanship or Firearms Related Activity

A lot of folks see the $650-750 M1s and love the idea, but balk at the effort needed to order.  But – it’s not really that hard, here’s the easiest path:

  1. Download an order packet here.
    You’ll want to fill as much of this as you can as a fillable form, then print the whole thing.  Pro-tip: Use the checklist page as you go.
  2. Easiest way to take care of the Citizenship and Date of Birth proof, is with a US Passport or Passport Card.  Make a copy of it on a copy machine, print, and put that in with the packet.  Done.
  3. CMP Affiliated club – you may a member of one, and not even know it, esp. if you’re a member of a shooting range or club, double especially if they do any NRA High Power / Service Rifle or CMP matches.
    If NOT, which will still be the case for most people, there’s a quick and easy to this, and it’ll only cost you $25.  Join the Garand Collectors Association here.  Even spending $25, you’re still getting a great deal.  Heck, you’re even going to get 2nd Day FedEx shipping on that rifle for no cost.
    In any case, once you’ve confirmed you’re in an affiliated club, or made it so, either print a copy of your membership card, or just the membership page of the website (they’re not too picky), and throw it in your order packet.
  4. Marksmanship or other Firearms Related Activity.
    Note: Exempt from this requirement if over 60 years old.
    Alright, so this may either be the easy one, or the involved one, depending on your situation.  If you’ve got a CHL / License to Carry, you’re good to go.  Copy and print it, shuffle into the order packet, and you’re done.
    If you do not have a CHL / LTC, you’ll have to meet this one some other way.   Current or past Military or LE service meets this requirement.  Copy a relevant ID card or DD214 and you’re good to go.
    Otherwise, there are a few other options, but the easiest is to print one of these, head to your local range, and get an RSO to sign off for you.  Congrats, the hardest part is over.
  5. Have that form all together, make sure you didn’t accidentally leave any original items in there (they don’t want your passport), get it an a document mailer, and take it somewhere with a notary.  UPS stores are a good bet because you can just send from there, but any kind of shipping / postal shop is a good bet so you can get page 2 notarized and then get the whole thing shipped in one go.
  6. Send to:
    CMP SALES
    1401 COMMERCE BLVD
    ANNISTON, AL 36207
  7. Wait.  Okay, actually this is the hard part.  They’re pretty full up on orders, so much so, that I’m always astounded they even HAVE any surplus Garands left.  If you don’t want to wait *that* long, get a Field Grade or buck up and get a Special Grade.  Service Grades, the current “best” condition USGI barreled rifles you can get, currently have ~ 2 month wait.

The neat part: once you’ve done the above, if you decide to make another order from the CMP in the following 3 years, you don’t need to do any of the above again.  You can just give ’em a call, tell them which grade rifle you want, and read them your credit card number.  You will also be “in the system” for things other than M1s.  More on that below.

The CMP is currently processing a has just started selling a big batch of rifles that we recovered from the Philippines.  Here’s a really interesting video on all that went into that:

Stay tuned for later posts about finishing / oiling that new production CMP marked stock you’re very likely to get.

Additionally, starting next month, surplus 1911s will be a thing, but expect a pretty long wait and possibility you wont make the cut, as they’ve only been authorized to sell a relatively small number of these per year, at least at first.  Maybe that will be increased in a later NDAA, depending on what congress looks like next year.