Windham Carbon SRC Project, Part II

I was initially going to do a review and write up on the base rifle prior to doing anything to it. I think I’ll change that up a bit though, and get it put together before testing extensively, killing two birds with one stone.
That being said, the first thing we’re going to do is get ourselves a base platform to work from, which means getting the factory handguards off of this thing.
The rifle shipped with a decent enough set of standard AR handguards, heatshielded and whatnot, they’d get the job done if that’s all you wanted. But that’s what not we’re going for here.
I wanted to stick with something that is an easy enough install for most readers, but still gives me what I was looking for in this build. Specifically I wanted a free floated tube that was lightweight, didn’t require removal or alteration of the Front Sight Base (on this case, worked with the integrated railed FSB), and VERY specifically in the case of this rifle, it needed to install on the factory barrel nut, rather than use one that’s proprietary, as many do, as Windham uses a barrel nut on the Carbon SRC whose external dimensions are standard, but the threading size is different, part of the reinforcement done on their carbon rifle vs. others in the market. Finally, I wanted one that had integrated QD mounting points.
With those requirements, my best choice was a carbine length (7″) so as to not alter the FSB, and keep the weight down. That’s still plenty of room to get what I need on there. Additionally, I’d be going with a 2-piece, to keep things easy on the install. Lastly, as mentioned, I’d be going with one that would use the OEM barrel nut. I narrowed my search to two options:
Troy 7″ MRF 2-Piece Free float
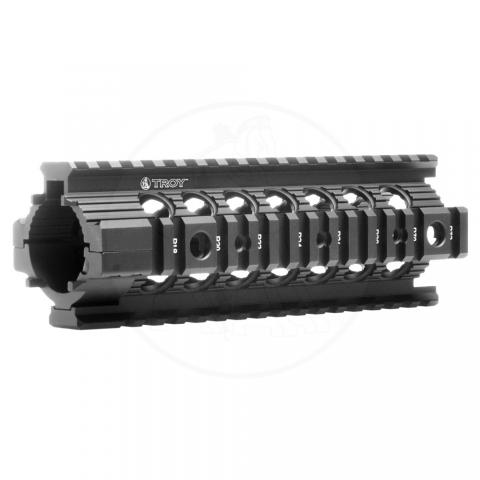
Midwest Industries Gen2 Two Piece Free Float, Carbine Length

Both seemed decent enough options, but just based on price, and a friend’s report of great customer service on Midwest’s part, so that was that. **DISCLAIMER: Installation of this part involves very slight modification to the upper receiver. As I haven’t yet received a yay or nay from Windham Weaponry on whether or not modification in this area is advisable, I have to note that this is done at you own risk.**
The install was easy enough, but did require a bit of cutting to remove the aluminum factory Delta Ring.

The ring is aluminum, whereas the spring and barrel nut are steel. Using a Dremel or rotary cutter with a metal cutting disc, it should slice through the Delta ring like butter, without harming the barrel nut below. Pro Tip: Wrap plastic or some other material around the barrel, FSB, and receiver nearby, there *will* be debris, lots and lost of aluminum dust. You don’t want that all over the place on your rifle.

You’ll want to make 2 straight cuts on either side of the Delta ring. It’ll get hot, so be careful. Just cut through, being careful not to mar your receiver, especially being that it’s Carbon Fiber and would easily get cut here. If you’re generating sparks, than you’re too deep, but the sparks should be your disc, not the steel. Be extremely careful, however, to cut on the sides, not the top and bottom, you do *not* want to damage your gas system.

Once you make the cuts, that thing will break off with a pair of pliers with no problem. Next up is removing the spring. Just bend it off of there with the pliers, it wont be “easy” but it’ll come off with a bit of effort.
Alright, so you’re ready to go. *One* minor issue specific to the Carbon SRC- this handguard includes “anti-rotation tabs” meaning it grabs the receiver on either side right below the barrel nut near the pivot pin. The Carbon SRC, being additionally reinforced in certain areas, is a touch more material here than a normal AR. Approx 4mm needs to be removed from the corner in these spots. **Disclaimer: I did stay in touch with Windham and verify a few things prior to this build, when I was initially making making inquires about the barrel nut dimensions. I don’t have a firm answer on whether or not this is advisable, as this area received additional reinforcement. At this time, as I have not heard from Windham one way or the other on whether or not this is advisable. PERFORM THIS AT YOUR OWN RISK.**
Once this is done, its easiest to fit the top first, then the bottom. It won’t *completely* seat together at first, there may be a millimeter-ish gap at the rear, though this should only occur on the Carbon SRC due to the tight fit where we took material off, this likely wouldn’t be the case on a standard AR.
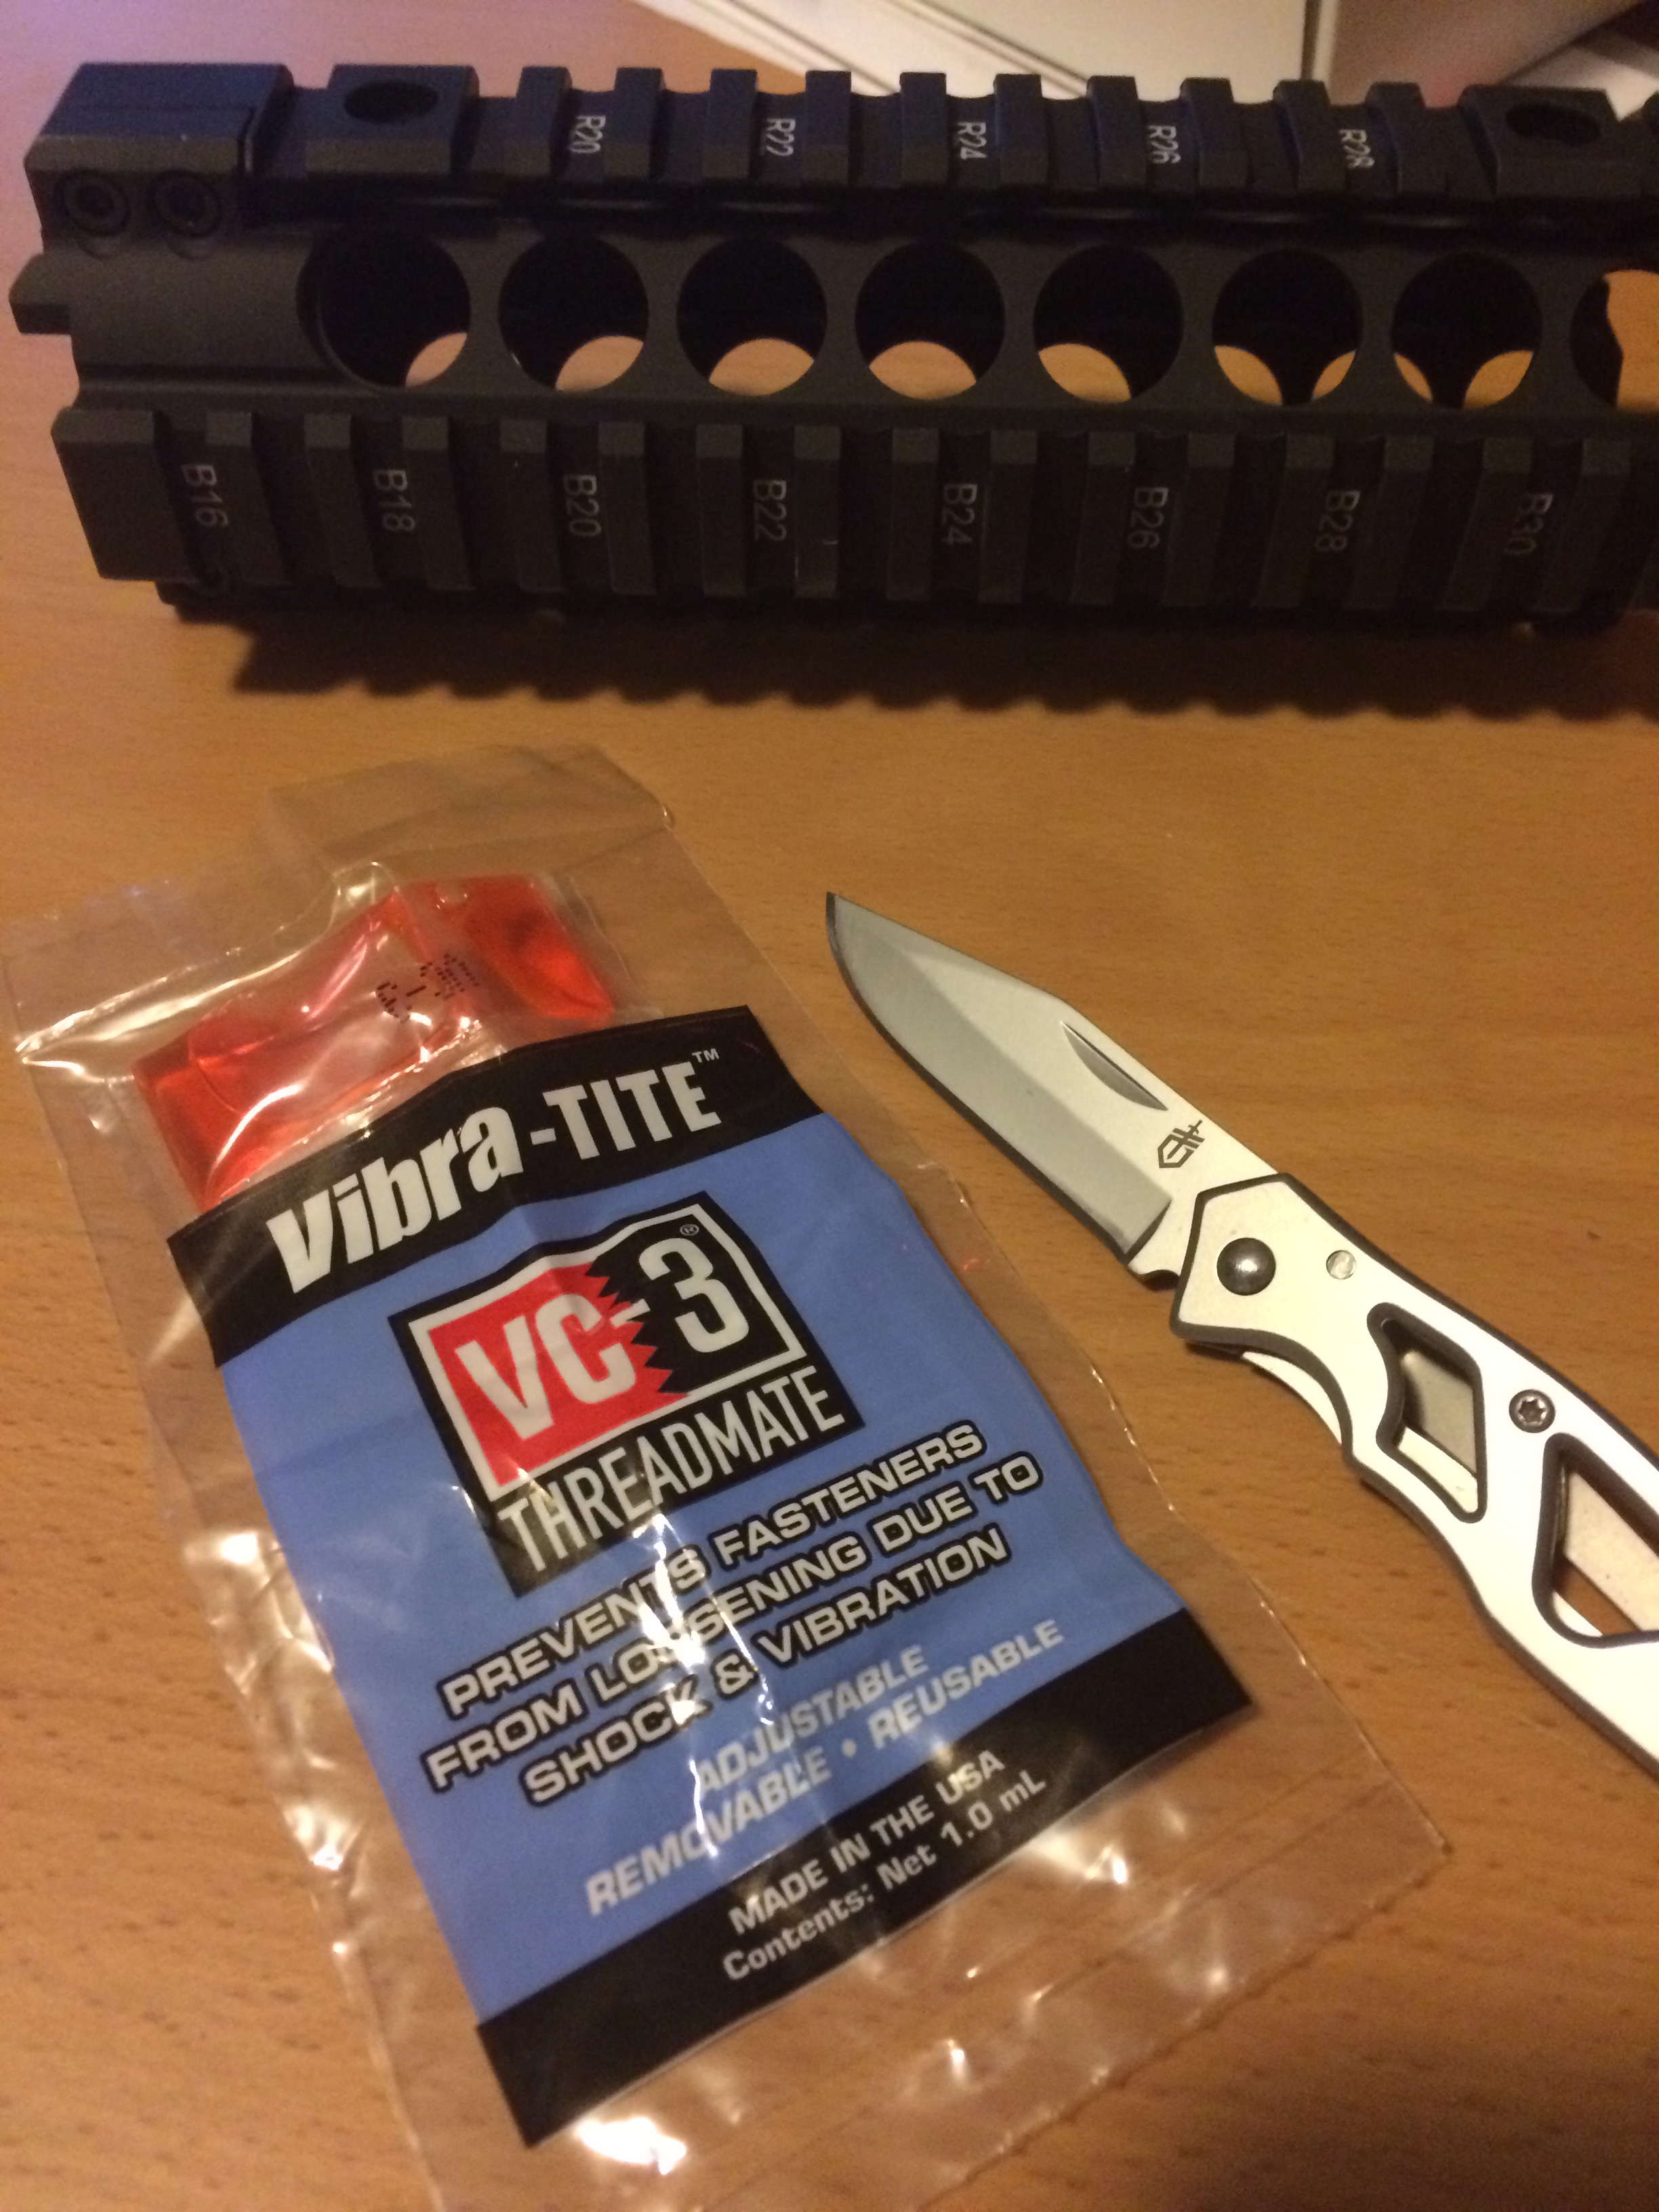
Finally, you’ll want to insert and tighten the set screws, getting them in, then tightening each a little at a time until they wont turn any longer. It would be a good idea to use the included VC-3 Threadmate adhesive.
Alright, we have our base for adding accessories. Next up, lets take care of getting the furniture on there. Stay tuned.
